Quick Editing/Processing Tip: Camera LCD
6 Comments
Despite a few contrarian voices, the overwhelming consensus is that the RAW format should be the choice for creative photography. A drawback is that RAW images look flat by design, so if you are shooting in RAW, you need to process the image to restore some of its brilliance. Unfortunately, when you are sitting at home processing the RAW image, your memory of the scene may be far removed, and that RAW file is a fairly inadequate representation of it. Sally Mann made the observation in her great memoir “Hold Still” that when you have a photograph of an event, in time the photograph tends to replace the memory, a process that removes some of the memories’s dimensions. That can be problematic if there is a disconnect between the sight that made you excited to take a photograph, and its incarnation as a RAW file.
I had left the summit of Snow Mountain under light flurries, and for most of my hike down, I was inside a damp cloud that had set up on the upper tier of the mountain. After I had hiked down enough, I emerged underneath the cloud, and following the uniform greyness that surrounded me before, I was stopped in my tracks by the sudden brightness of the landscape and the drama of sunrays filtering from the clouds in the distance. The image below was correctly exposed to preserve the highlights in the clouds, as can be seen on the histogram. It is obvious that with default settings, it is way too dark to convey the mood of the moment.
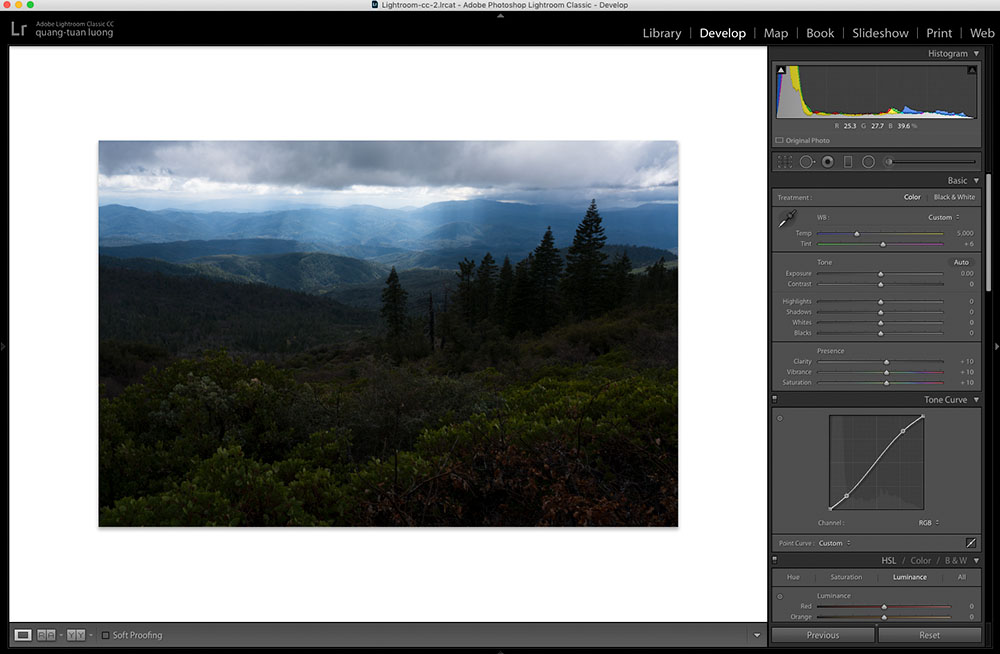
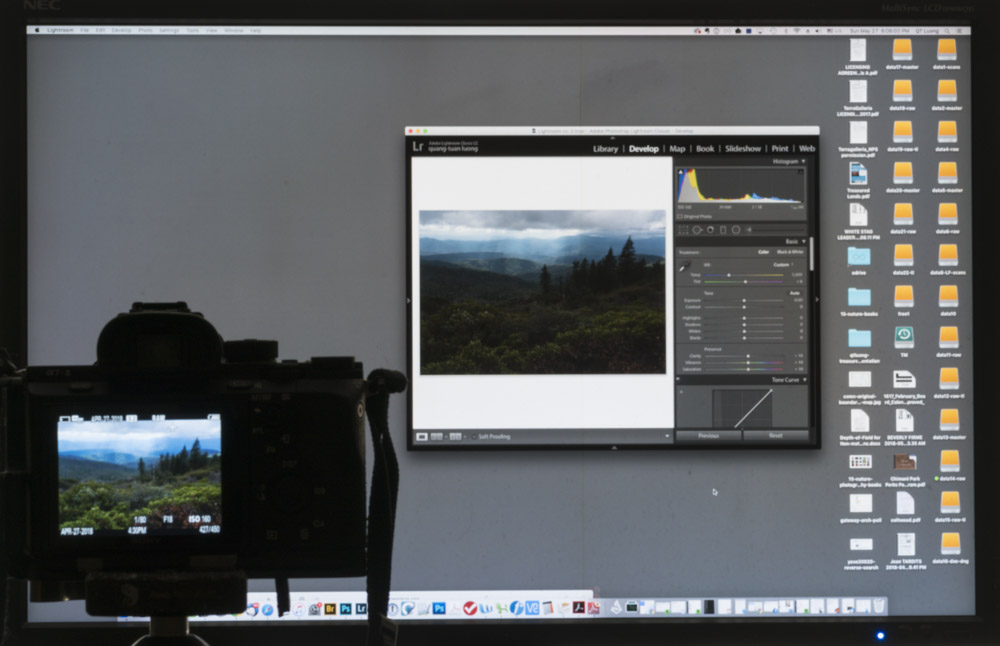
While editing the images to build a selection, the image was dark enough that, should I have not benefited from the fresh memory of the elation of that moment, I may have passed on it, and the image may have never be seen anywhere. Fortunately, one doesn’t have to rely only on memories to be reminded of what the scene looked like. When I was on the mountain, I was not only excited about the scene, but also about the photograph. Would I have felt excited if the image looked that dark on the camera’s LCD? Probably not. The fact is that image wasn’t dark, and this can be seen readily in the image below, a single, unprocessed shot of the camera and computer screens.
Like everybody, after the shot, I almost always give a quick glance to the LCD. Garry Winogrand said “I photograph to see what the world looks like in photographs”. Even unconsciously, I am always interested in comparing the scene and the photo, and judging how well the camera captured the scene. Based on that, I can confirm that the camera LCD image always looks much closer to the scene than any RAW file. With DSLRs, in bright light, it was difficult to appreciate the LCD image without a viewing accessory such as the HoodLoupe by Hoodman, and with my aging eyes, I had to look over my glasses. Those issues are superbly addressed by a mirrorless camera such as the Sony A7R2.
When processing the RAW file on the computer, the camera LCD image makes for a useful reference point, one that gives you a better connection with the scene. Sometimes it is not that easy to create a final image that even looks as good. But this doesn’t mean trying to only replicate the camera LCD image. However good, it is still the product of a machine, without your sensitivity. In the finished version (I used a slightly different image for illustration so that I wouldn’t have to undo the LR adjustments), I darkened the sky to bring out the texture of the clouds and brightened selectively the greens to accentuate that feeling of spring.

I am curious if you used this approach before. Would you agree that the camera LCD image is the right starting point?


Hi QT,
Interesting approach I have NOT used this approach before, thanks for sharing it. I may try this on my next photography excursion (Bandon in a week).
Best
Paul
I only recently dipped my toe into digital origination, picking up a D810 and Sigma 35mm f/1.4 Art lens shortly before visiting Yosemite last December. The camera’s screen has been my sole guide when photographing, always on a tripod. I use it like a view camera, employing the + and – buttons in conjunction with the multifunction control similarly to a loupe being moved around a ground glass. All recording is RAW. I “process” (open) the RAW files at home using Nikon’s Capture NX-D software, which places on my PC monitor a very close analog to what is visible on the camera screen. Exporting to a TIFF then enables processing — sharpening, tonal manipulation, etc. — in an image editing program. I bought a copy of Serif PhotoPlus X8 a few years back. Today I’d go with Serif Affinity. Renting software has never appealed to me, so Adobe no longer offers anything of interest. 🙂
I haven’t used this technique. I’ll try it on some recent photos to see how I like it. However, I often don’t get around for months (or years) to working on all of my photos, so by then the cards have been reused several times and I won’t have them as a reference point, and that’s likely to be my more common situation. I’m also going to try looking at the camera JPEGs captured along with RAWs (I always take raw and often turn off the additional JPEG option) to see how the jpeg compares to what I see on the camera screen. I can see some interesting experiments ahead.
Both of these tips are quite helpful. I’ve been actively working in the digital realm for 11 years now, yet both of the tips were new information to me. Thanks!
Doesn’t RAW+JPEG capture achieve most of this goal? Certainly I find it helps alleviate the issue of the RAW looking very flat. It also means you don’t need to go digging around to match the images. Some image editing programs will also render the image as per the camera settings which is also similar.
Dave, I think you are right. I am not a big fan of having more files to handle, but that is a good argument in favor of RAW+JPEG, one that you don’t read often about!