Night Landscape Capture and Processing Example
No Comments
Despite being one of the most spectacular spots on the entire coastline of Acadia National Park, Ravens Nest on the Schoodic Peninsula is a little known and unmarked location. I will elaborate in the next article, which will be a location guide. In this article I discuss how I photographed and processed the image using specific techniques for night landscapes.
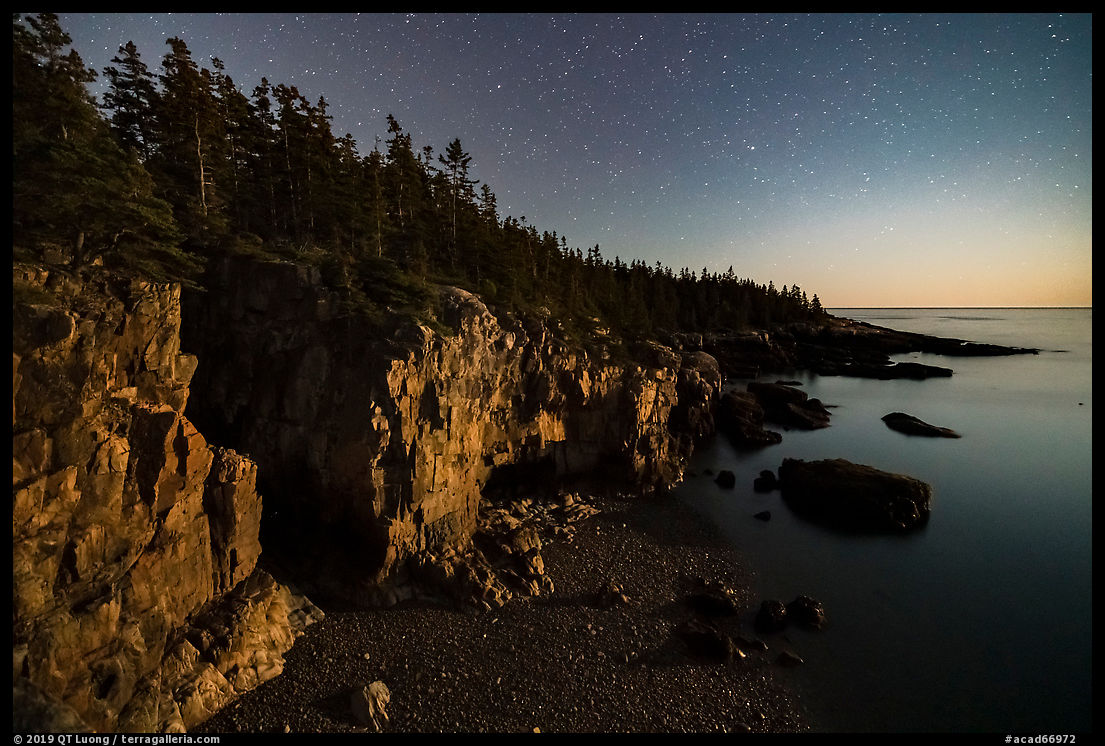
In night landscape photographs, the main challenge is often that the land is too dark compared to the sky. Conditions have to be right for a single capture to work well at depicting the land and the stars well, and this generally means just the right amount of moonlight. They did align on the day of my visit, Oct 5, 2019. The moon was in its first quarter, the maximum before its light overwhelms the sky. It set at 11:15 PM, well past sunset at 6:09 PM, and astronomical twilight at 7:45 PM. I timed the photograph for about half an hour before moonset. This would allow me to capture the setting moon illuminating the cliffs and the moonset glow on the horizon. Although the eye does not see that color because the light is too dim, moonset projects a warm and soft light just like sunset. Well past astronomical twilight, with that setting quarter moon, although the sky would be brighter than after moonset, the stars would still be very visible.
I would have preferred to photograph at a 14mm focal length, but after coming home from a previous trip, I noticed that all the images I made with my 14-24mm were slightly unsharp, an issue that had eluded me while on the field – ruining many images. It is likely that after being dropped, that lens had gone out of alignment. I had not gotten around to replacing it yet, so I had to content myself with the wide end of the excellent Sony 16-35/2.8 GM that I shot wide-open at f/2.8.
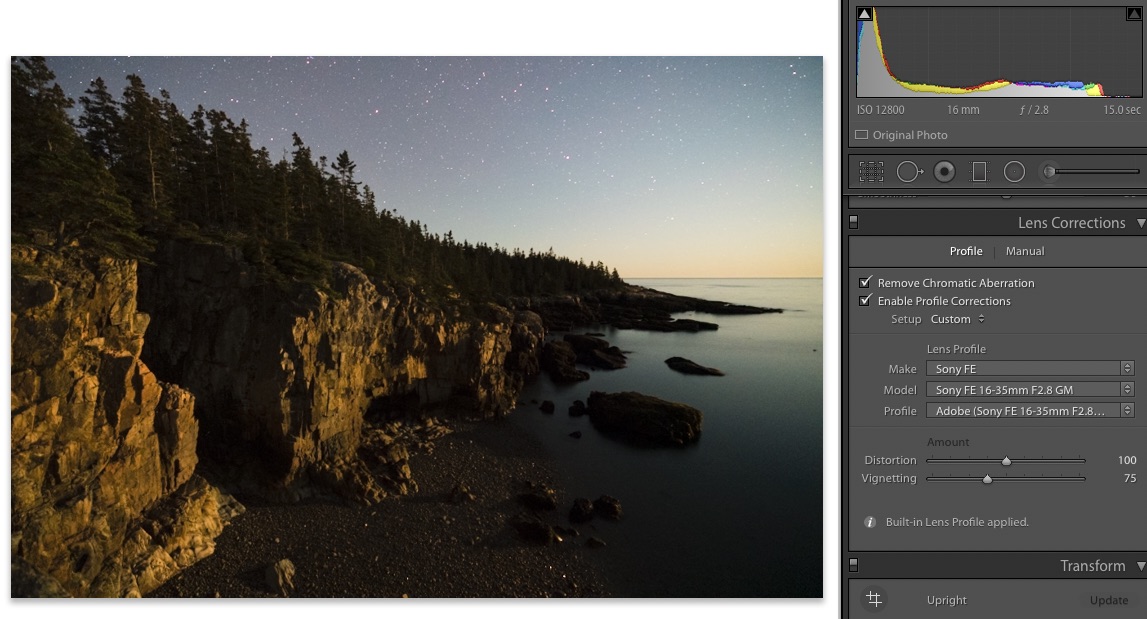
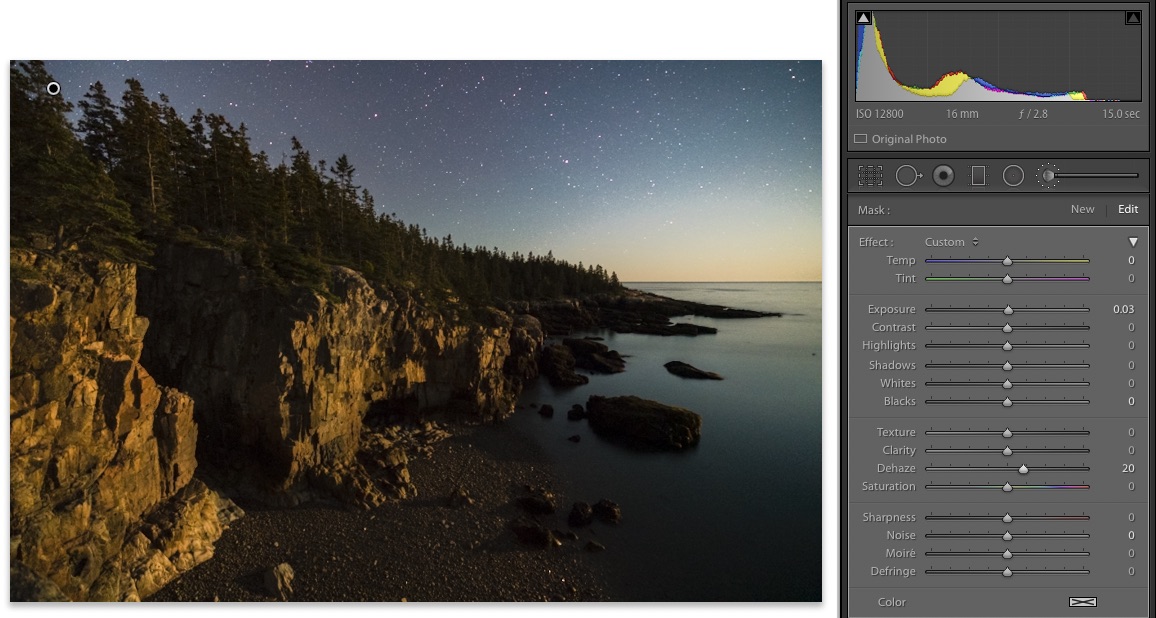
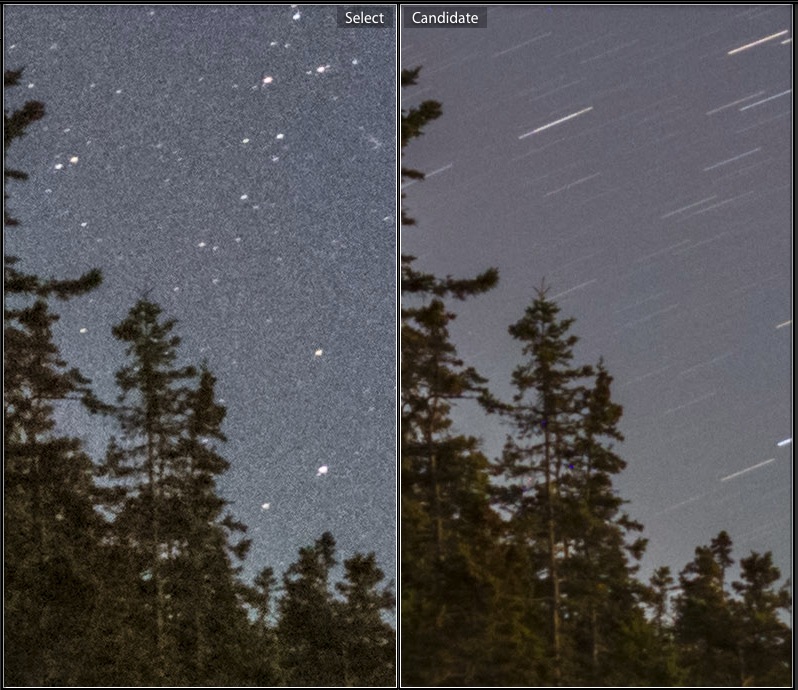
I made two captures with a similar exposure but different settings. In the first one, I kept the shutter speed at 15s, which is the maximum length before star trails become too visible at 16mm. With the standard night sky exposure, this dictated a ISO value of 12,800, about the maximum I like to use on the Sony A7R3. Here is the raw image with standard Lightroom (LR) settings:

Vignetting is almost always pronounced when using a superwide angle lens wide open. I correct it by applying a lens profile, walking back the correction from 100% since a little vignetting helps keep the eye in the picture.
After correcting for vignetting, the sky is quite bright because it was exposed for the stars while the moon is still there. After brightening a bit the image, (+0.5) I tone down the highlights to the max (-100) to darken the sky.
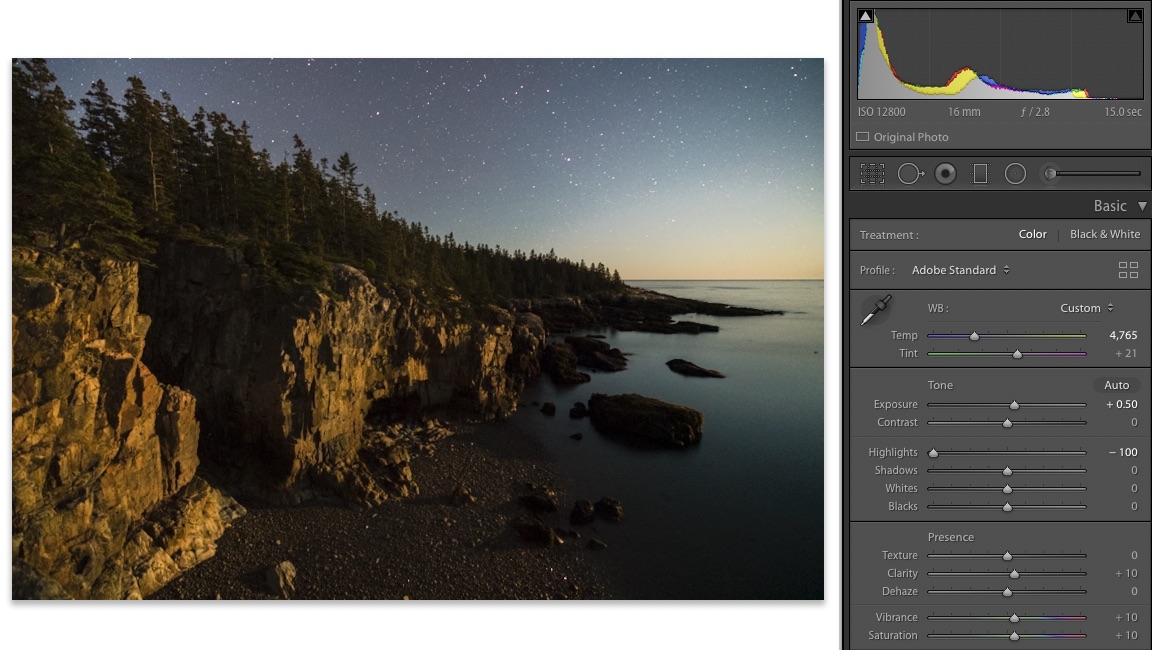
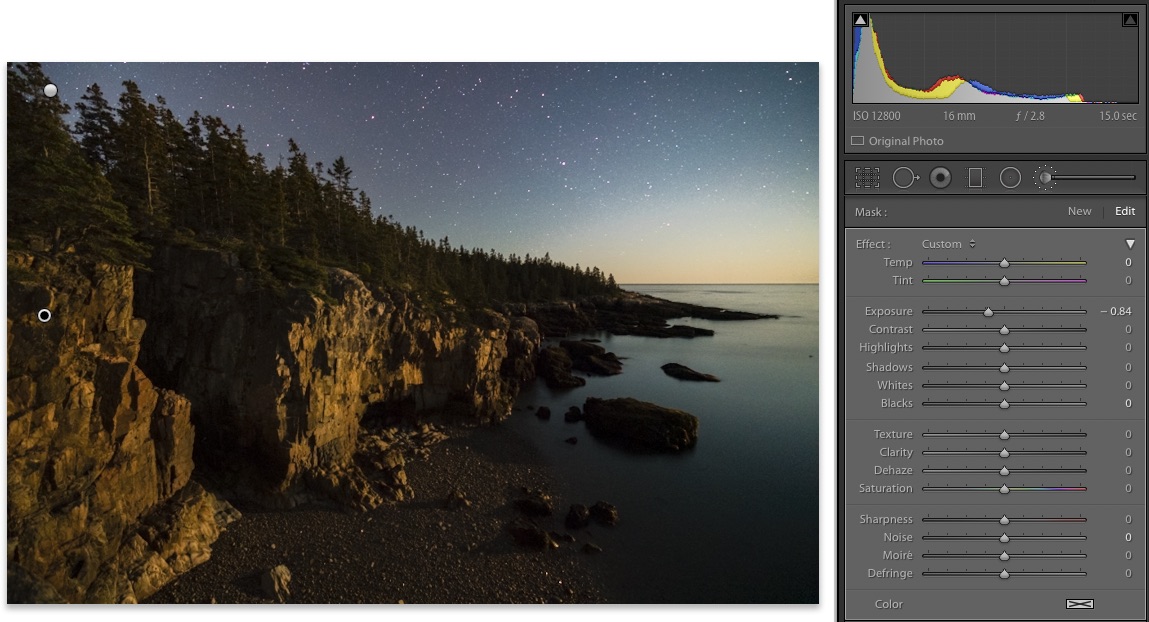
To darken it further and make the stars stand out, I will use one of the relatively new slides, Dehaze. Although not initially meant for that use, I have found that Dehaze works wonders in enhancing the stars and the Milky Way, especially on a clear moonless night. Give it a try on such an image! As an example, here is an image made at the same location after moonset (at 1 AM) shown with Dehaze at 0 and then at 100%.
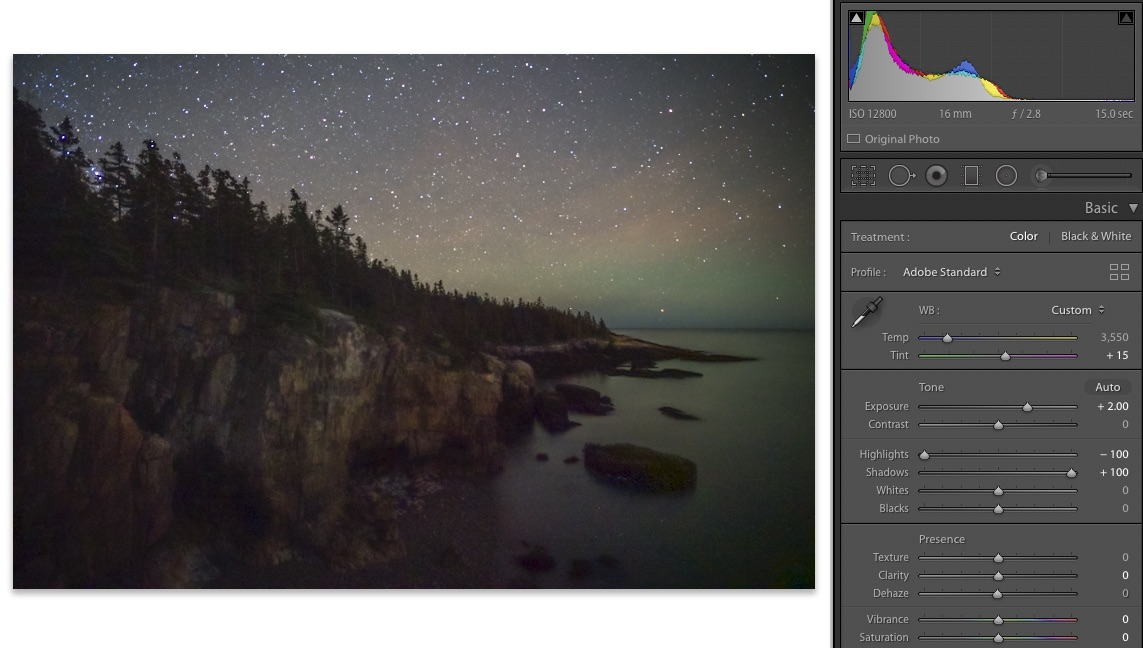

By the way, it appears from the 1 AM photo that starlight is enough to light up the land, with no moonlight needed, but with the radical adjustments made for that high ISO image (Exposure +2, Shadows 100%), although the image looks OK as a low-res web image, it has too much noise for any high-res use. Back to the image shot at moonset, I have to be careful because I do not want the horizon glow to become too bright, so I use a conservative value of +20 for Dehaze, applied on a brush selection covering the upper part of the sky.
The rock on the left of the image is a bit too bright, with its visual mass it draws the eye outside of the image. I darken it selectively with another brush set at Exposure -1, and I am done with adjustments.
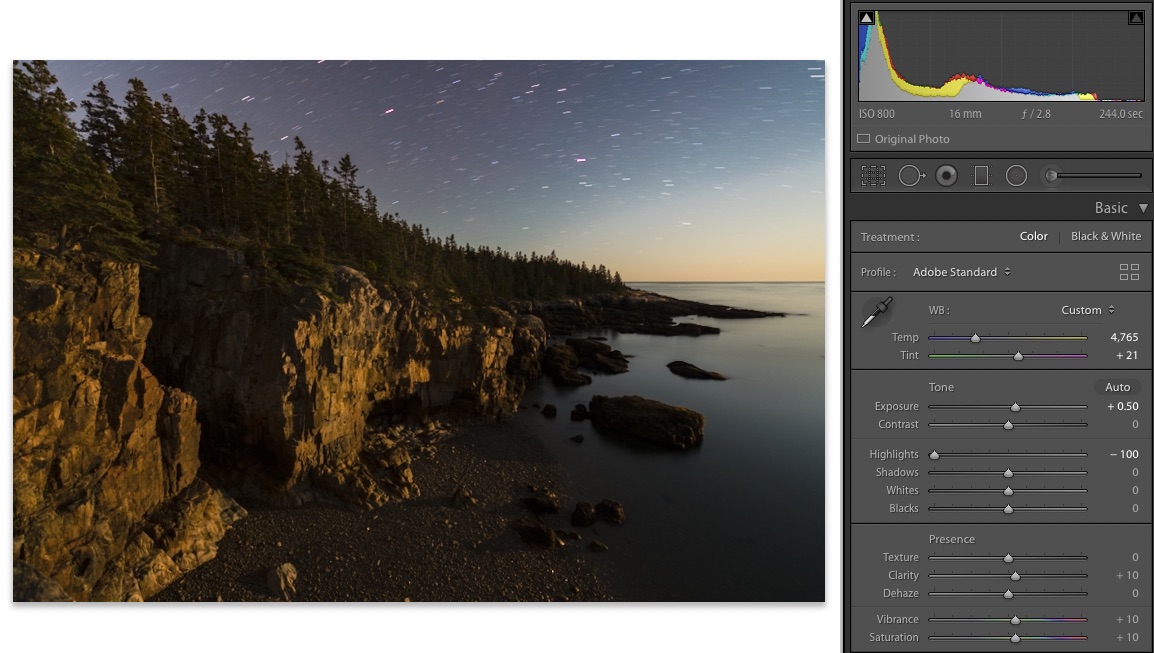
Here is the second exposure I made. Using a 4 minute exposure made it possible to reduce ISO to 800. Ideally, I would have used an even longer exposure to obtain a lower ISO. However, that 4-minute exposure tied up my camera for 8 minutes using long exposure noise reduction that captures a dark frame of equivalent exposure time. Since the light was changing fast, I did not want to tie up the camera for 15 minutes. With such a long exposure, the stars are trailing, not an effect I am after.
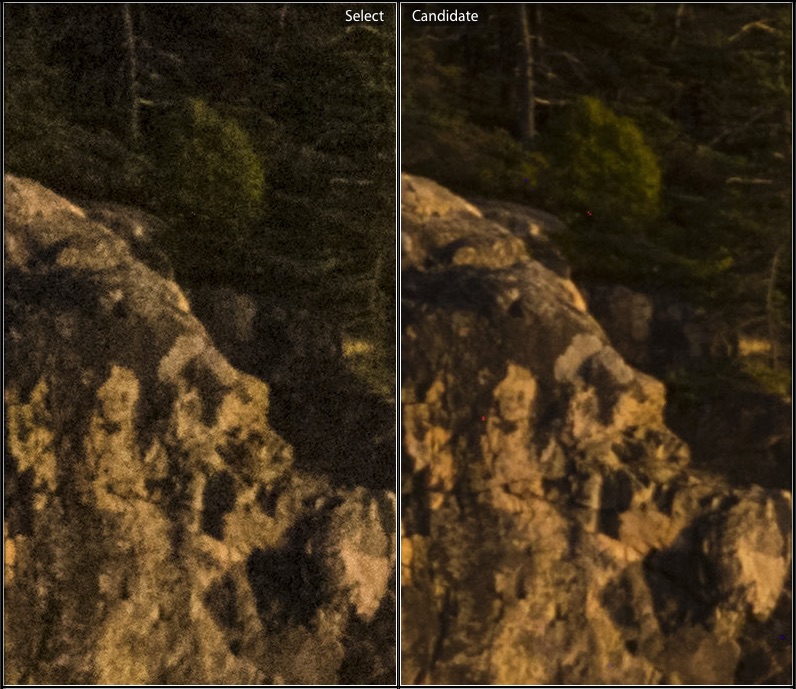
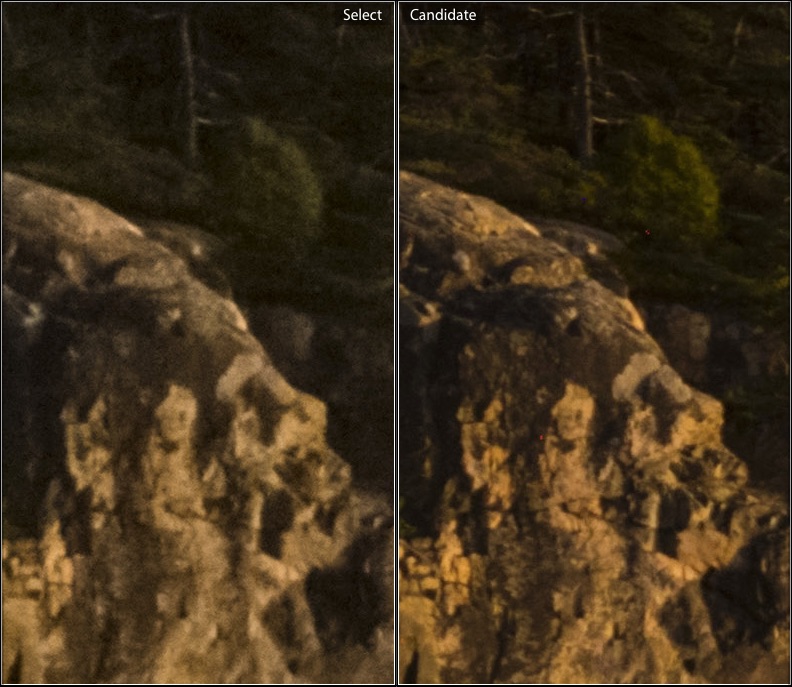
If we compare a cliff detail, we can see that the ISO 12500 image (left) is less detailed and noisier than the 800 ISO image by quite a bit.
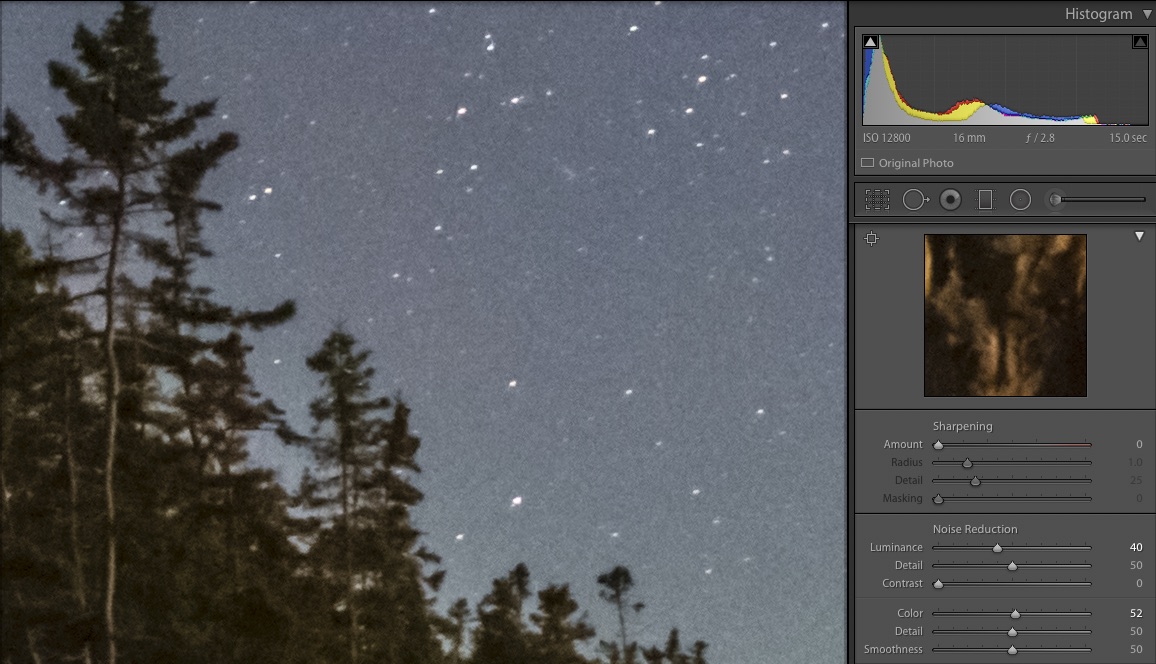
The difference in noise is more apparent in the sky.
Here are the noise reduction settings that tame the sky noise.
However, we can see that this noise reduction obliterates the fine texture and detail on the cliff.
A quick solution in LR would be to apply noise reduction selectively to the sky. The sky requires more noise reduction than the land, because its smoothness makes noise more visible. It can take more noise reduction than the land because it has no texture to be worried about. You’d apply a mild noise reduction to the whole image, and then a stronger one to the sky on a brush selection similar to what we did before.
A more elaborate solution is to use Photoshop to combine the two exposures to get a sky with point stars, captured at higher ISO, over the land captured at a lower ISO. That is the very reason why I made the two exposures. Personally, I do not use the so-called blue hour blend, where you make an image of the land while there is still a bit of residual light (during the “blue hour”), and then combine it with an image of the sky made when it is totally dark. This technique results in striking (and popular) images. However, I feel that blending components captured at radically different times compromises the truthfulness of the photograph, since you are not representing a moment in time, while giving the impression that you are doing so. On the other hand, I feel that blending two images taken (almost) at the same time simply gets around a technical limitation of the camera – its inability to produce the cleanest image at high ISO. That limitation is relative, we are looking at 100% views of a 42MP image. The single-capture ISO 12,800 image is just fine for most uses, and this illustrates the importance of being there at the right moment.

