Bears Ears, Dismantled Again
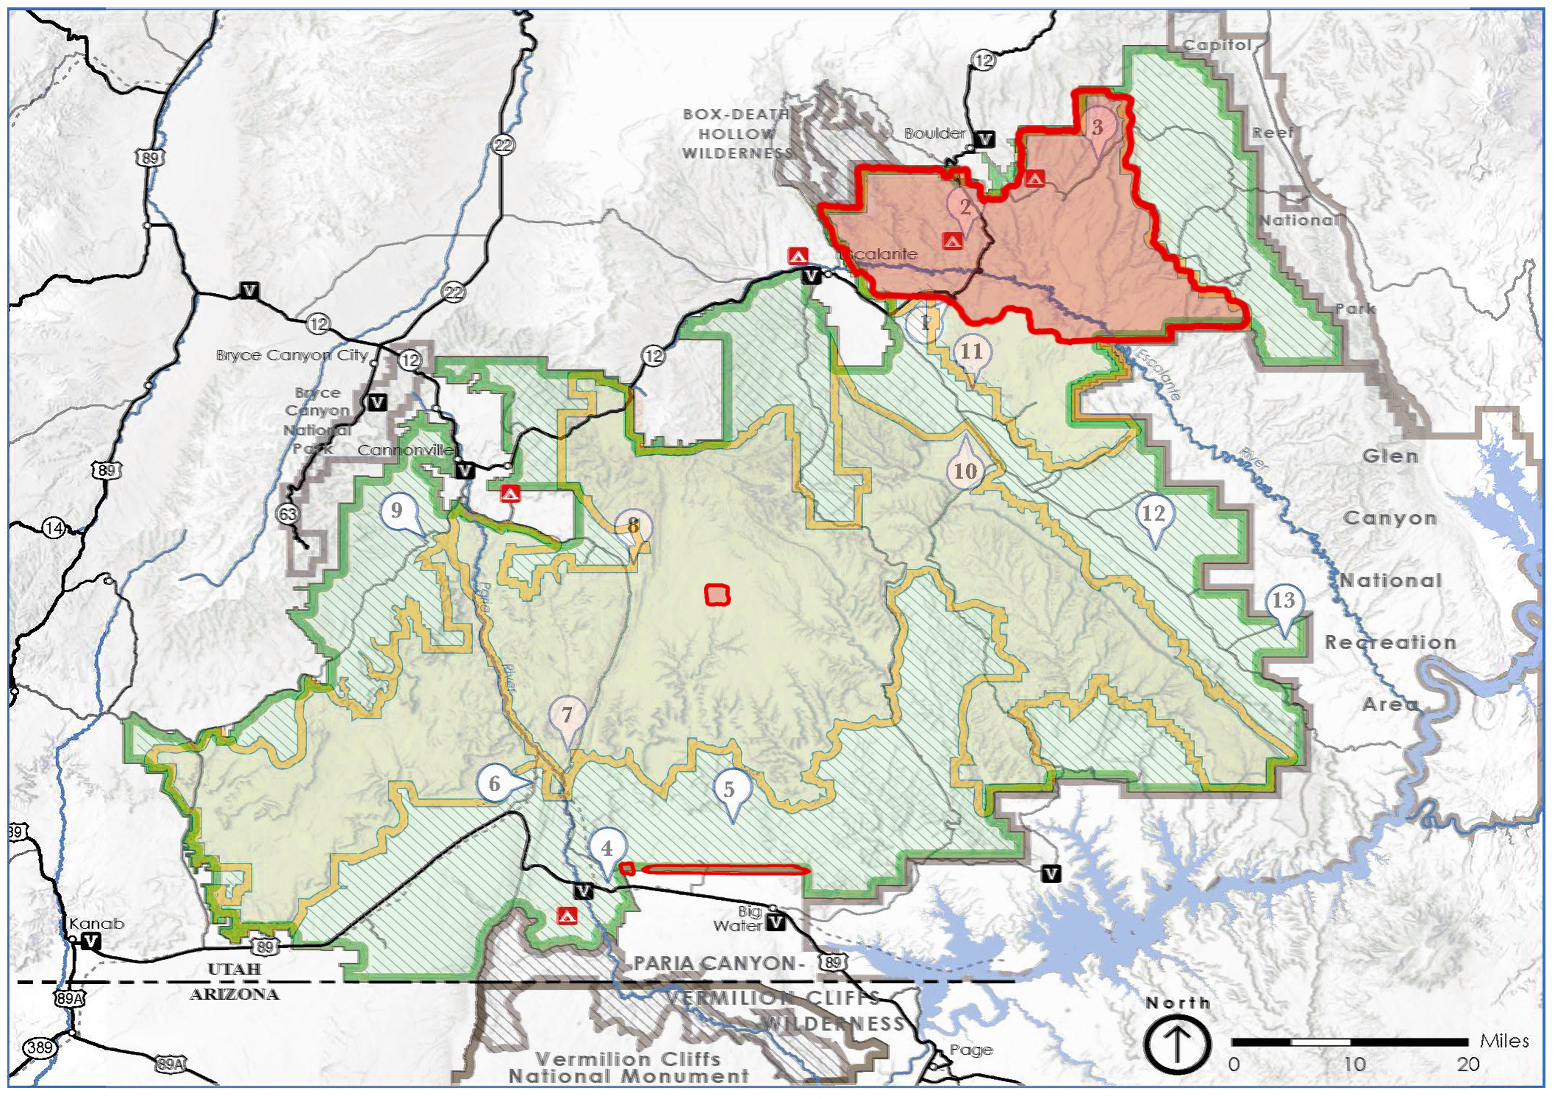
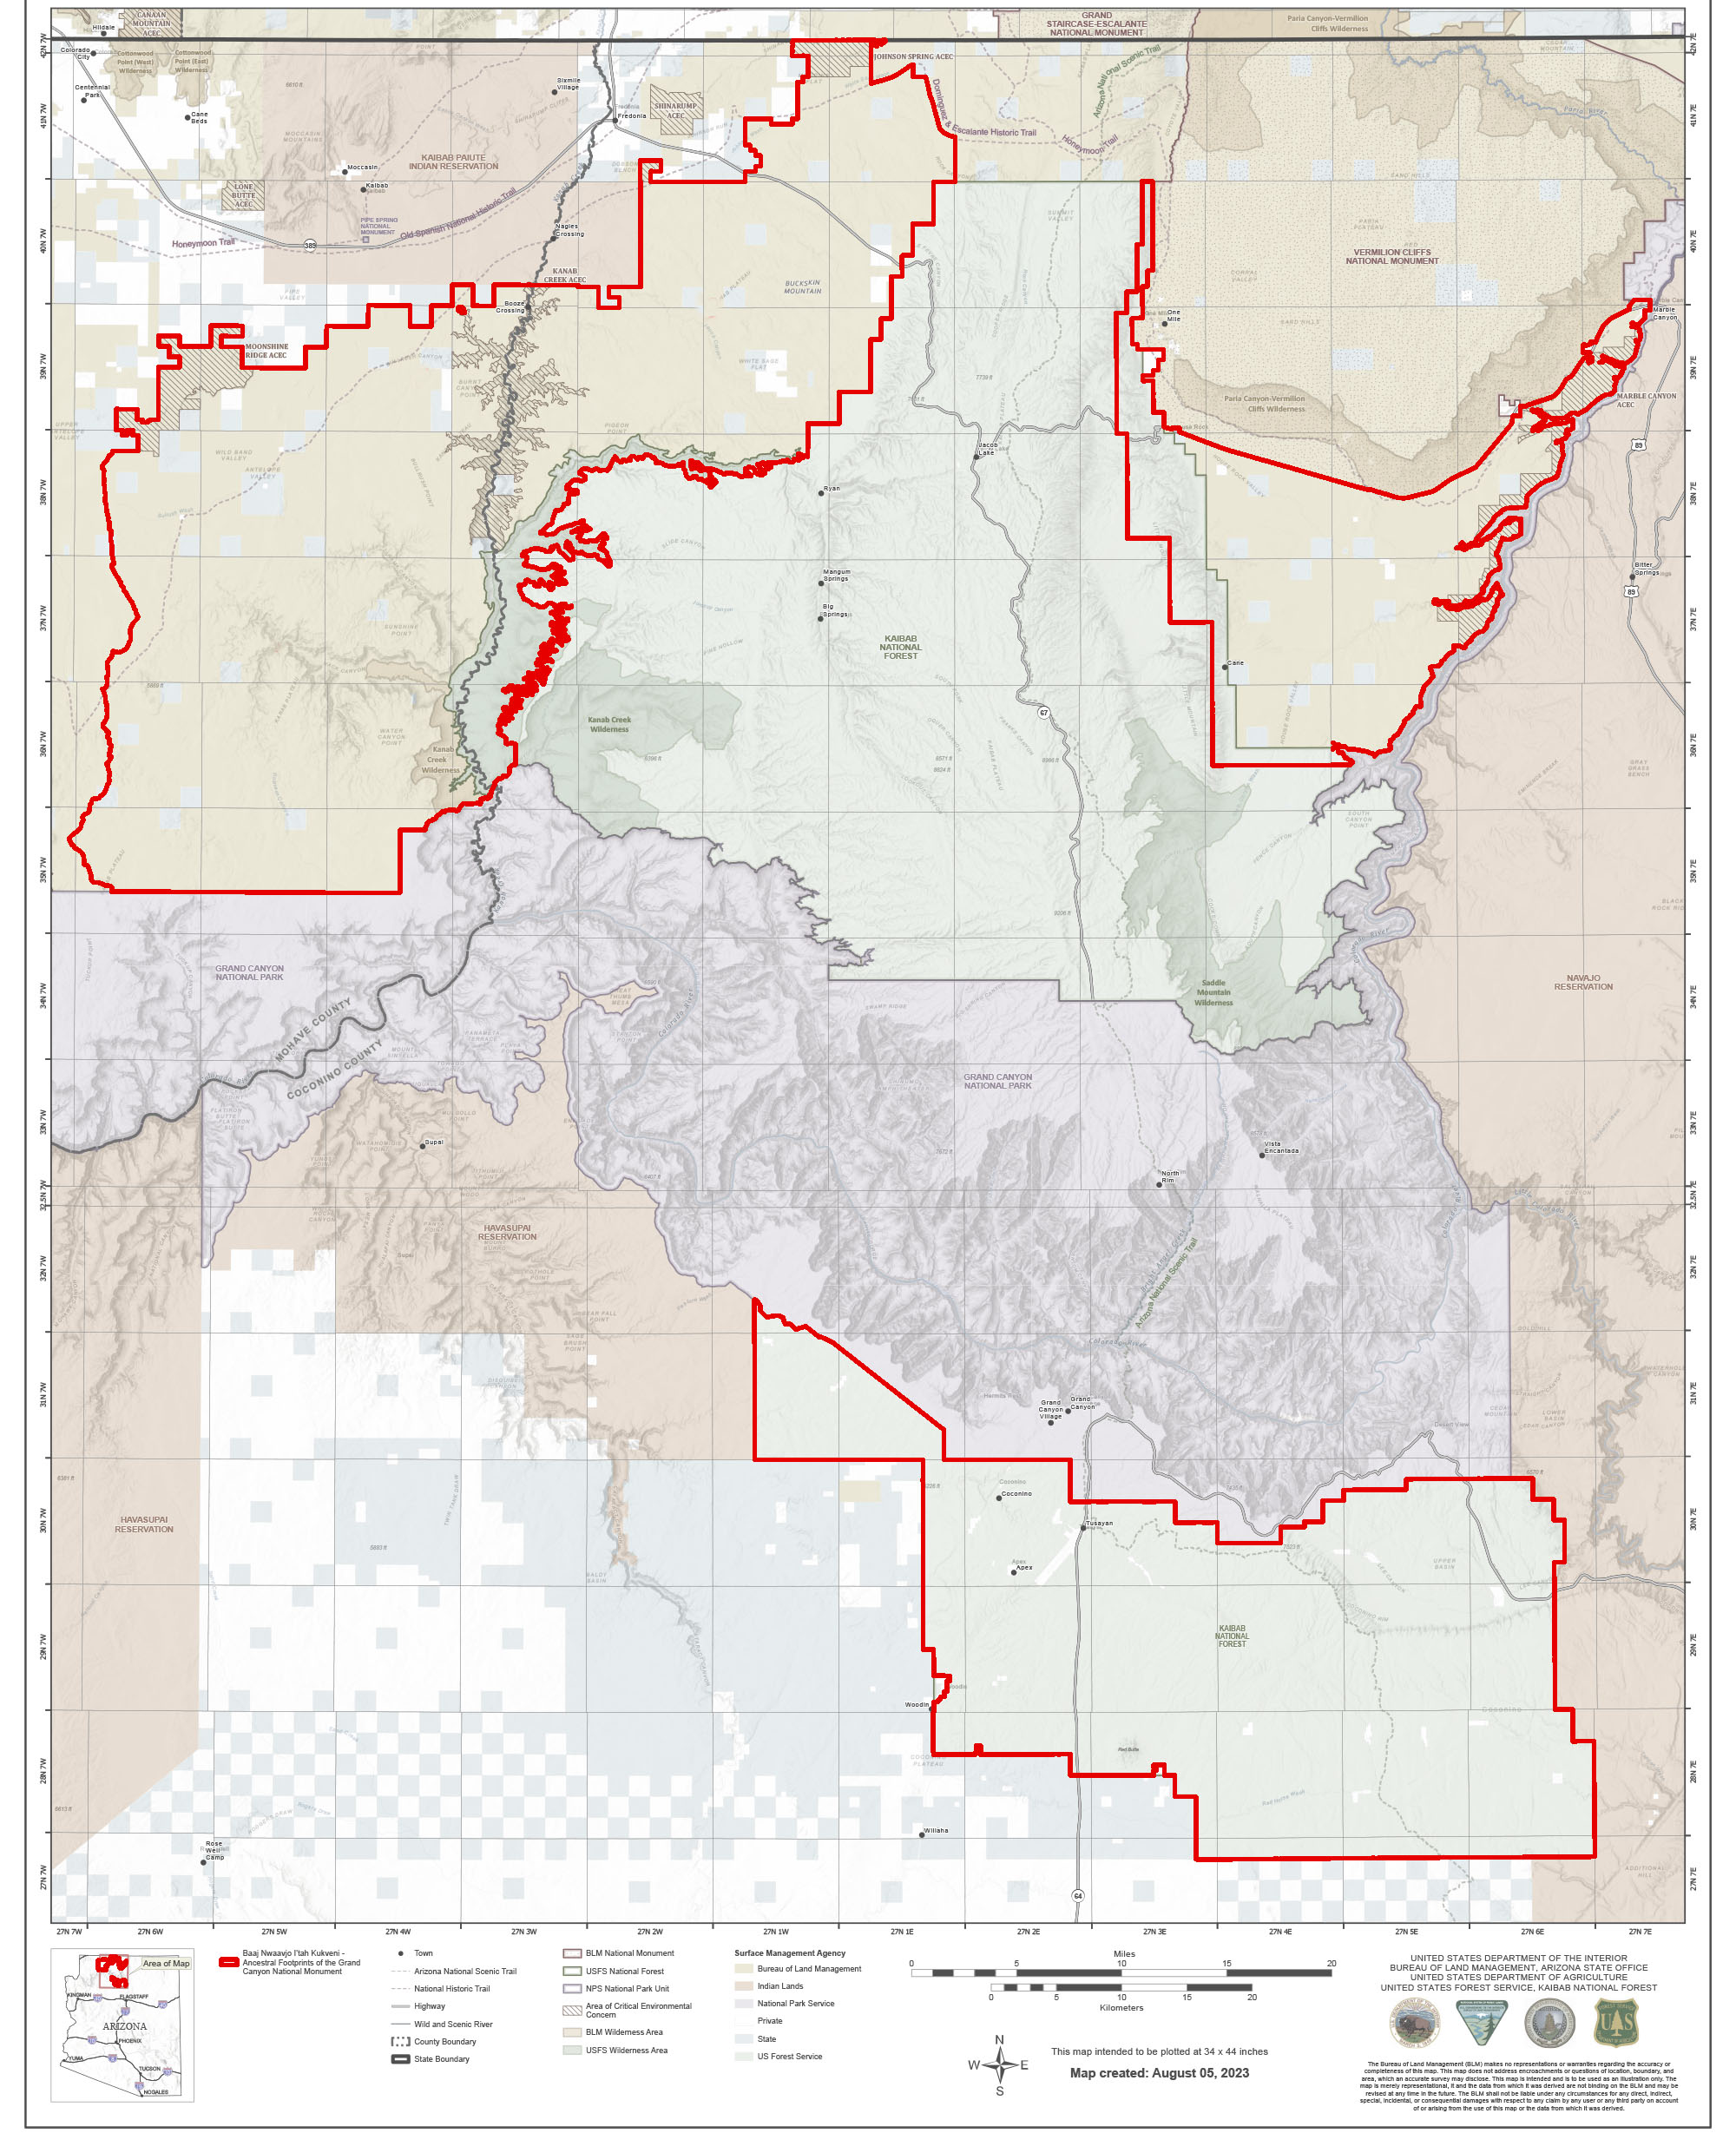
When President Trump reduced Bears Ears National Monument by 85 percent in 2017, it was difficult to imagine a more drastic dismantling. The 1.35-million-acre monument established by President Obama in 2016 was cut to 201,876 acres. President Biden restored and slightly expanded it in 2021. On July 13, 2026, Trump reduced Bears Ears again. This time, he went further. The new proclamation leaves only 121,096 acres—about 9 percent of the restored monument. The remnant left in 2017 has been reduced by about 40 percent. The most precise map I’ve come across can be seen here.

Green: original boundaries of Bears Ears National Monument, established in 2016 and restored in 2021. Yellow: boundaries established during the first Trump administration in 2017. Red: boundaries established by the July 13, 2026 proclamation. Numbered markers identify locations featured in the Bears Ears chapter of Our National Monuments.
The new proclamation also does something the map cannot show. It abolishes the Bears Ears Commission. Bears Ears grew from a Native-led effort and was the first national monument to do so. The original proclamation created the Bears Ears Commission, composed of representatives of the Hopi Tribe, Navajo Nation, Ute Indian Tribe, Ute Mountain Ute Tribe, and Pueblo of Zuni, to advise federal agencies on management. After the 2021 restoration, that relationship developed into a collaborative management structure. The Bears Ears Commission represented a historic approach to public-lands management, giving those with the deepest and longest-standing ties to the land an ongoing, collective role in its stewardship. The Tribal seals added to monument signs in 2022 became a visible symbol of that progress. After the Commission was abolished, the Bureau of Land Management began removing those seals even from signs that remain within the new monument boundaries. What message does that send? That a decade of relationship-building can simply be erased? That the federal government can recognize a Tribal role in caring for Bears Ears, then remove both that role and its symbols when political power changes? The 2026 proclamation declares the Commission “disbanded and terminated” and removes the specific obligation for federal agencies to engage, consult, or coordinate with it or a comparable body.
To understand why that matters, it helps to hear Bears Ears described by people involved in creating the monument. I invited Utah Diné Bikéyah, the Native-led organization whose elders began developing the Bears Ears proposal in 2010, to introduce the Bears Ears chapter of Our National Monuments. Gavin Noyes, co-founder of Utah Diné Bikéyah, and Woody Lee, then its executive director, contributed the following essay while the 2017 reduction was still in effect.
Bears Ears – Deities in Conversation, by Gavin Noyes and Woody Lee, Utah Diné Bikéyah
Perhaps you have heard and even been inspired by the story of the Five Tribes who came together to protect the 1.3-million-acre Bears Ears National Monument in Southeastern Utah. The Hopi, Navajo, Zuni, Ute Mountain Ute, and Ute Indian Tribes aligned across cultural divisions and bestowed their vision for protecting this sacred landscape upon officials in Washington D.C., creating the first-ever indigenous-led national monument in the U.S. However, the story of Bears Ears goes back even further to the Native elders of Utah Diné Bikéyah (UDB), who began this journey with hope and a prayer in 2010. Even before then, though, a ceremony was set in motion by the Holy People that dates back to the beginning of time.
The Navajo teach all life on earth began as a conversation between the Holy People. One deity asked, “what kind of life should we create?” The second decided it should be the kind of life that every being can enjoy. So, the first deity said, “if we are going to pursue this action, it must be done through ceremony and the sacred.” The Holy People first created the universe around them. Then, the sun and the earth. Once the earth was made, one of the deities said, “all life must have a male and female form. Life will be in pairs.” The other said, “we have a sun, and so we shall create a moon, and they will follow each other.” Finally, the last thing left to create was the five-fingered people. Humans were created from insects, passing through five worlds, finally emerging into this one. Then the first Holy Person said, “so long as the sun comes up, it will remind everyone that the ceremony is still happening.” That is why we call this mother earth and why it is a sacred and holy place. We are still in the middle of a ceremony, and the mountains and buttes of Bears Ears are part of the ongoing ceremony where the sun still rises and sets for all creation, for all time.
Bears Ears has always been a place of peace, restoration, emergence, strong medicine, and healing powers. Beginning in 2010, at the request of local elders, Utah Diné Bikéyah created the 1.9-million-acre boundary proposal for Bears Ears. This request is again being made by the Five Tribes to restore and expand protections President Trump took away in 2017. At the outset, UDB’s founding Board Chairman, Willie Grayeyes, established the purpose of the Bears Ears National Monument as a place of healing, where we are each invited “to heal the land and its people.” Willie advises each of us to look deeper into ourselves. “Healing,” he says, is first rooted in our spirituality, and it has essential “psychological, physiological, and social components.”
In Navajo tradition, we are taught monsters once roamed the earth wreaking havoc on human society. Thanks to the “Twin Warriors,” five-fingered people were protected from the wrath of these beasts, who in their final hour pleaded for their lives to be spared. Instead of slaying the monsters, the warriors decided their bodies would be buried underground for all of eternity. As humans, we are taught never to disturb these monsters in their final resting place. The monsters we now understand represent oil, coal, natural gas, uranium, and other minerals placed under the earth’s crust. As humans, we must respect the monsters’ original life-saving plea and leave these negative forces buried. Failure to do so will unleash these “monsters” into the human realm once again.
Bears Ears National Monument is a geography for all “five-fingered people” to enjoy and preserve for our children and future generations. Our organizational name, “Diné Bikéyah” (pronounced di-NAY bi-KAY-uh), is a Navajo word that translates as “the relationship (ké) between the “sole of your foot” and “the earth.” When you visit Bears Ears or any sacred place on this beautiful planet, we at UDB invite you to take your shoes off, tickle the earth with your toes, and say a prayer. This small act will strengthen your relationship with the planet.
Diné Bikéyah, or our soles’ relationship to the earth, is sacred; it is the location on each of our bodies where we directly interact with the natural world with each step we take. We invite you to take your shoes off and feel the ground beneath you, wherever you are. You do not have to visit Bears Ears to know how to respect the earth. Even so, Bears Ears is a great teacher; she is also our companion and healer as we walk the earth. “Diné Bikéyah” is a concept we can all respect and understand wherever we are, and it is part of the ceremony we walk as the sun rises each day.
Some Places Removed from Bears Ears
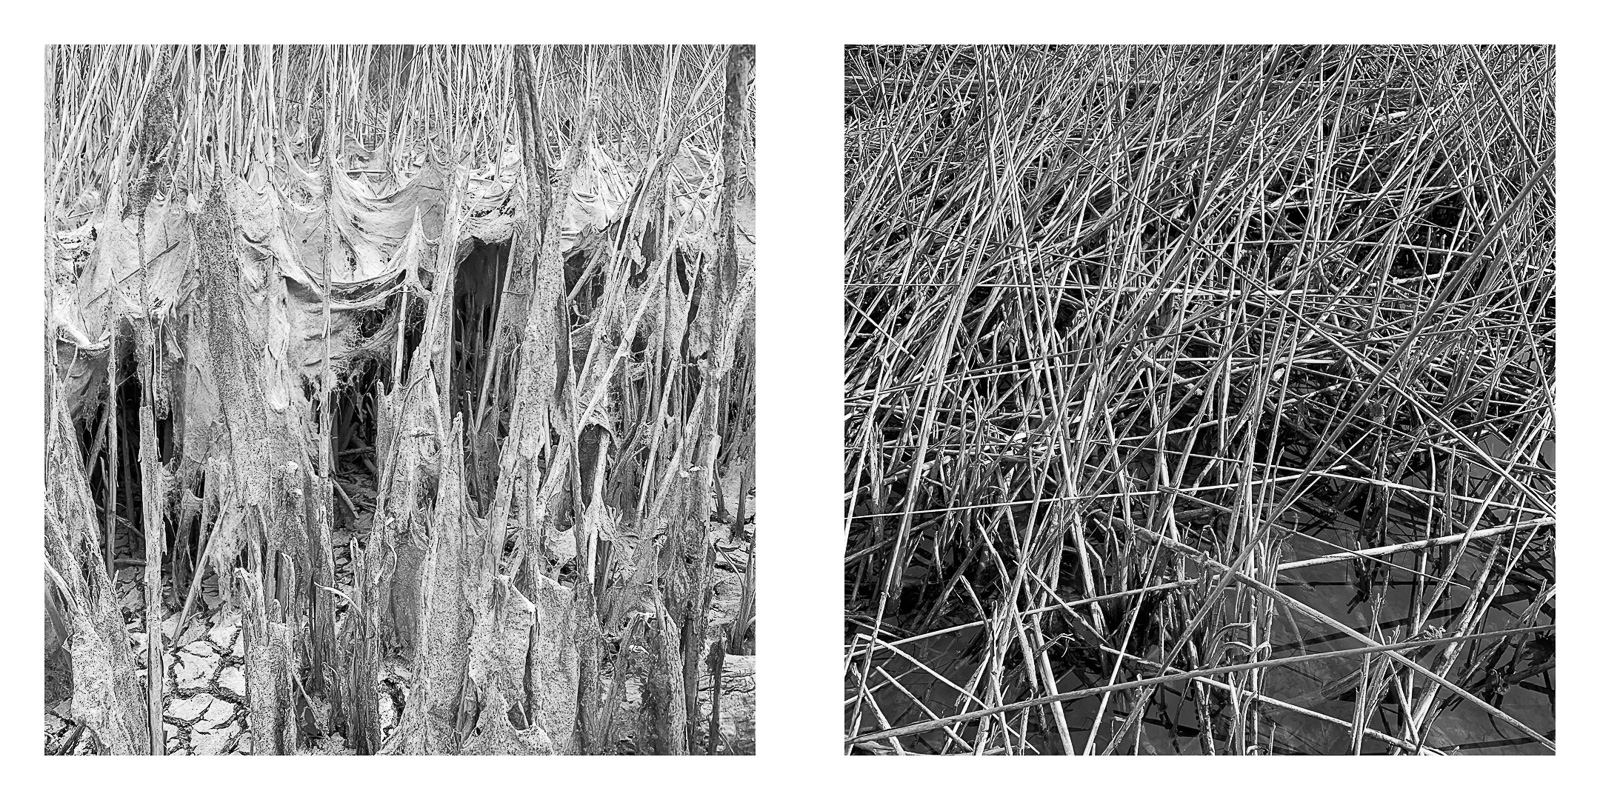
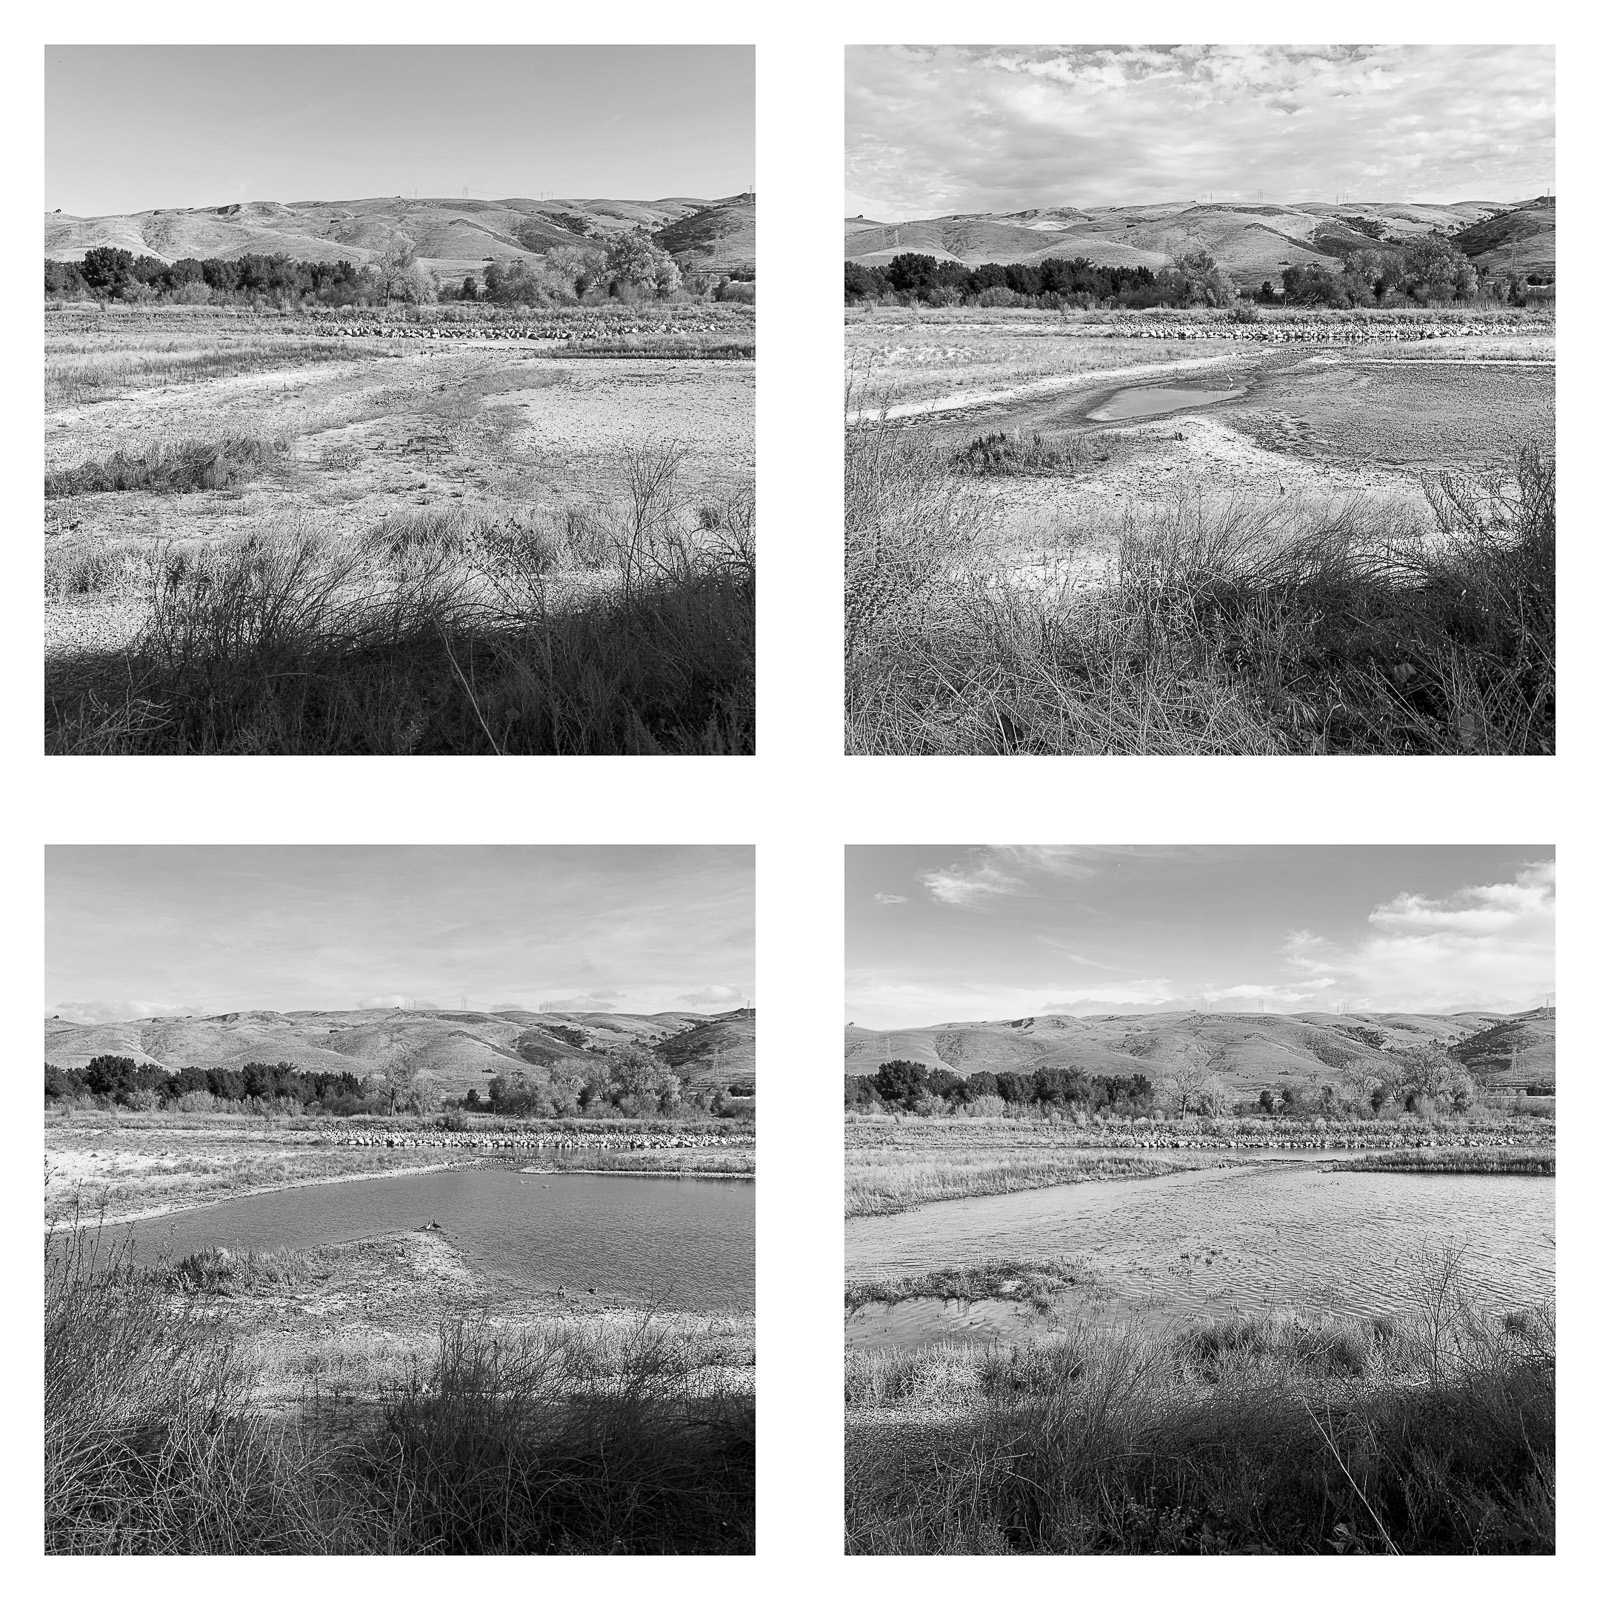
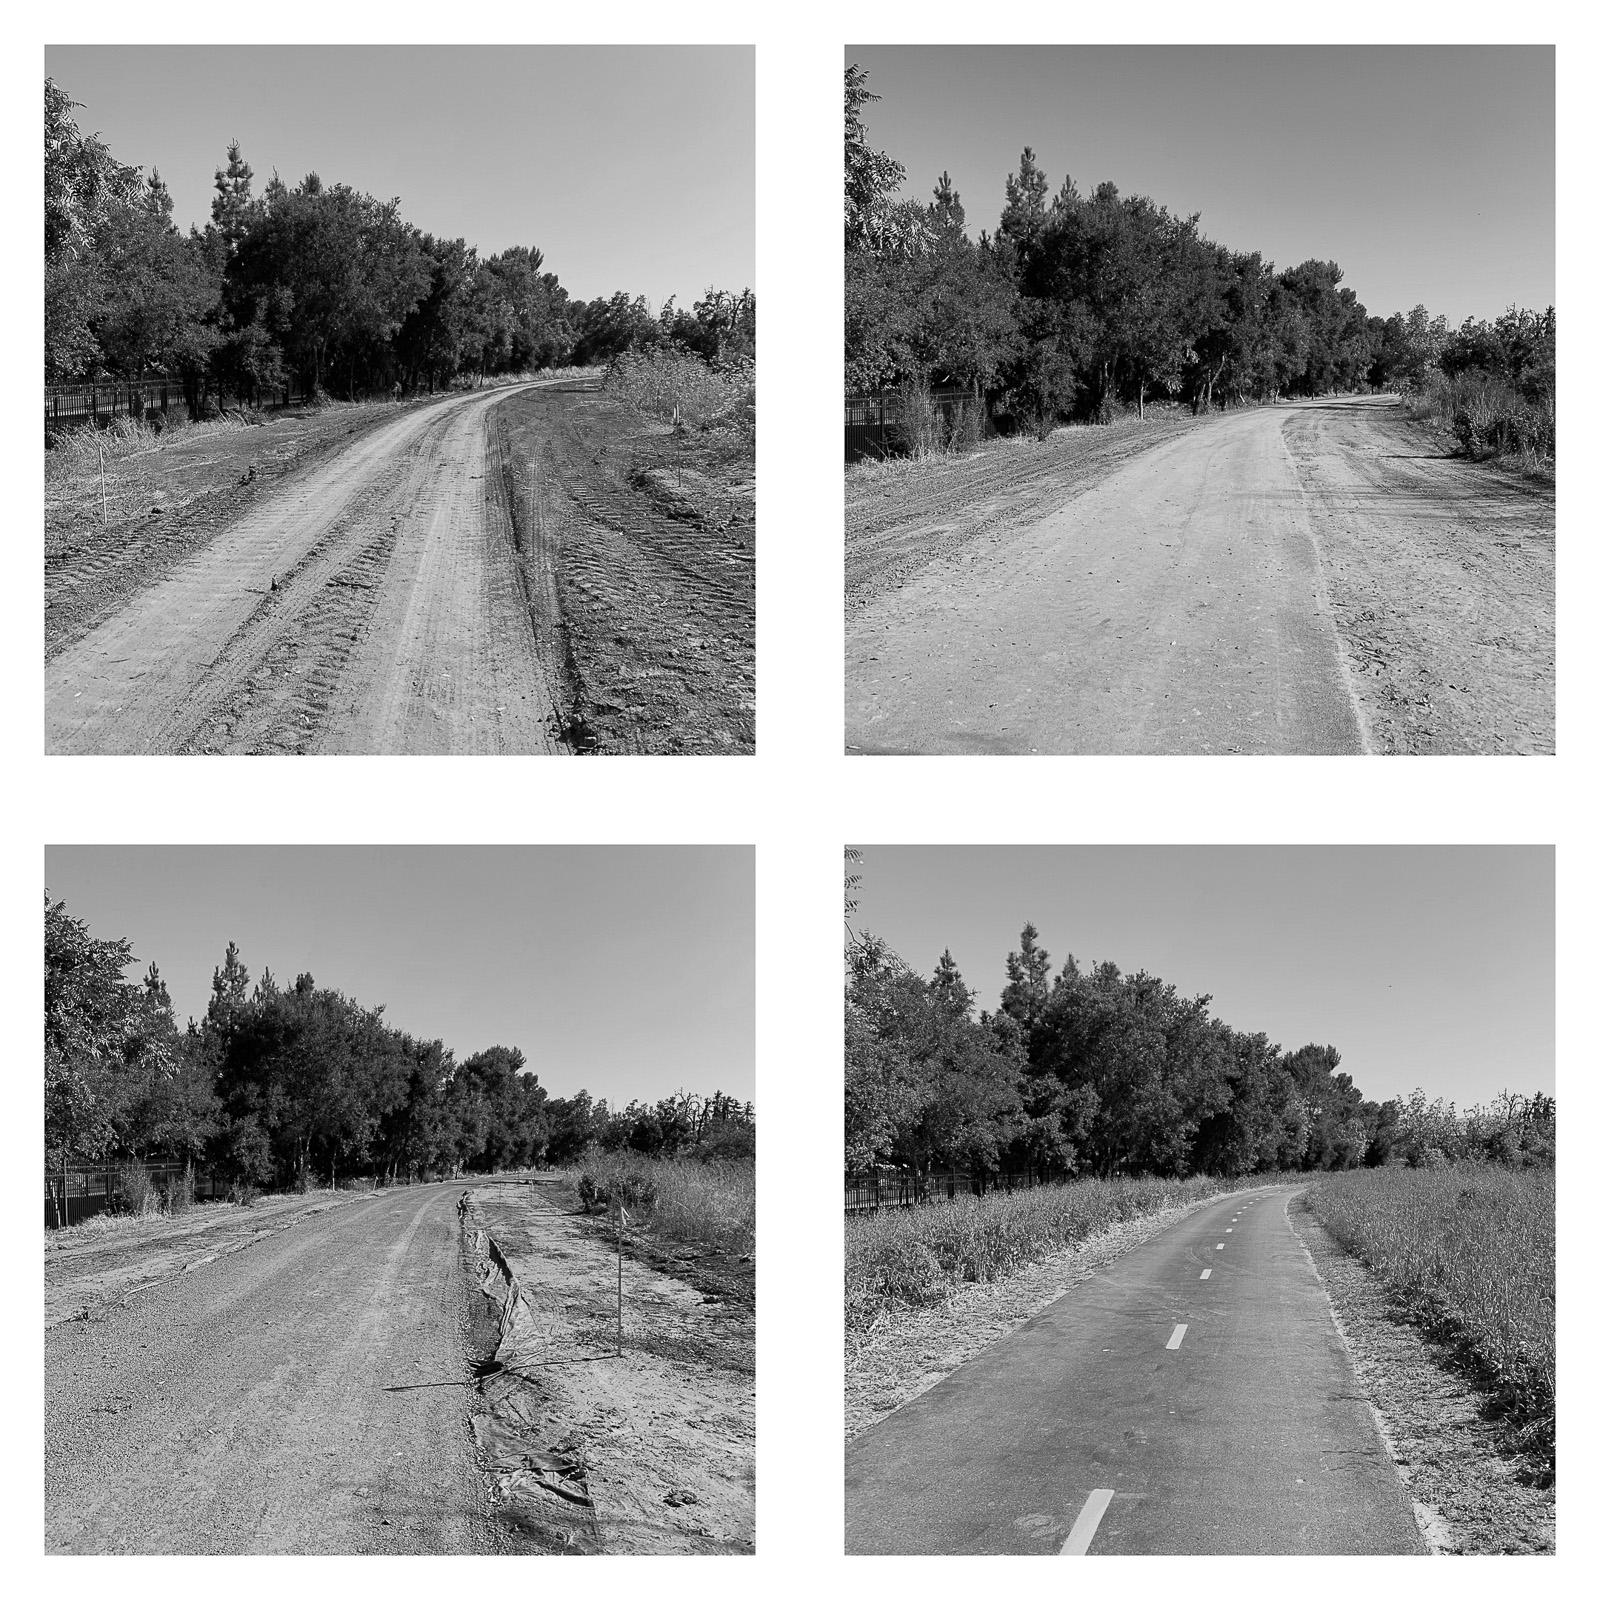
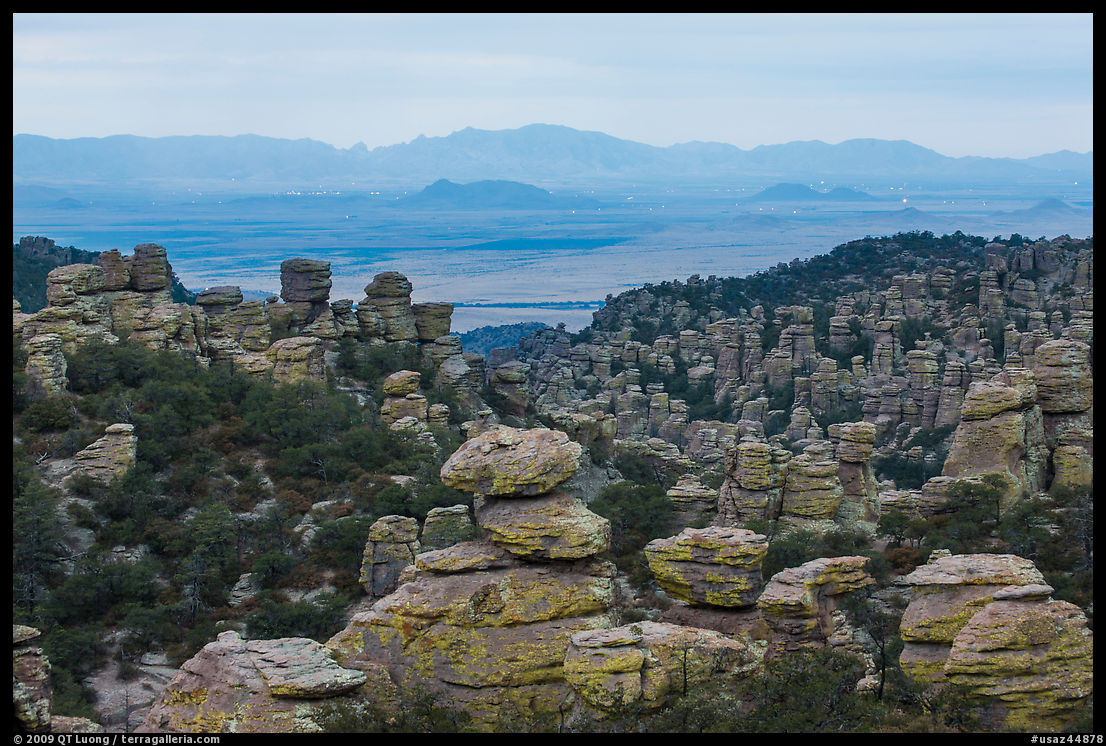
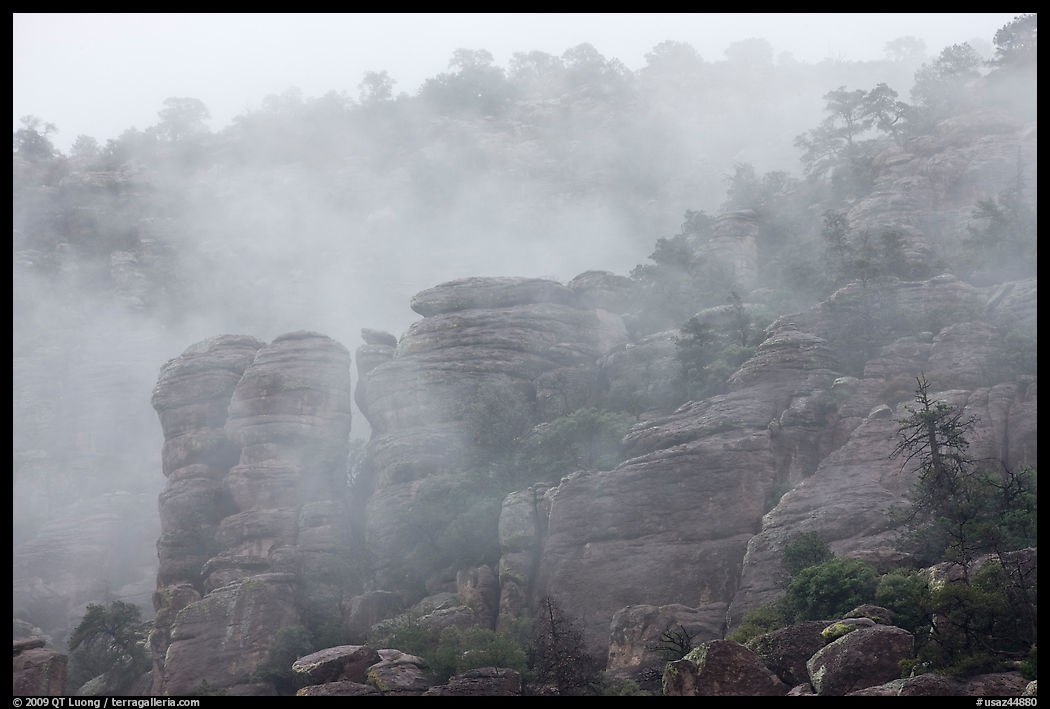
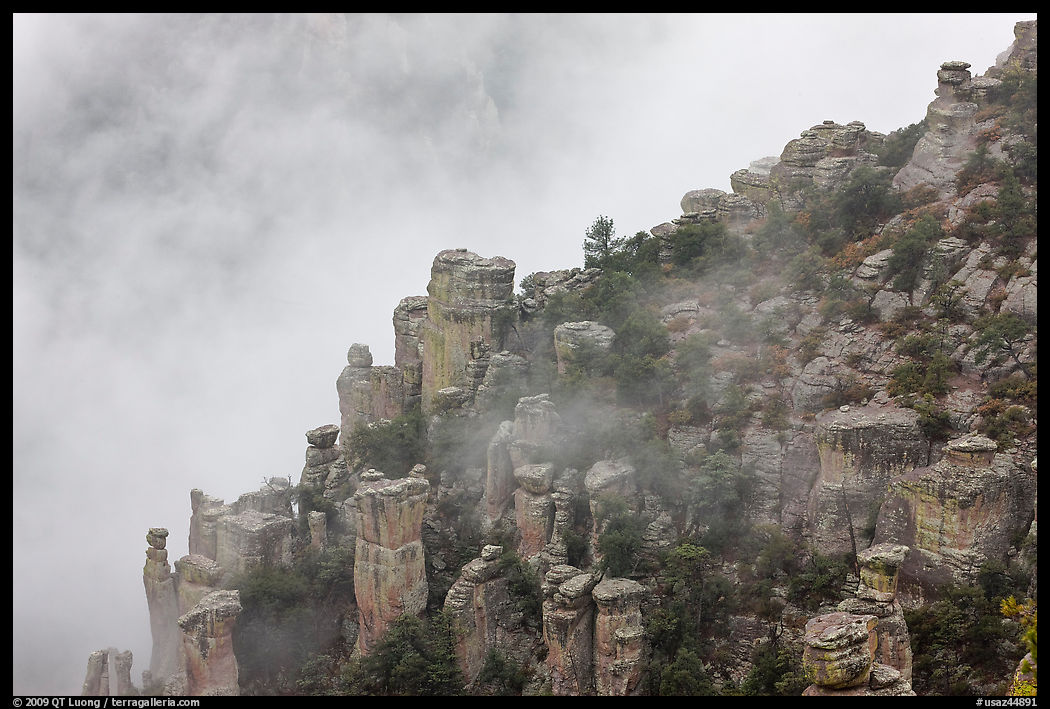
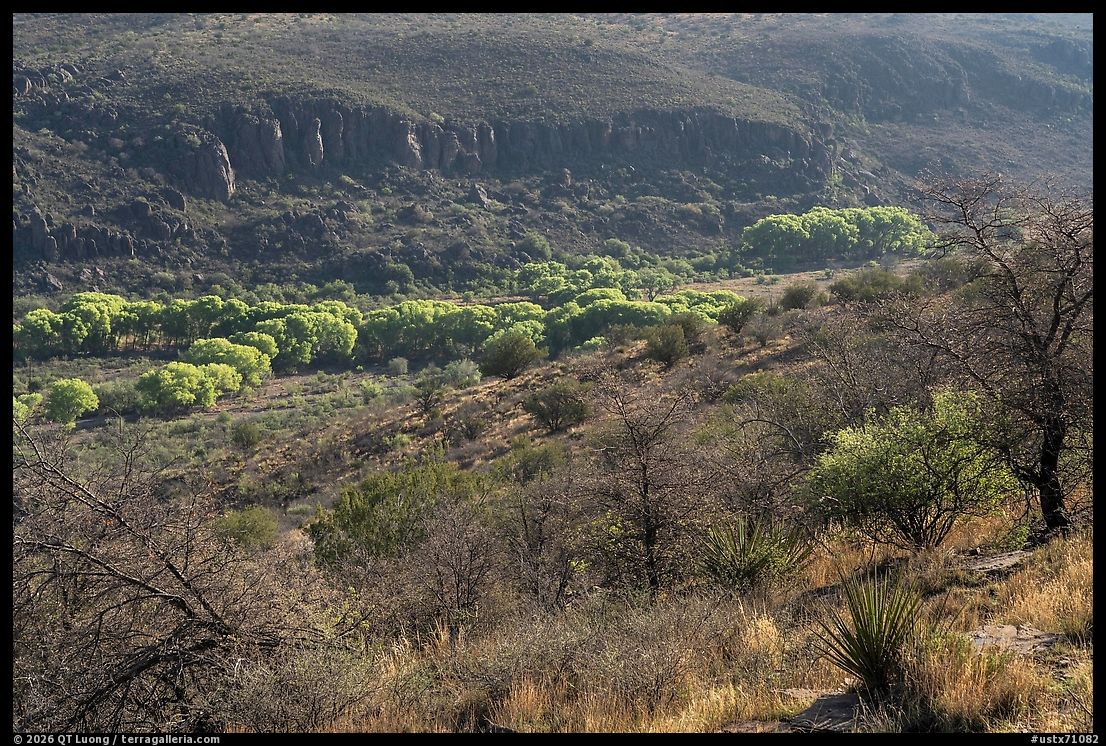
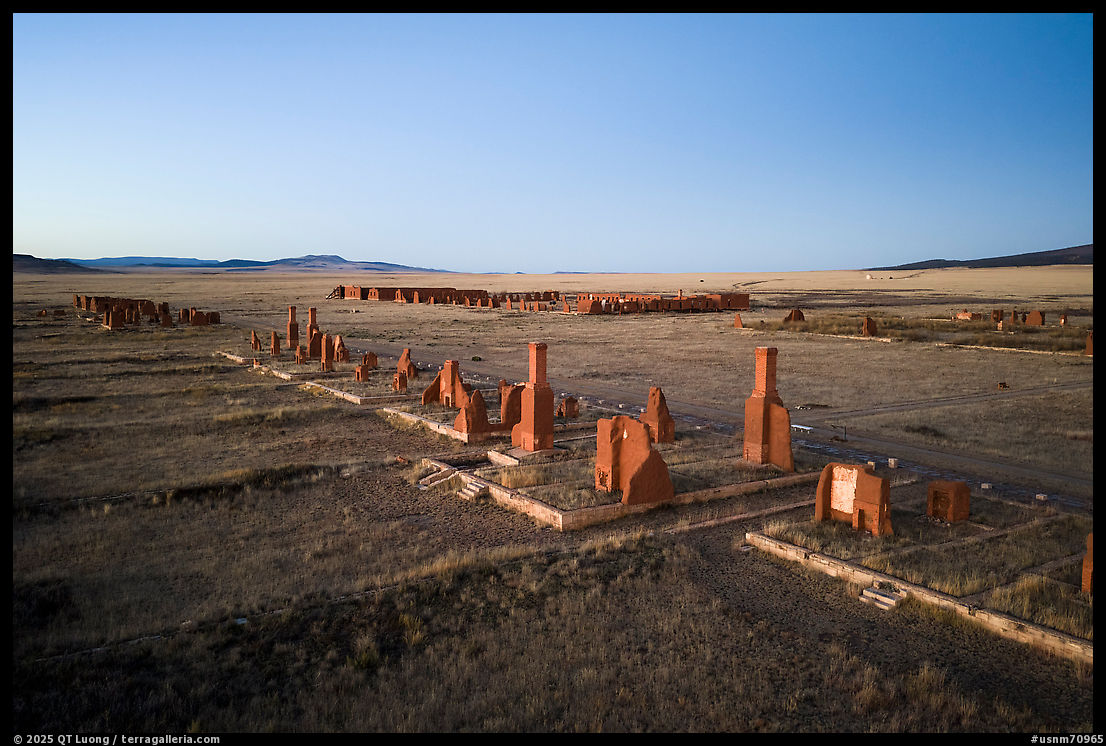
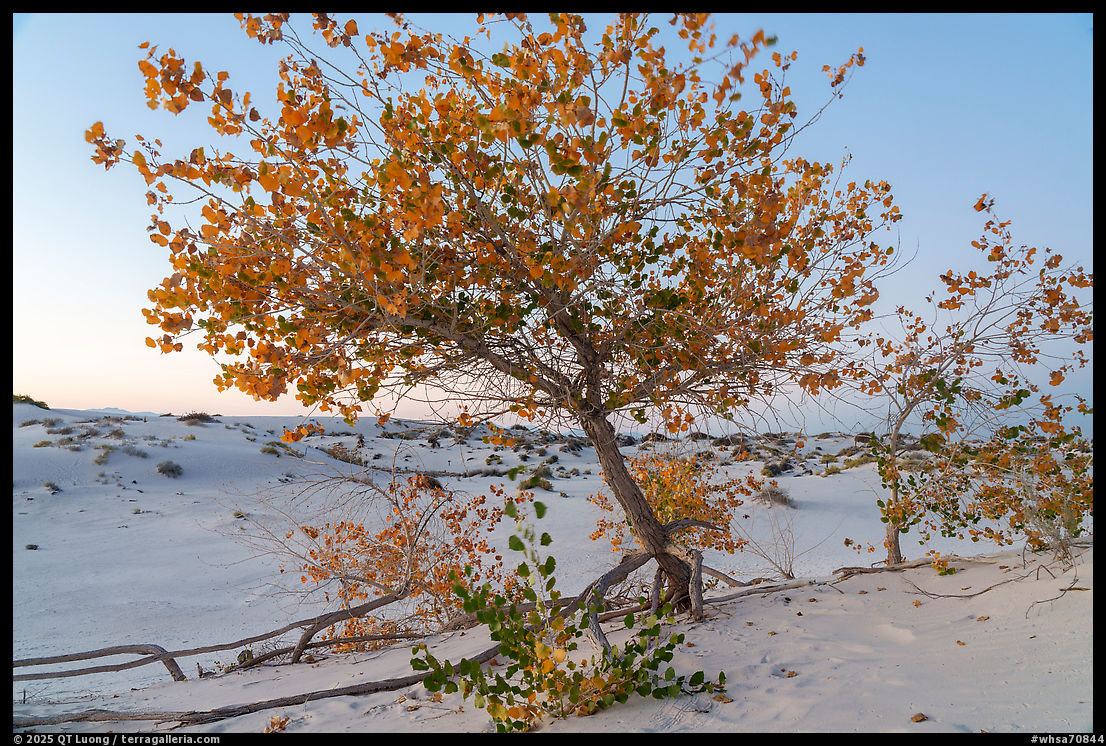
That essay above was written years before the 2026 proclamation. Its discussion of the “monsters” beneath the earth has acquired an unintended immediacy. In explaining the 2026 reduction, the proclamation overtly and specifically cites silver, copper, molybdenum, lead, uranium, vanadium, and zinc as resources important to economic and national security. Sixty days after the proclamation, lands removed from the monument reopen to mineral and geothermal leasing and to mining claims.The photographs below were originally published in the Bears Ears chapter of Our National Monuments. Their locations are keyed to the map above. Seen together, they suggest what a boundary map cannot: the continuity and diversity of a landscape of canyons, mesas, forests, archaeological places, and open country. The six following locations are now excluded from the national monument.

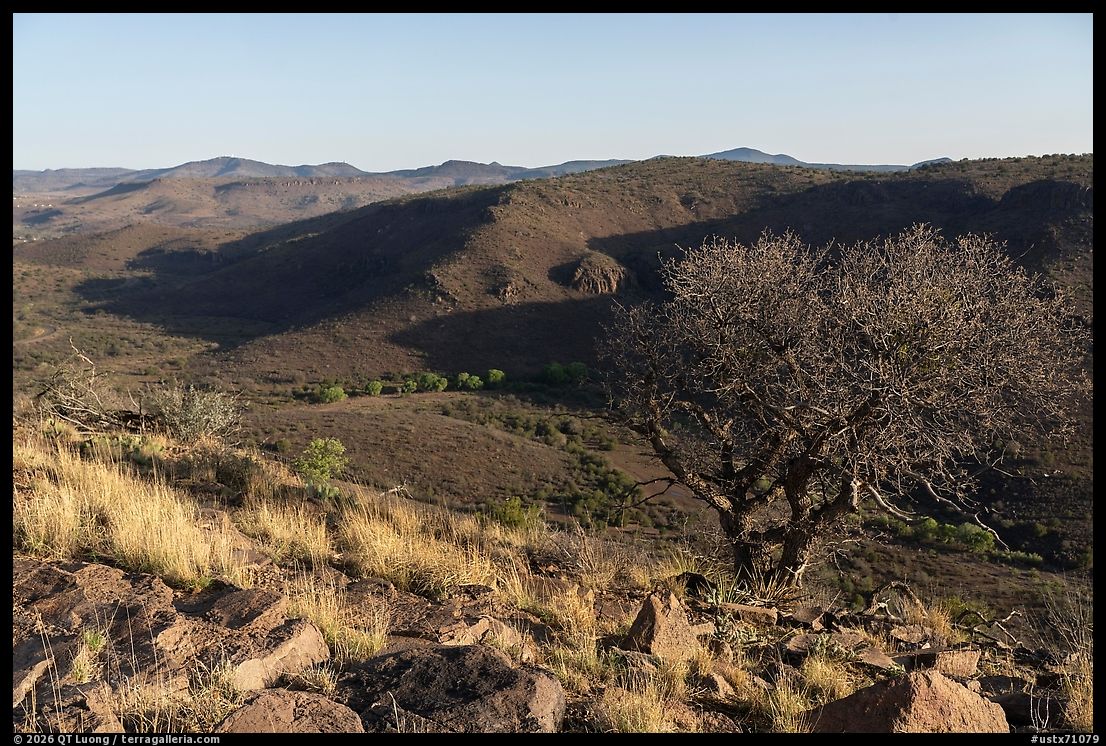
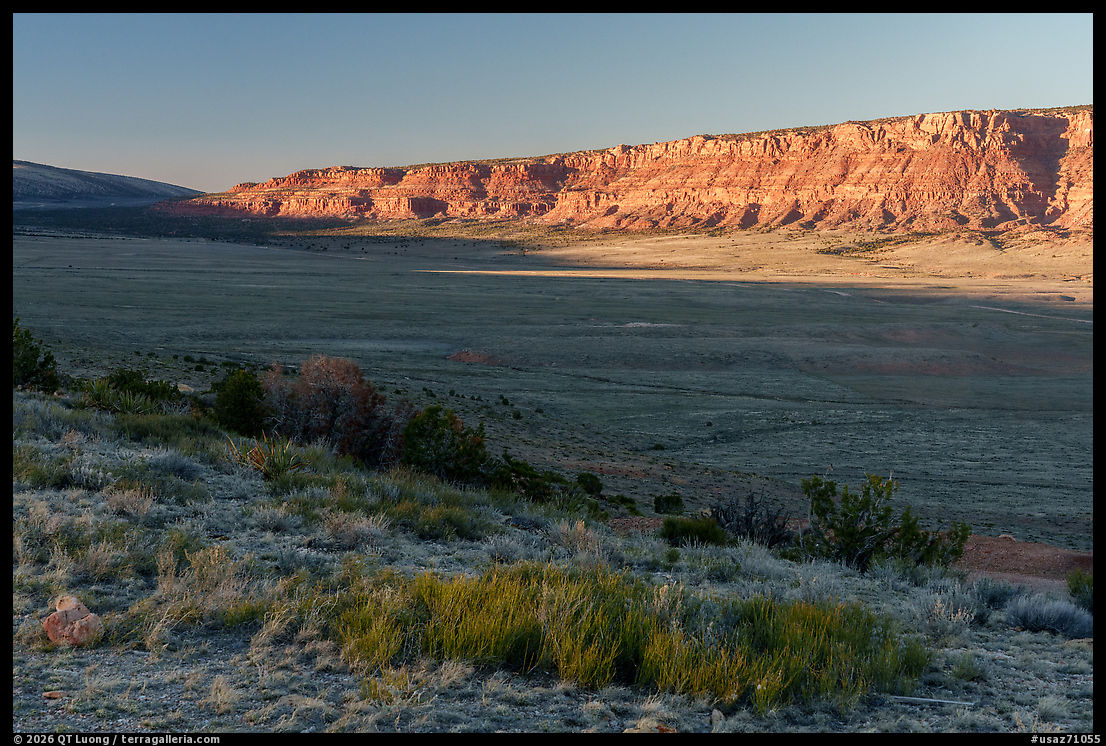
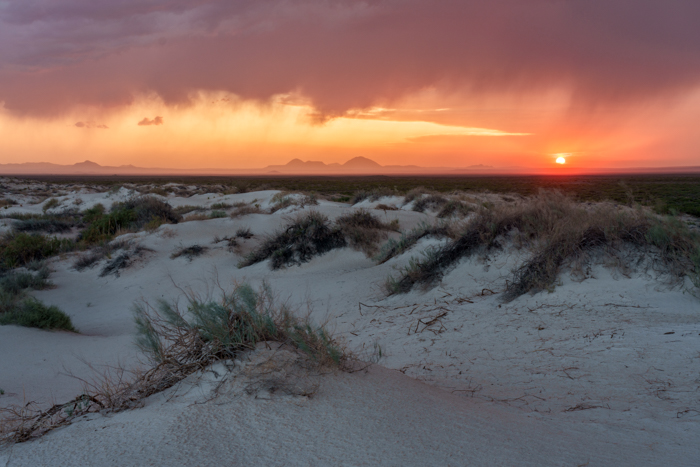
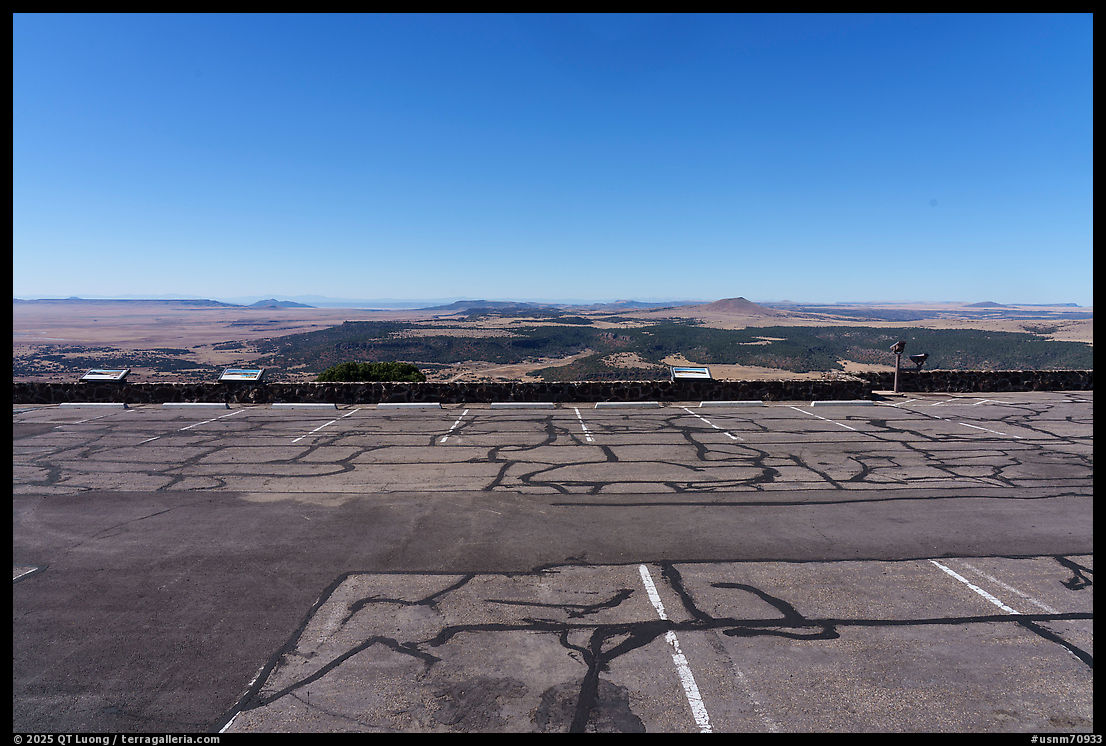
3. Lockhart Basin from Needles Overlook, sunset
From Hatch Point Plateau, Needles Overlook opens onto a vast wilderness of rock 1,500 feet below, with views extending toward Indian Creek and Canyonlands National Park.

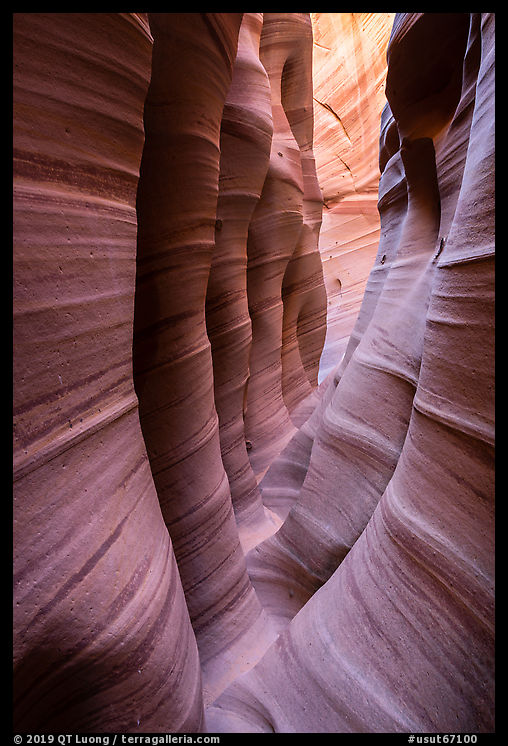
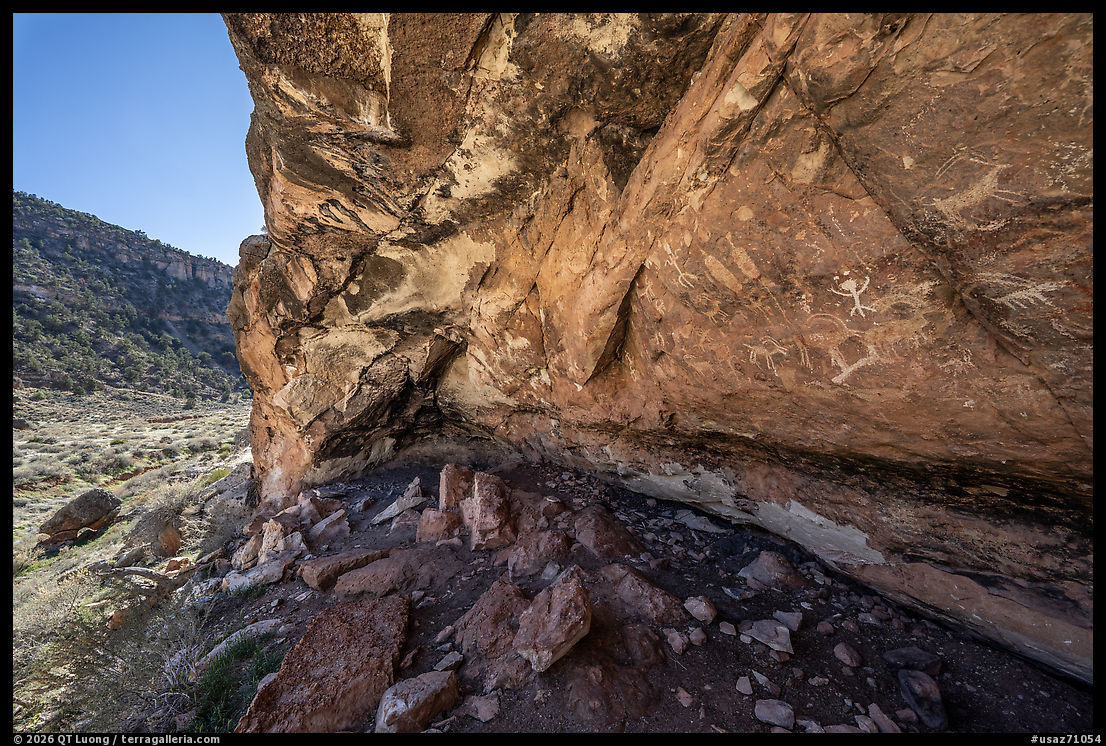
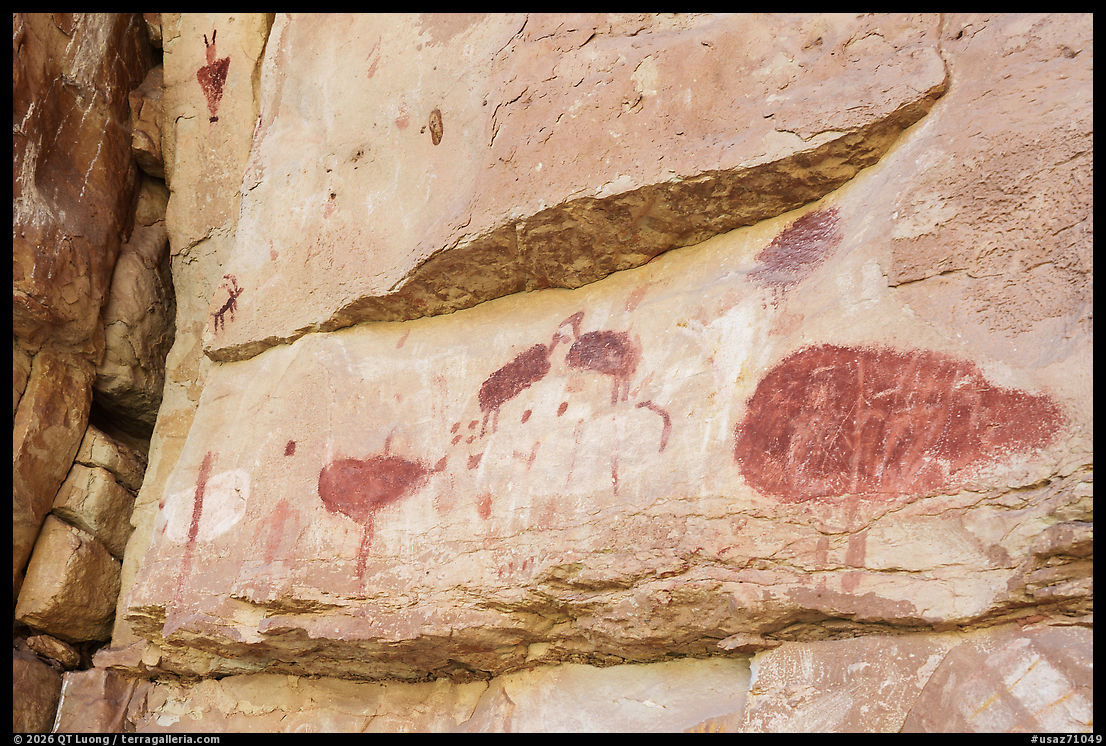
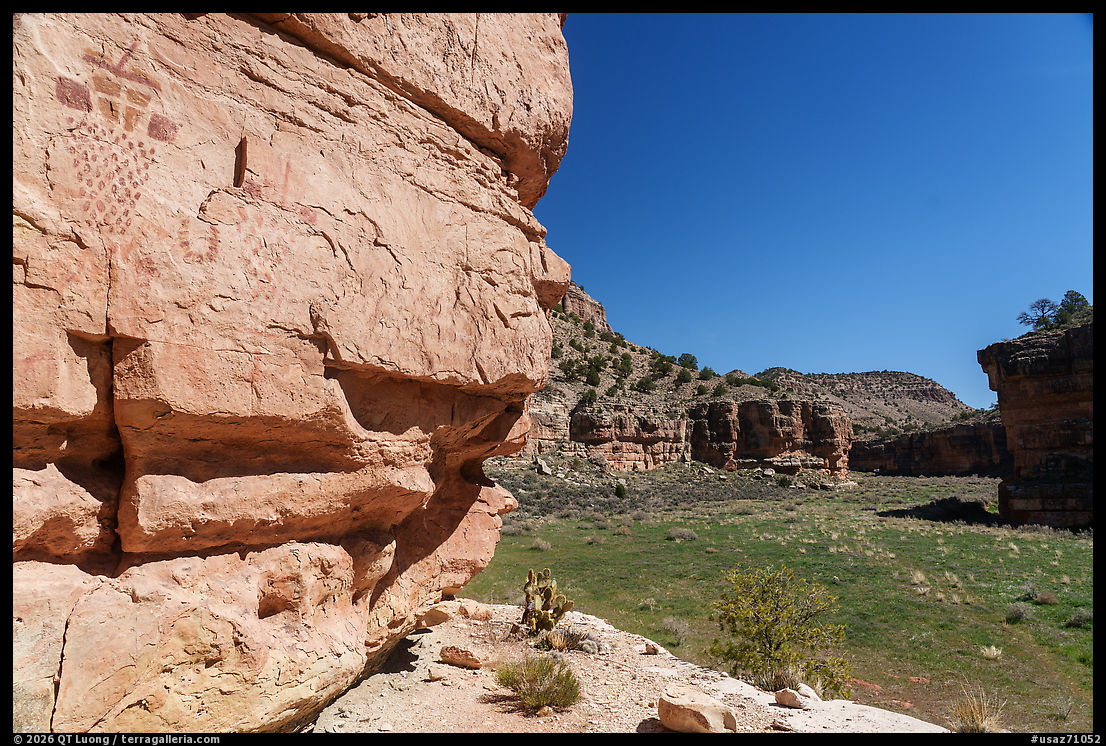
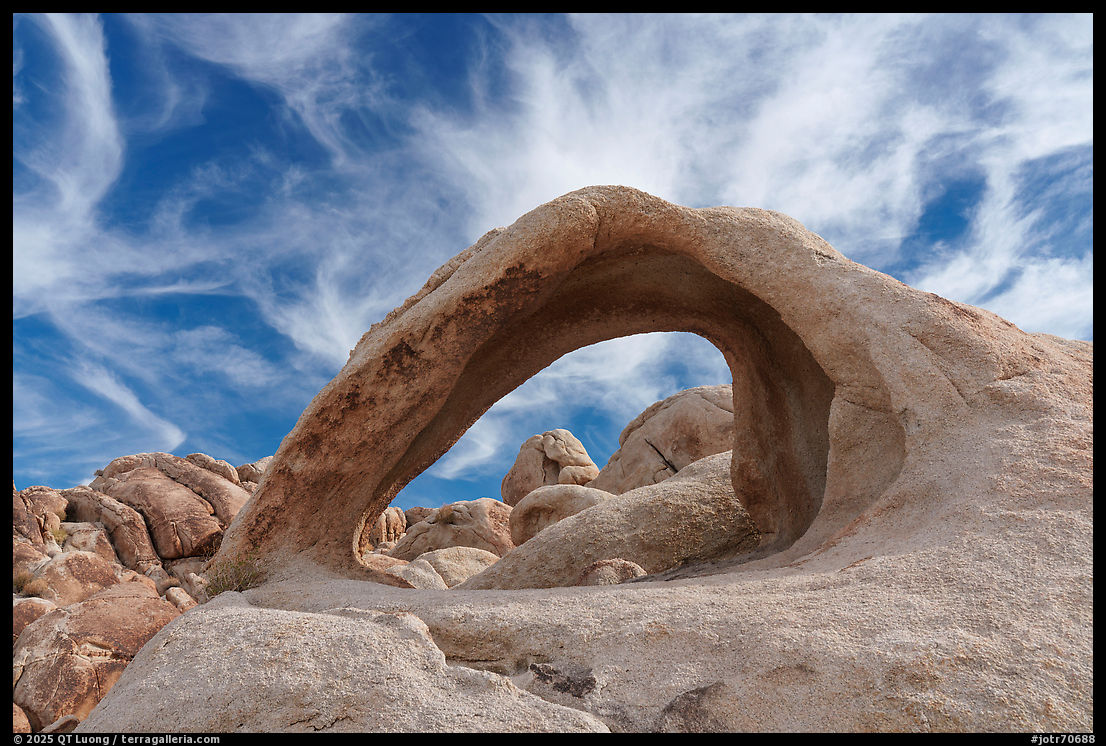
6. Fallen Roof Ruin, late morning
High above Road Canyon, a small Ancestral Puebloan structure lies beneath a richly patterned sandstone ceiling. Reflected sunlight from the canyon walls gives the shaded alcove its warm glow.


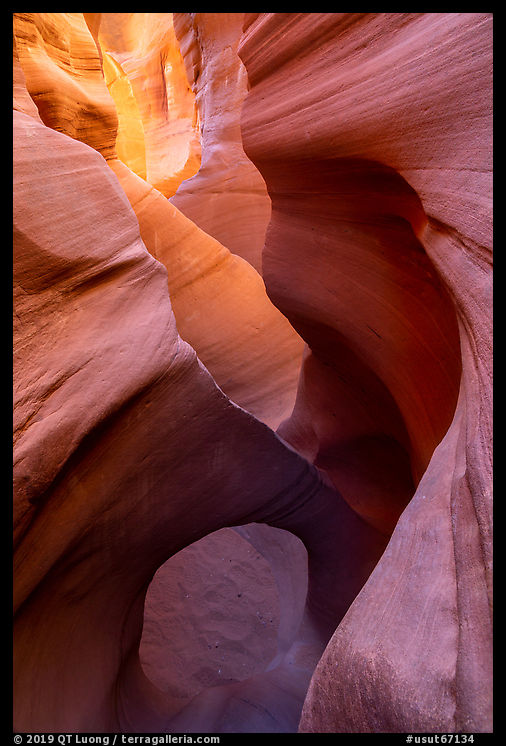
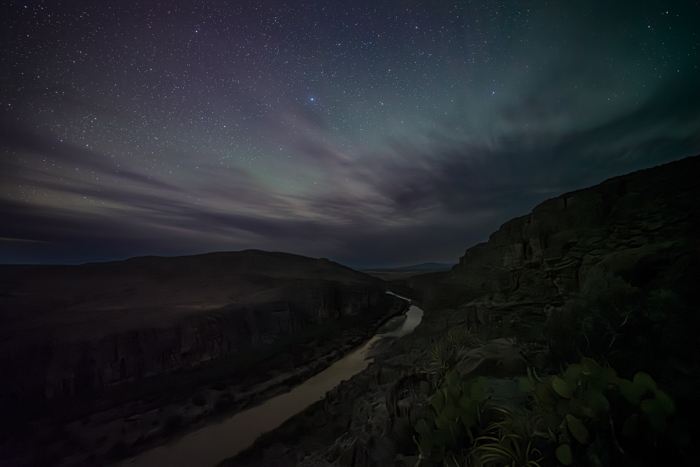
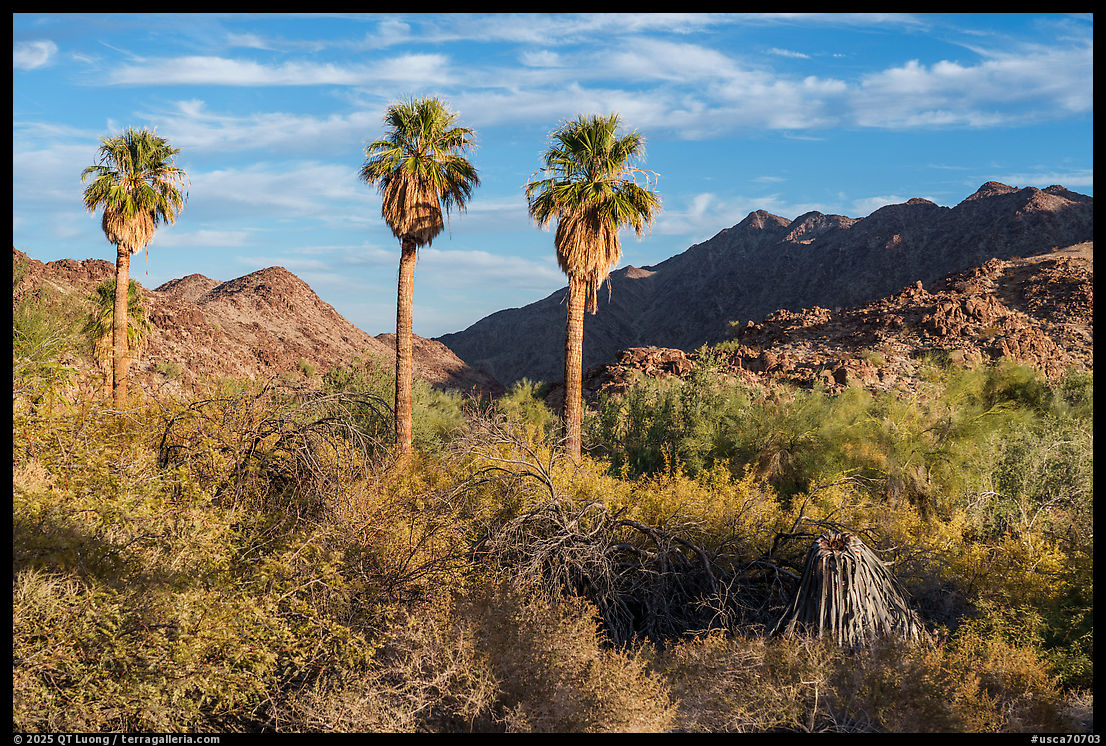
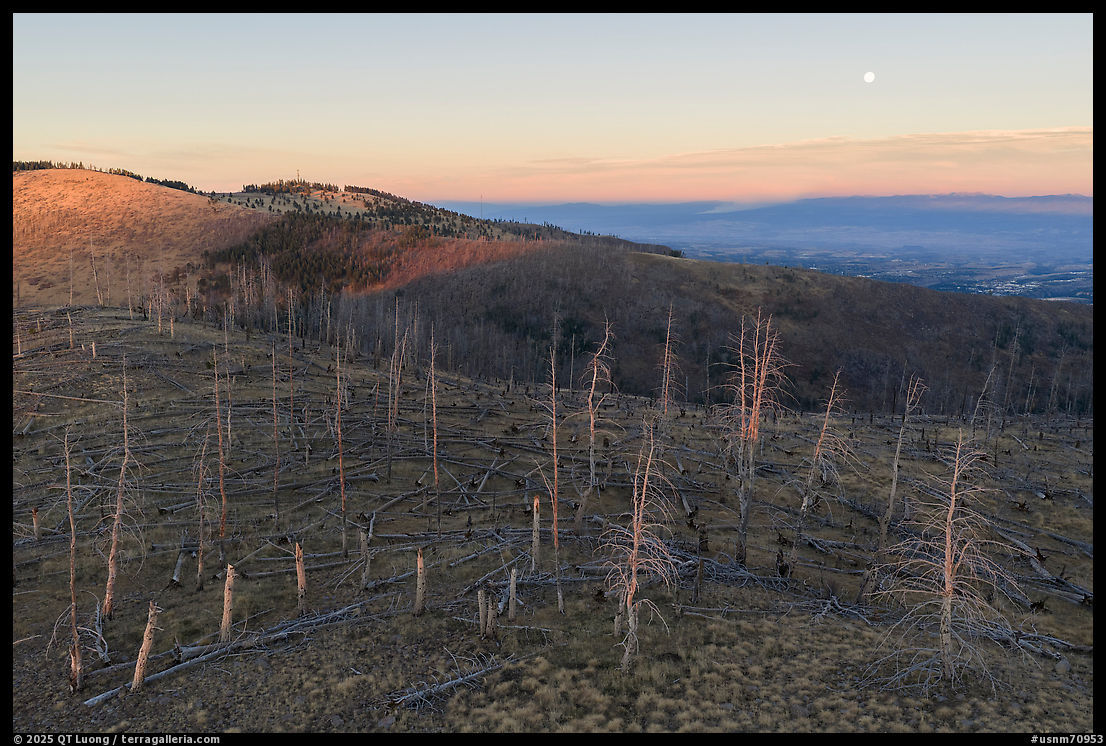
7. Bullet Canyon; Perfect Kiva and moon
The 50-mile Grand Gulch drains much of western Cedar Mesa and contains an exceptional concentration of rock art and well-preserved ancestral structures.


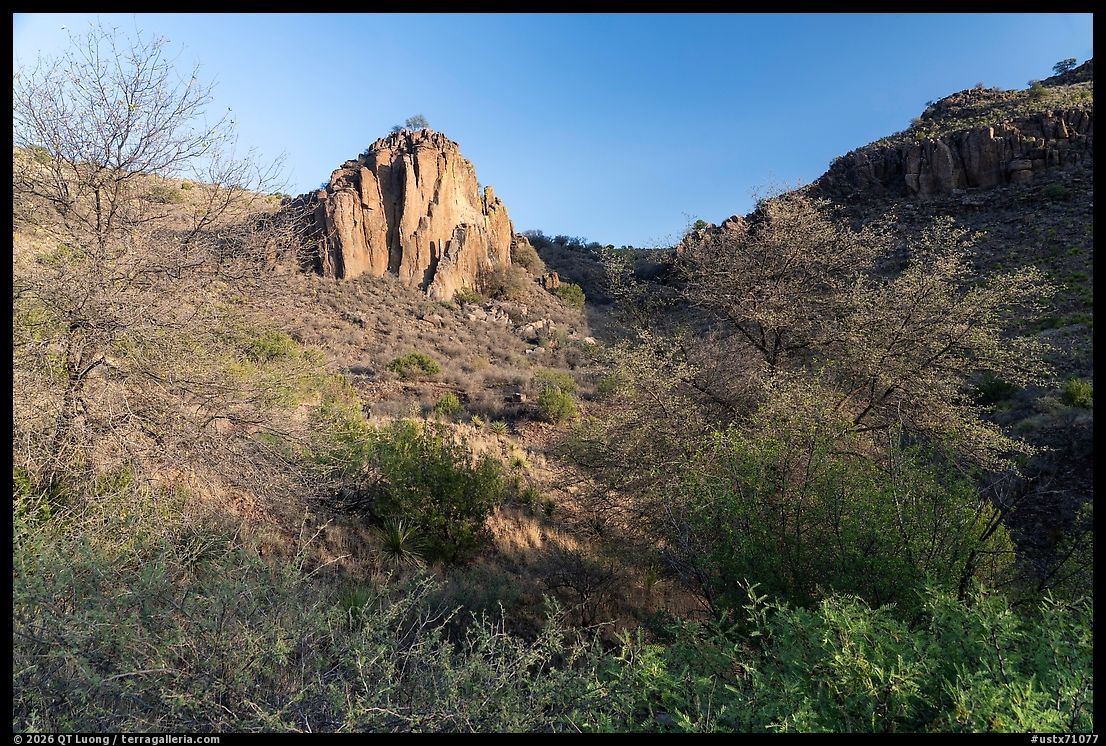
8. Valley of the Gods from Moki Dugway, afternoon; Muley Point, sunset
At the southern edge of Cedar Mesa, the plateau drops abruptly toward the San Juan River. From the Moki Dugway and Muley Point, immense views extend across Valley of the Gods toward Monument Valley and the deeply incised country of the San Juan.


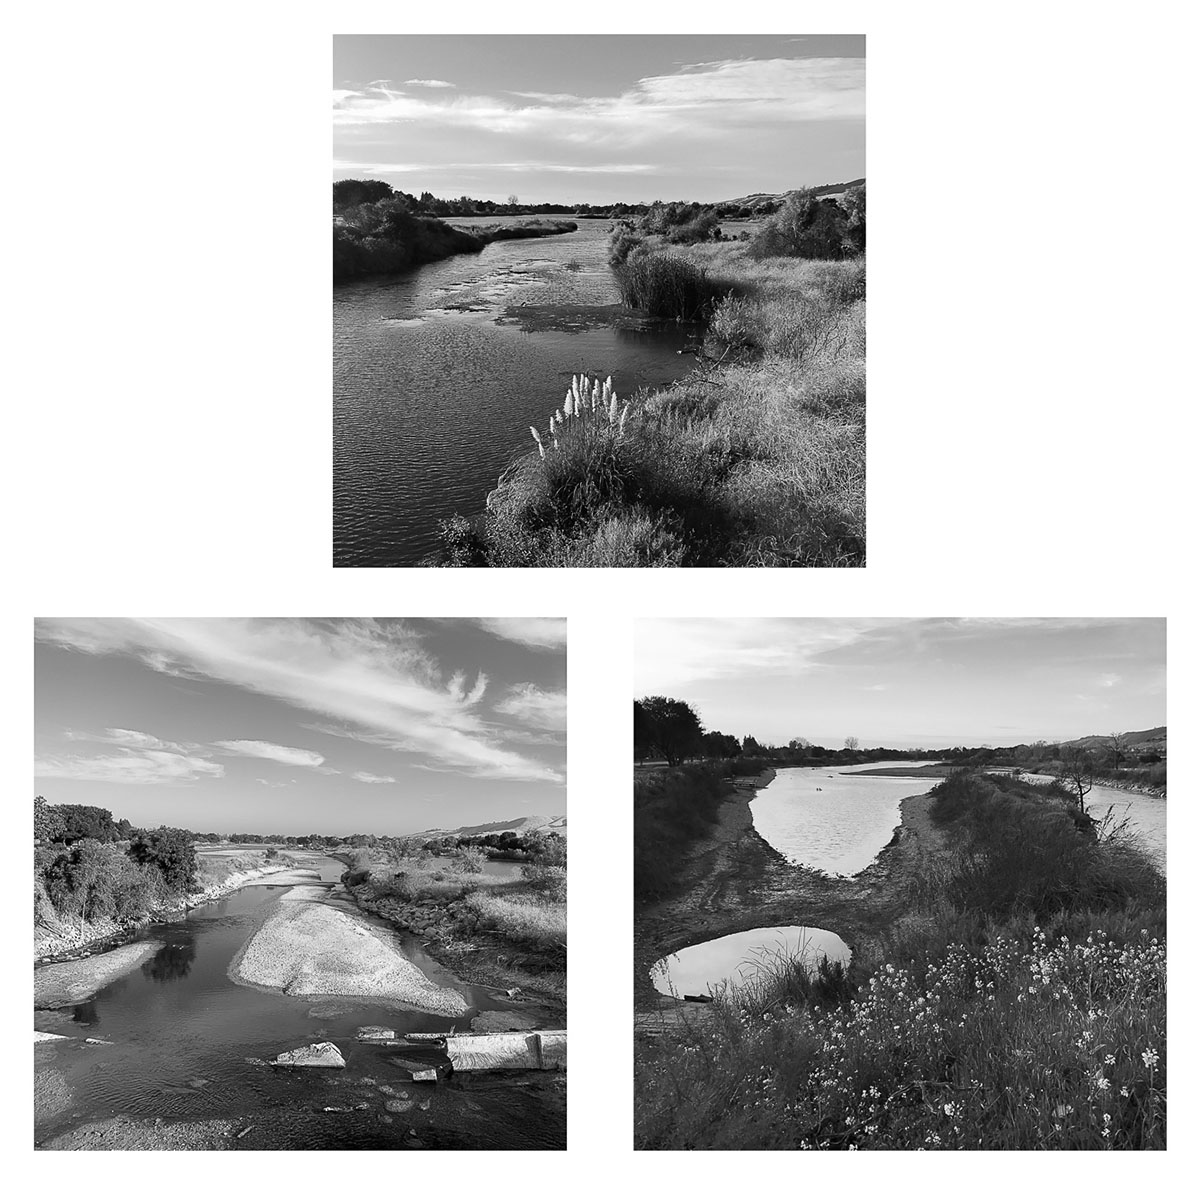
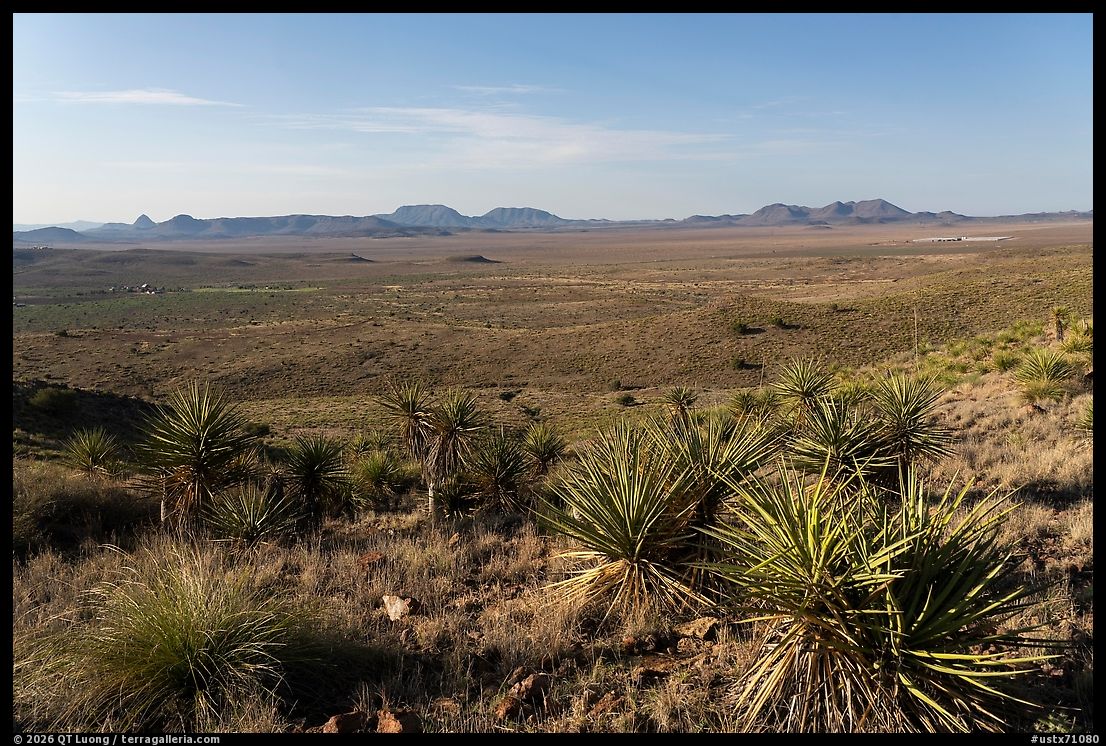
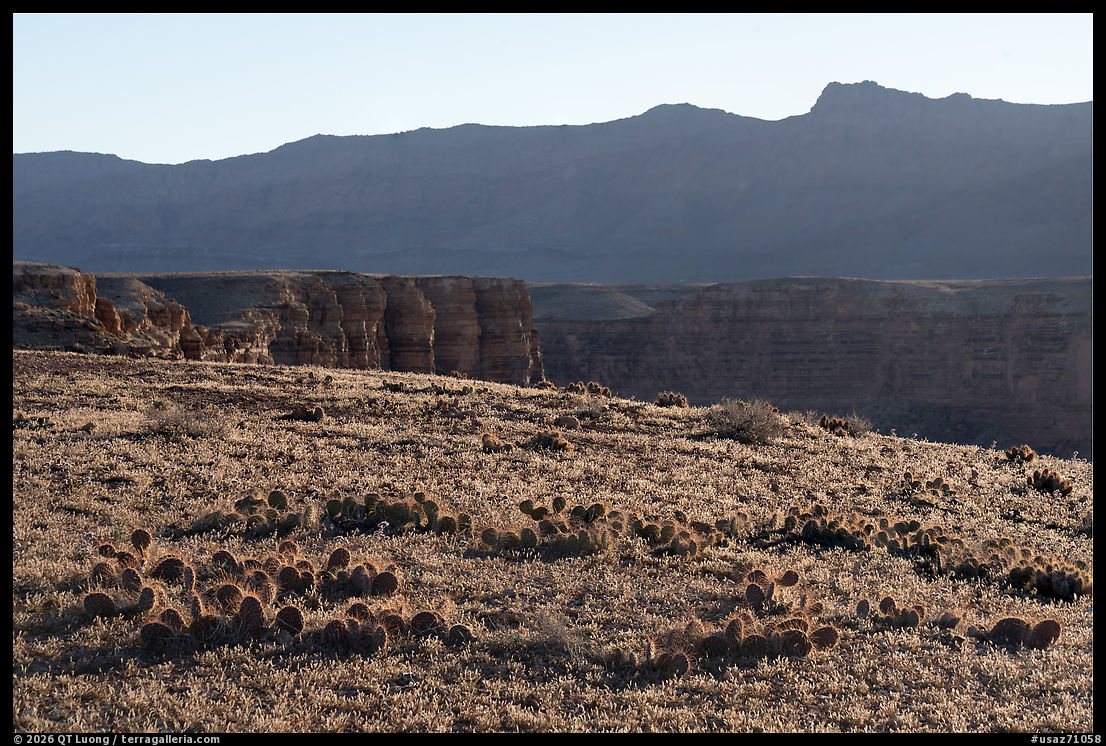
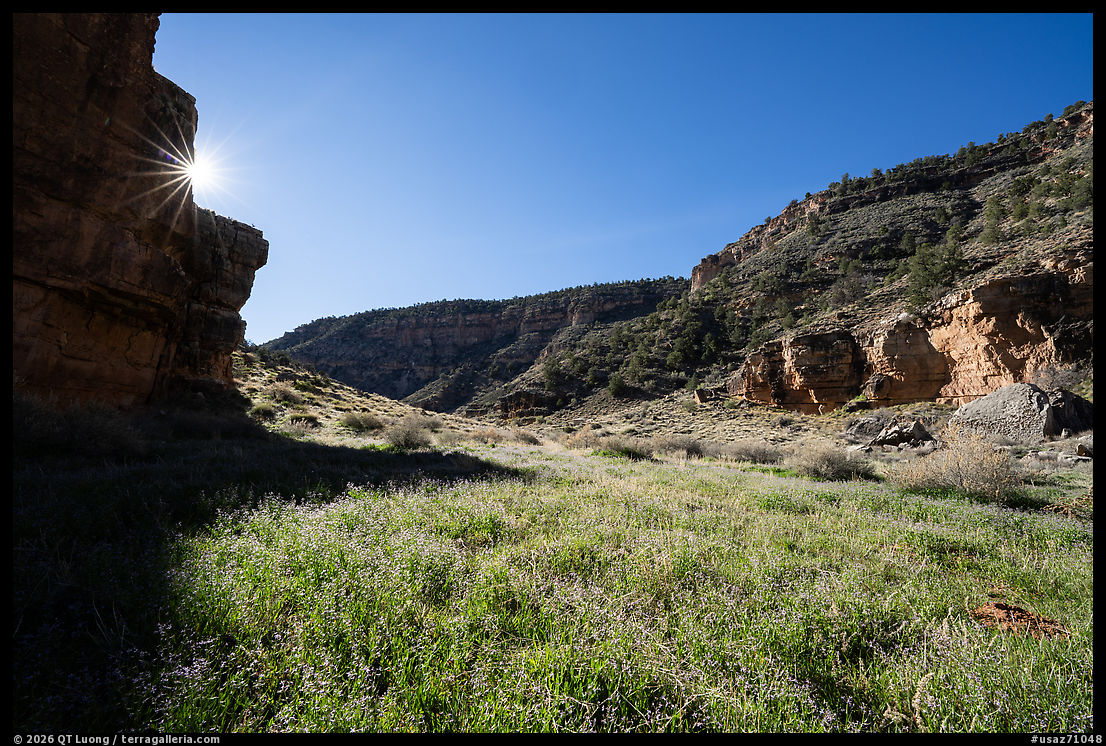
9. Looking north and south from Valley of the Gods, early morning
Between the cliffs of Cedar Mesa and the San Juan River, sandstone buttes and spires rise from a broad desert plain. The landscape recalls nearby Monument Valley but remains quieter and much less developed.

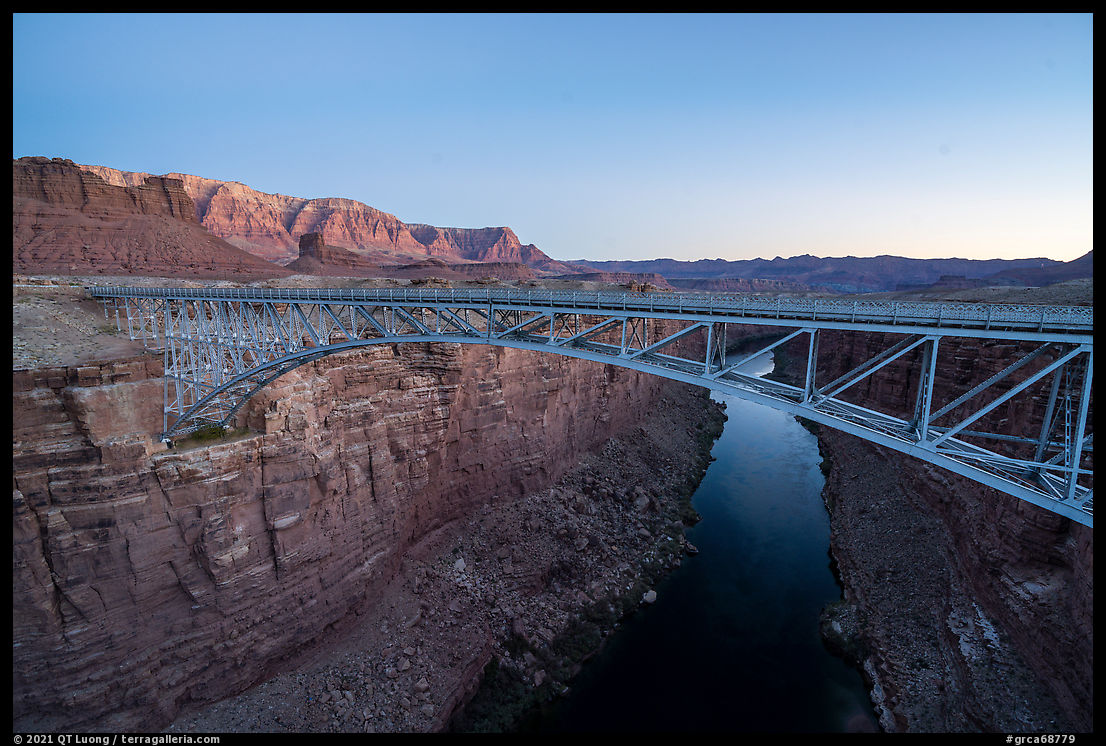
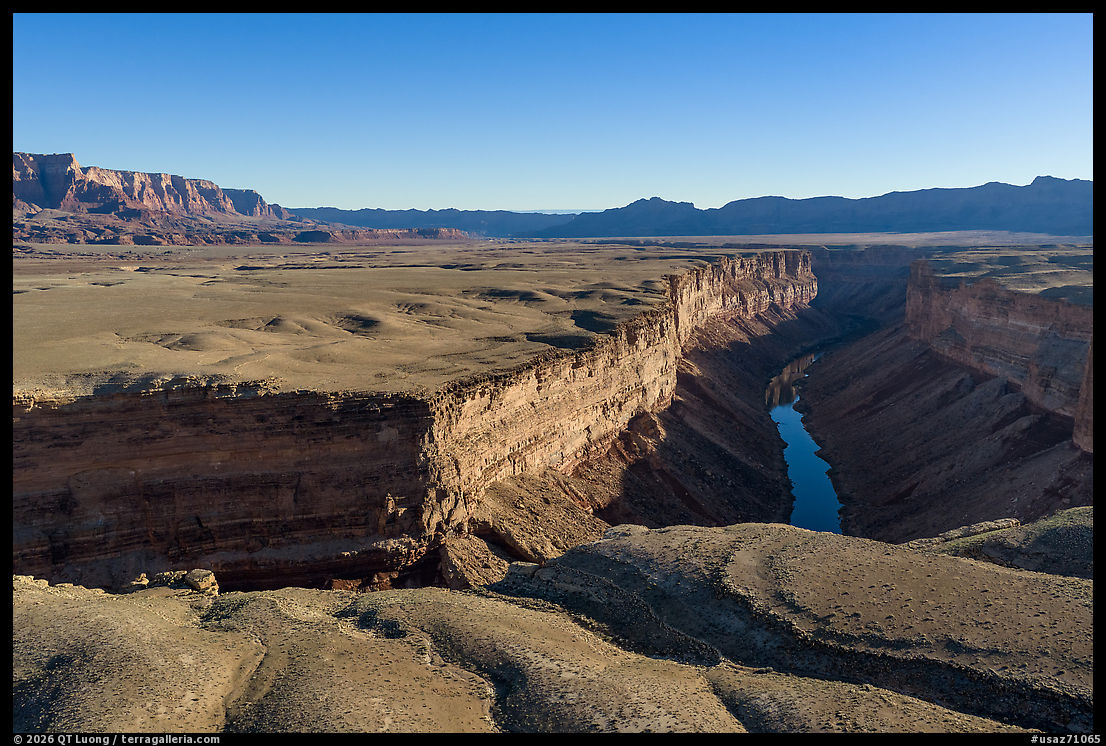
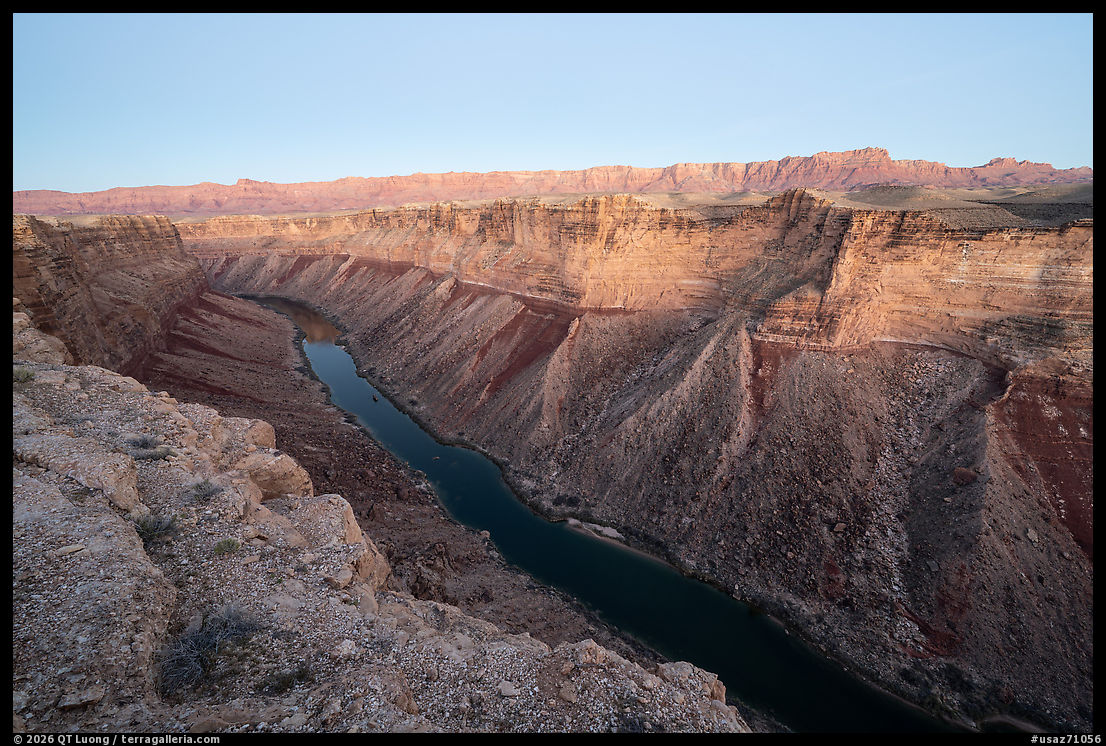
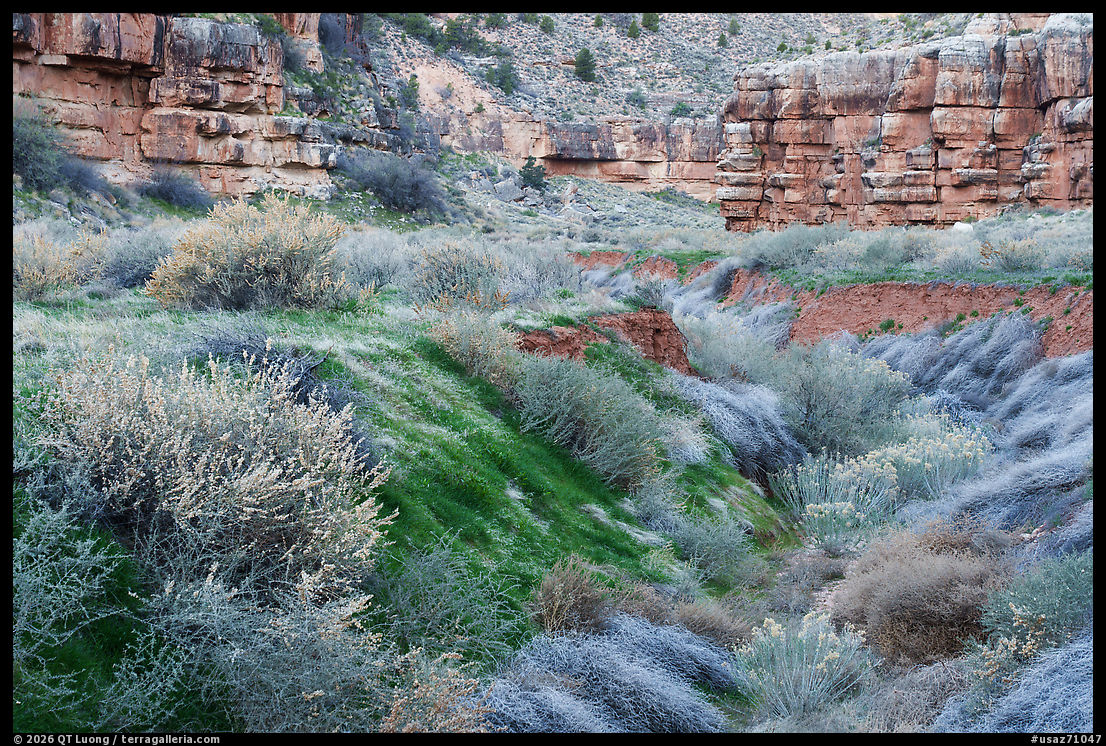
10. Goosenecks of the San Juan River
The San Juan twists for more than six miles while advancing only about a mile and a half, carving meanders roughly 1,000 feet into the uplifted Colorado Plateau.
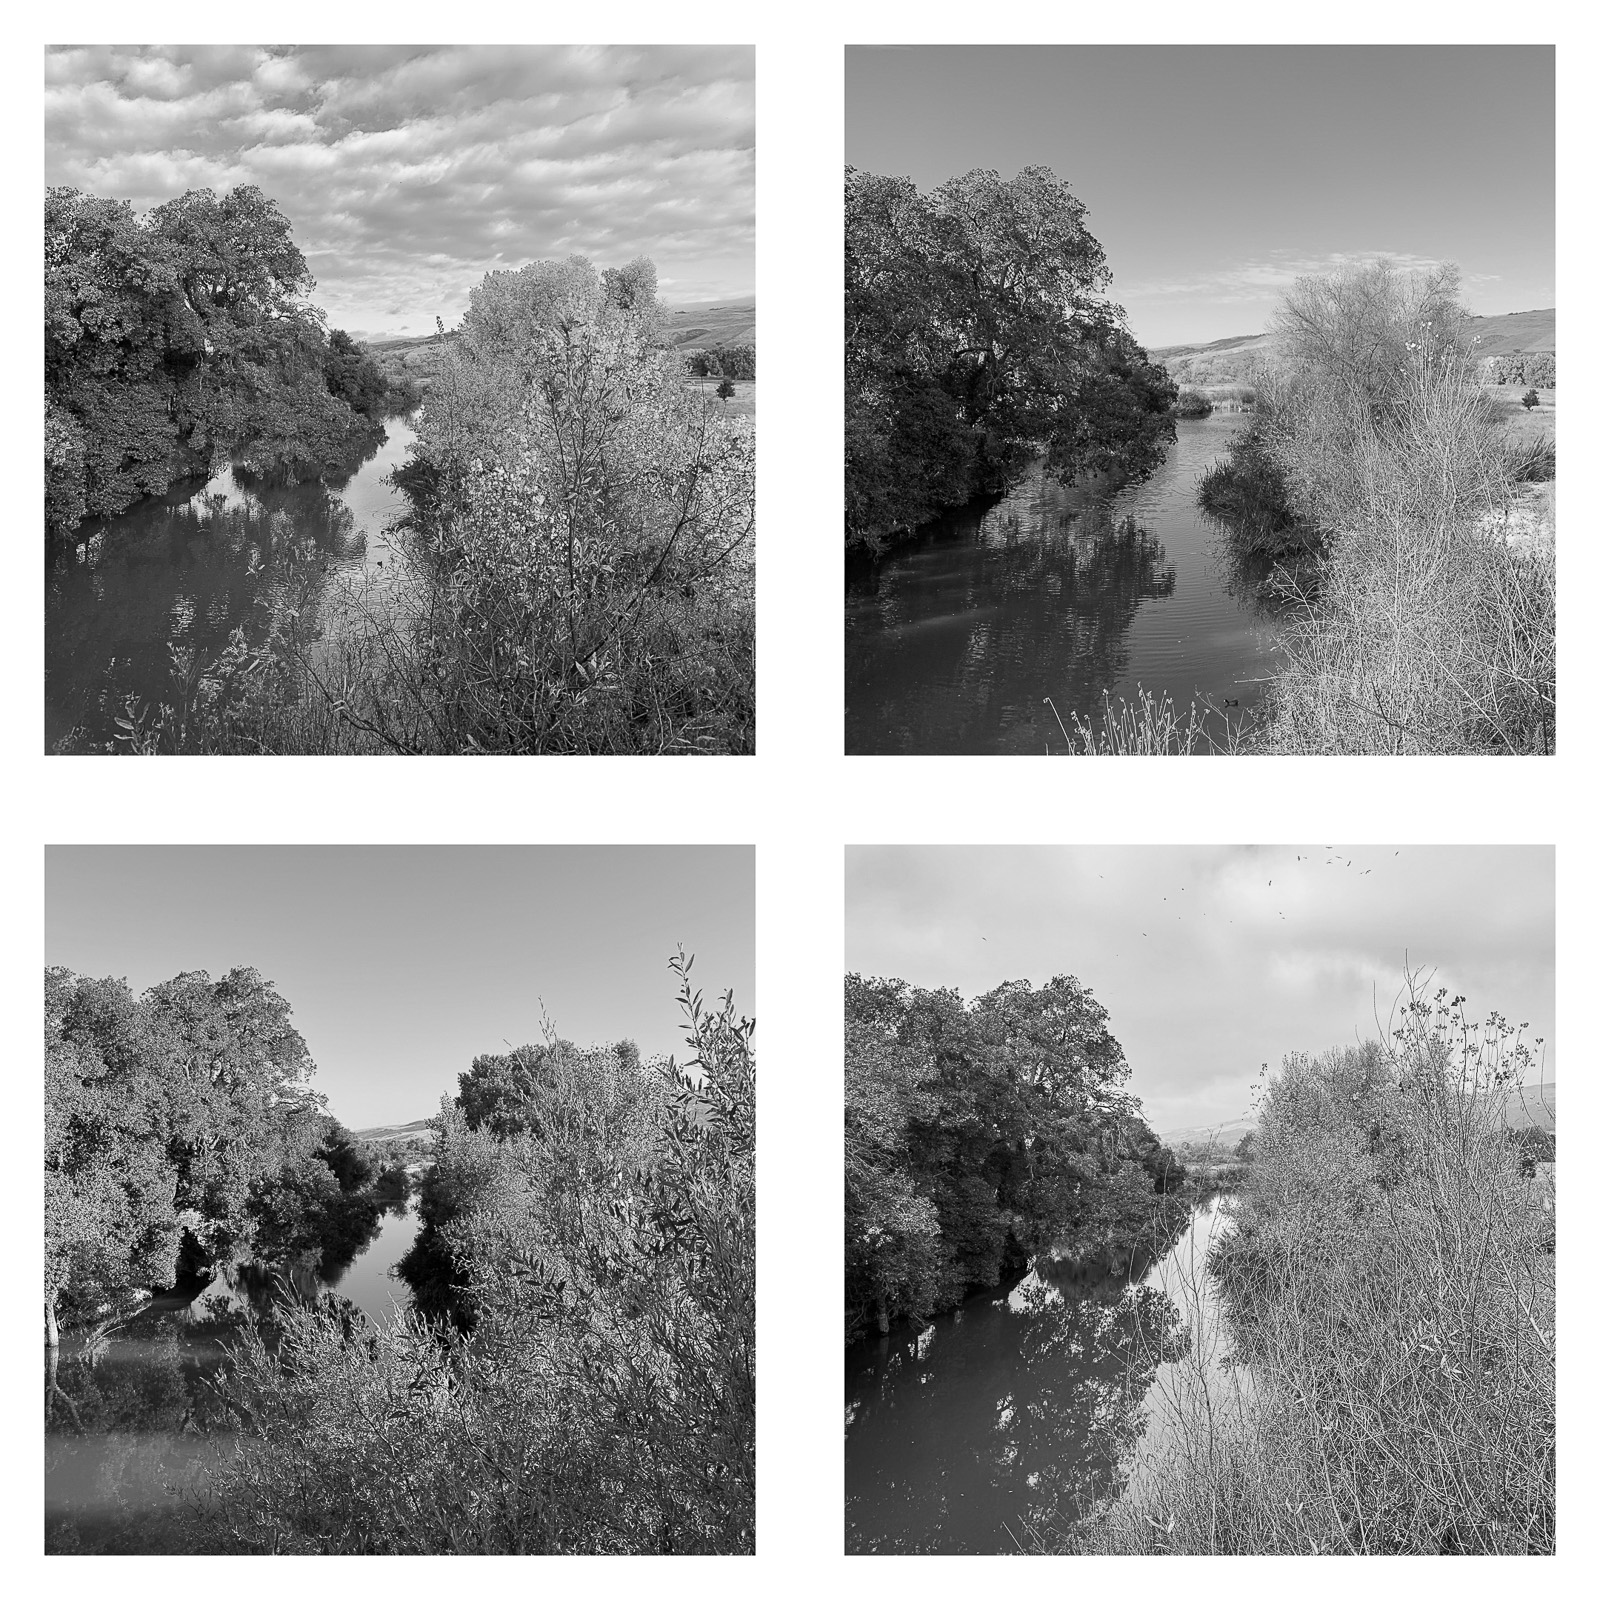
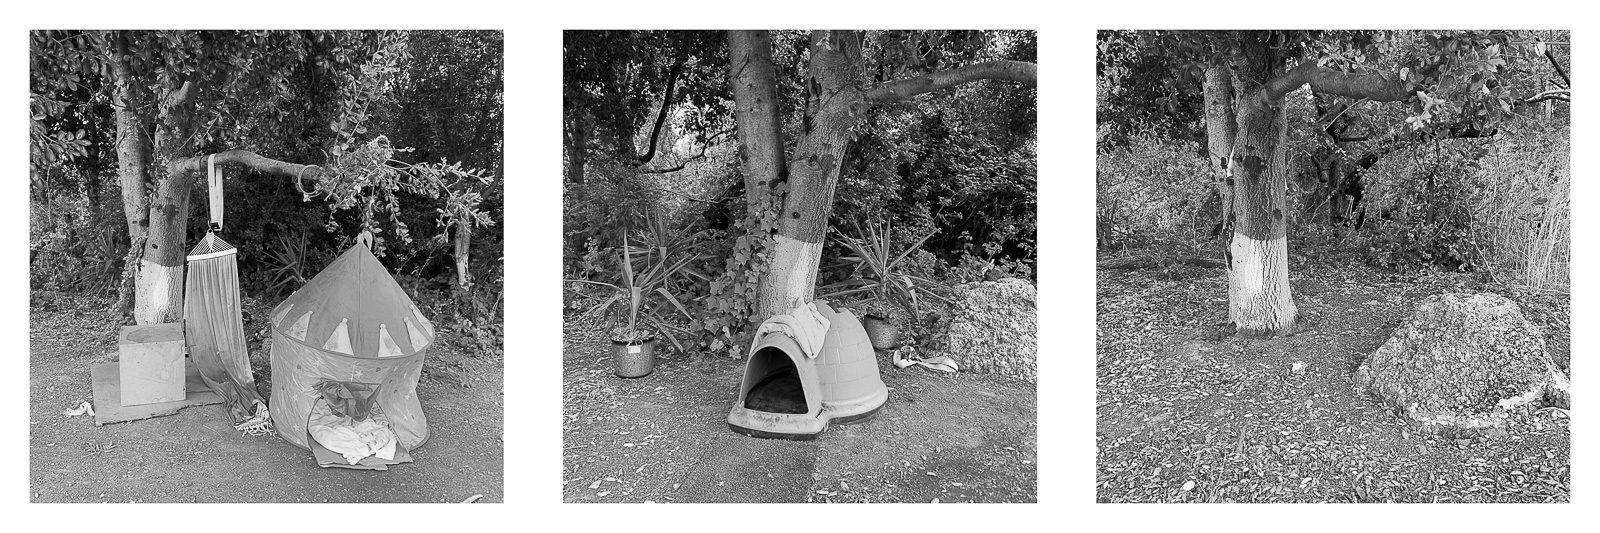
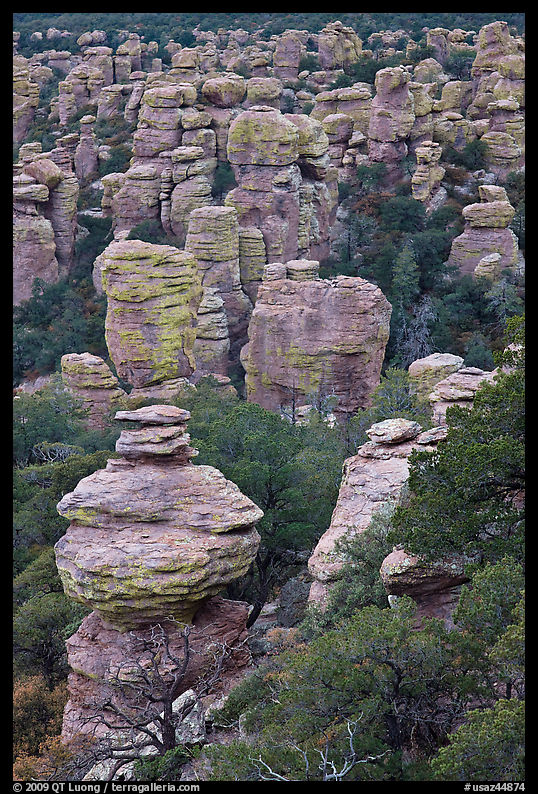
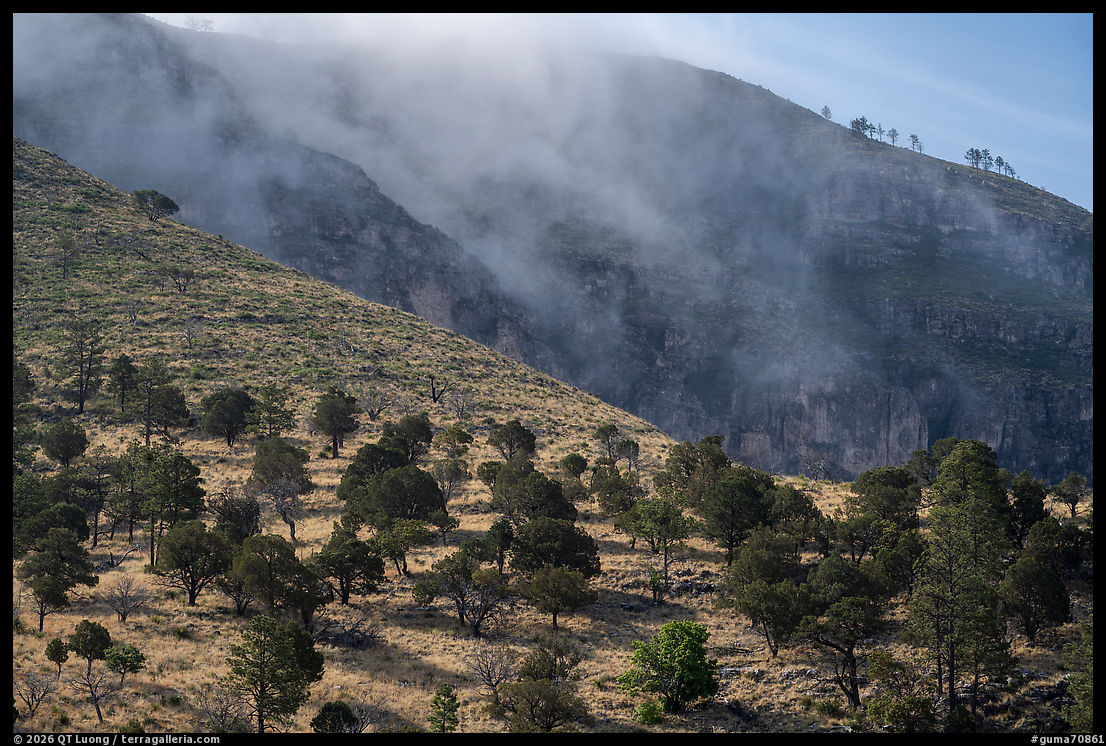
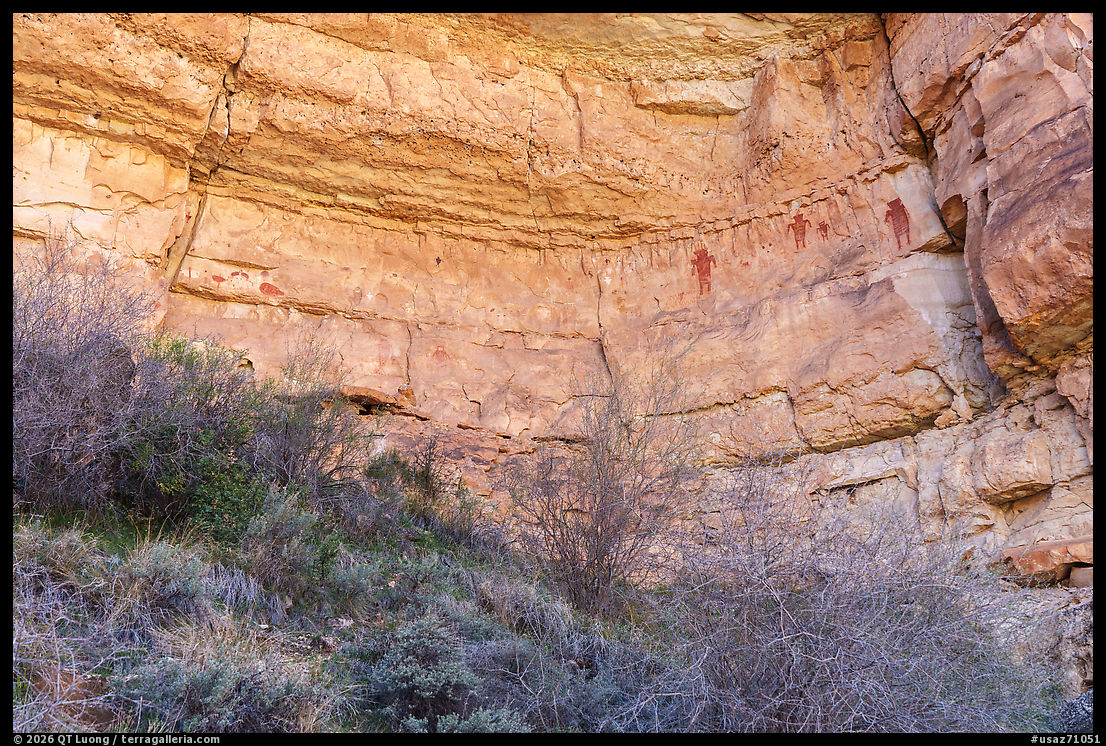
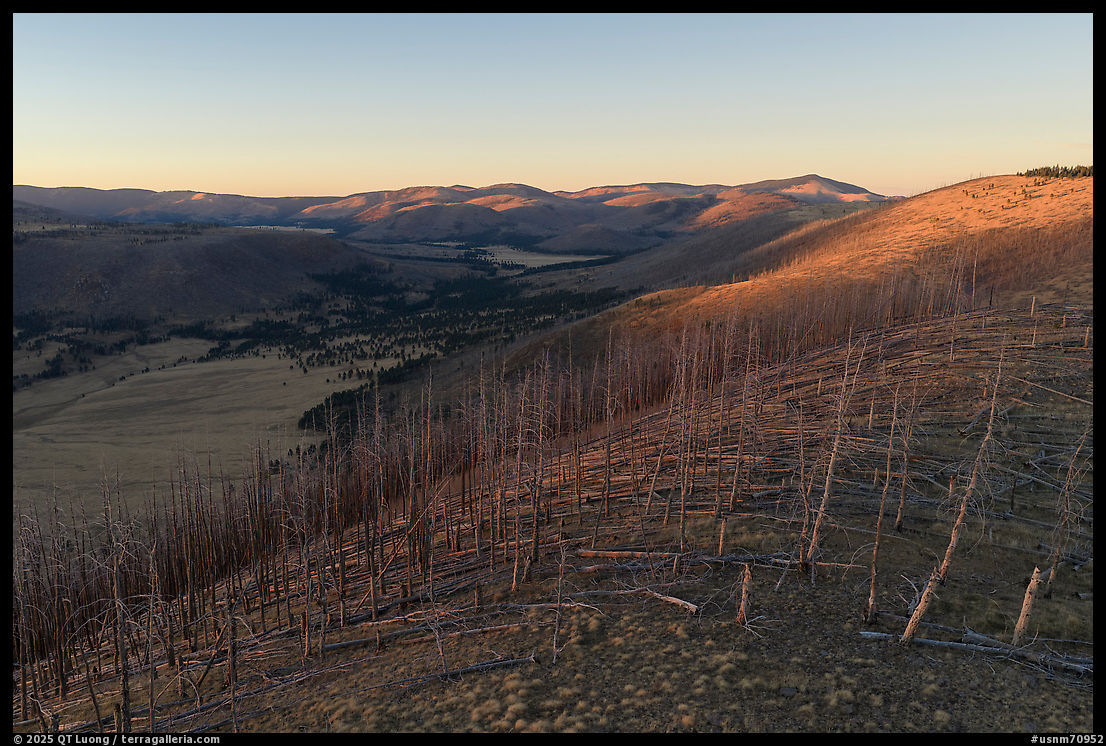
The 2026 proclamation takes a narrow view of what merits protection. It calls the landscapes seen above “generic,” and argues that petroglyphs, pictographs, prehistoric ruins, and other cultural resources are too common across the West to justify protection of such a large area. That is not only a disagreement over where to draw a line. It is a disagreement over what Bears Ears is: not a collection of isolated archaeological sites and scenic features, but a cultural landscape whose meaning lies in the relationships among places, landforms, routes, resources, and generations of human presence. A boundary drawn tightly around selected “objects” may leave some of them technically protected while severing them from the larger landscape that gives them context. The photographs that follow show three such places. They remain inside the monument, but now lie perilously close to its new boundaries. Out of the ten locations in the Bears Ears chapter of Our National Monuments, only one, Mule Canyon, remain solidly inside the new boundaries.

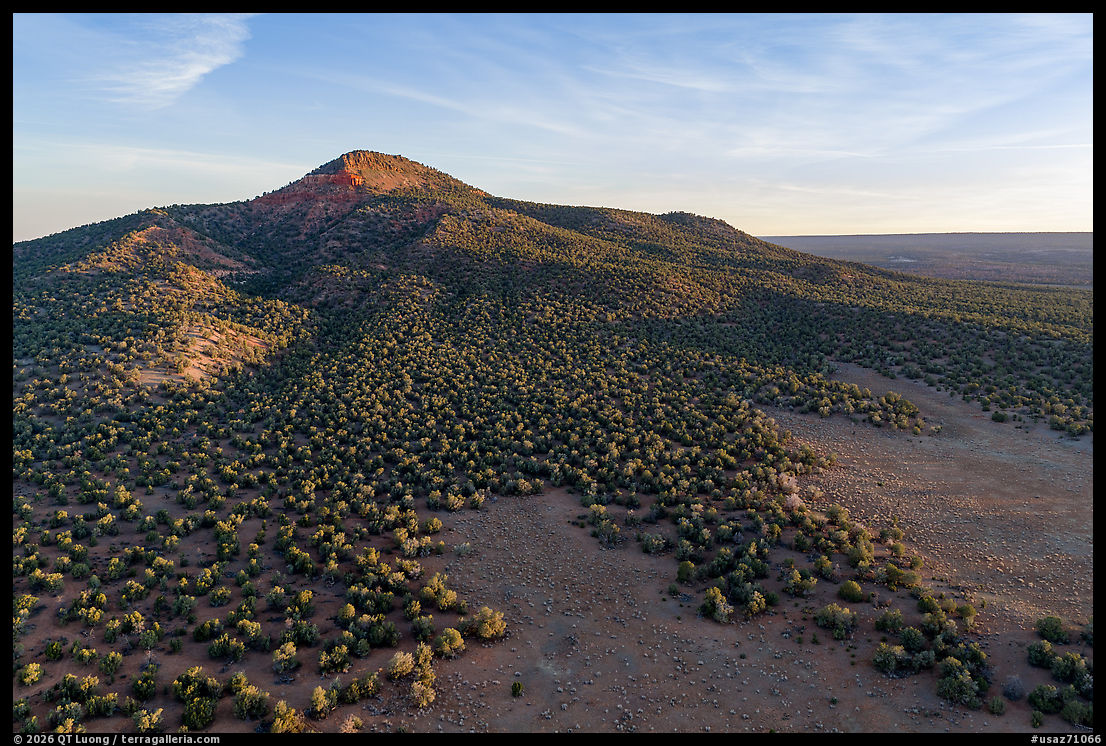
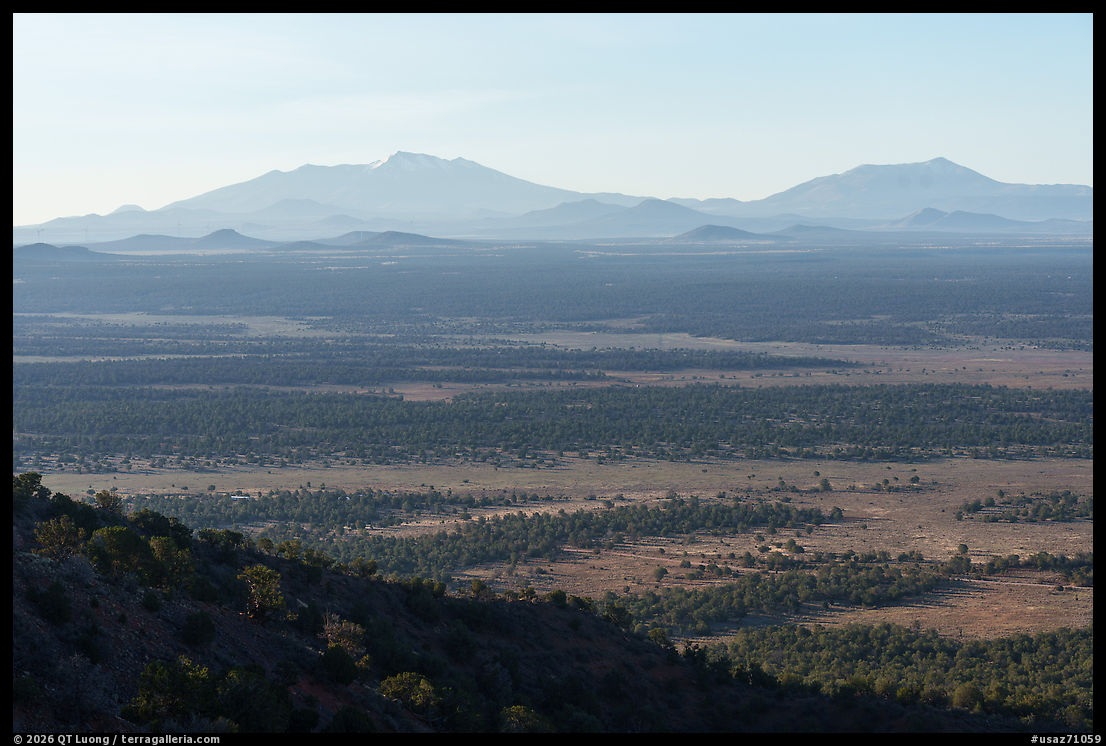
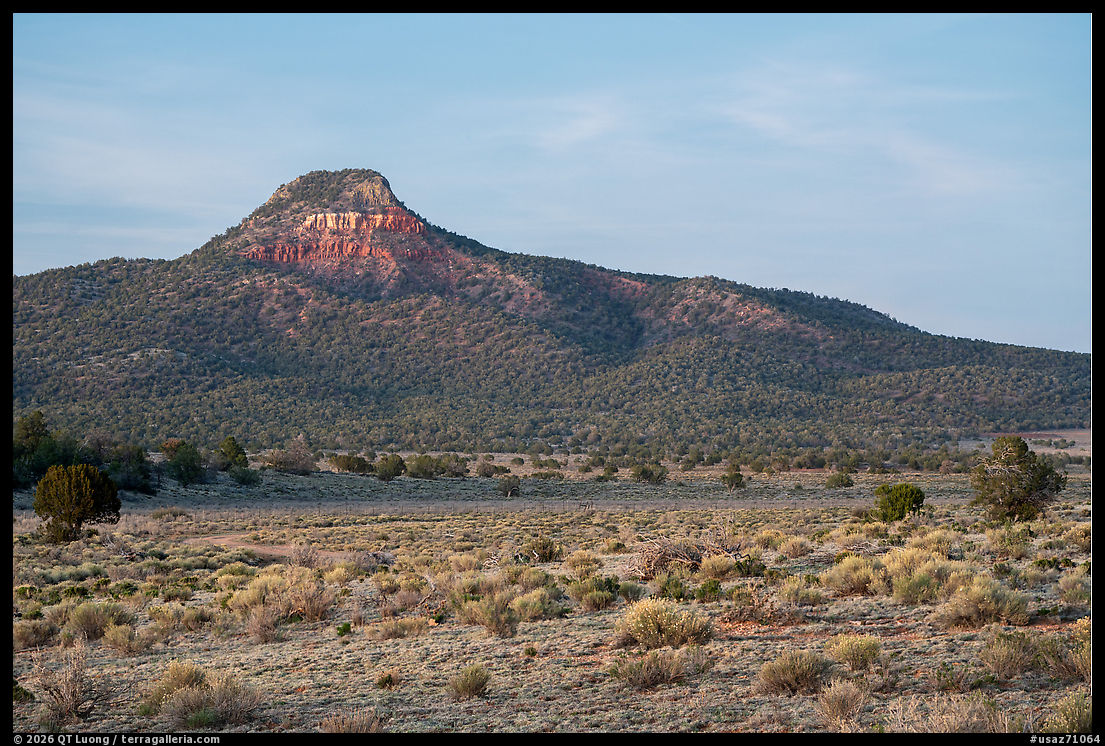
1. Aerial view, West Bears Ears Butte
Elk Ridge rises nearly 9,000 feet between the Abajo Mountains and Cedar Mesa. The twin Bears Ears buttes, visible across much of the region, are sacred to area Tribes and traditionally used for gathering medicinal plants; I chose to photograph them from the air rather than stepping on them.

2. Newspaper Rock
Indian Creek cuts through towering Wingate sandstone walls. At Newspaper Rock—Tse’ Hane, “rock that tells a story,” in Navajo—more than 650 human figures, animals, and symbols were pecked into the dark desert varnish by people from several cultures over centuries.

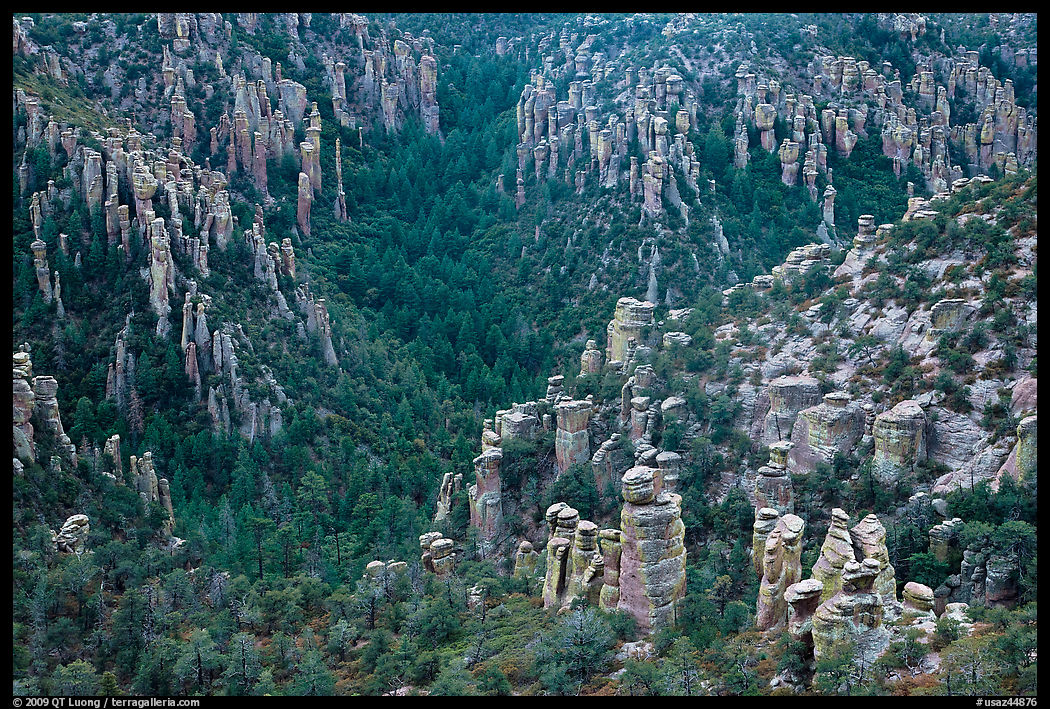
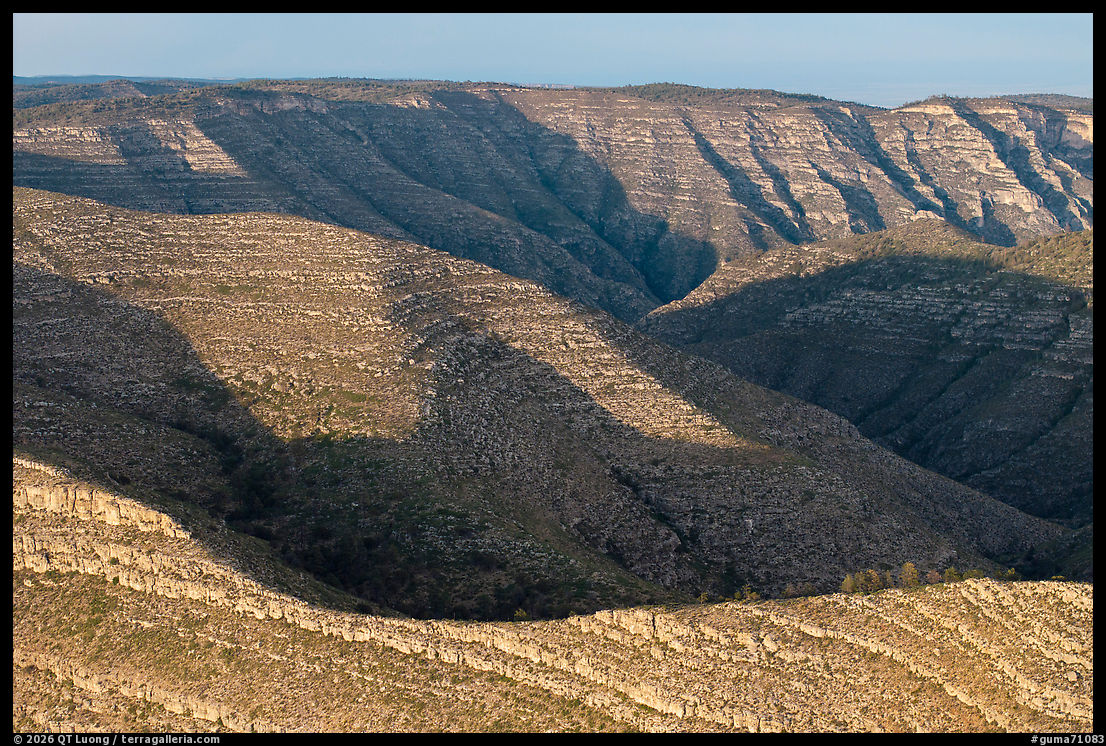
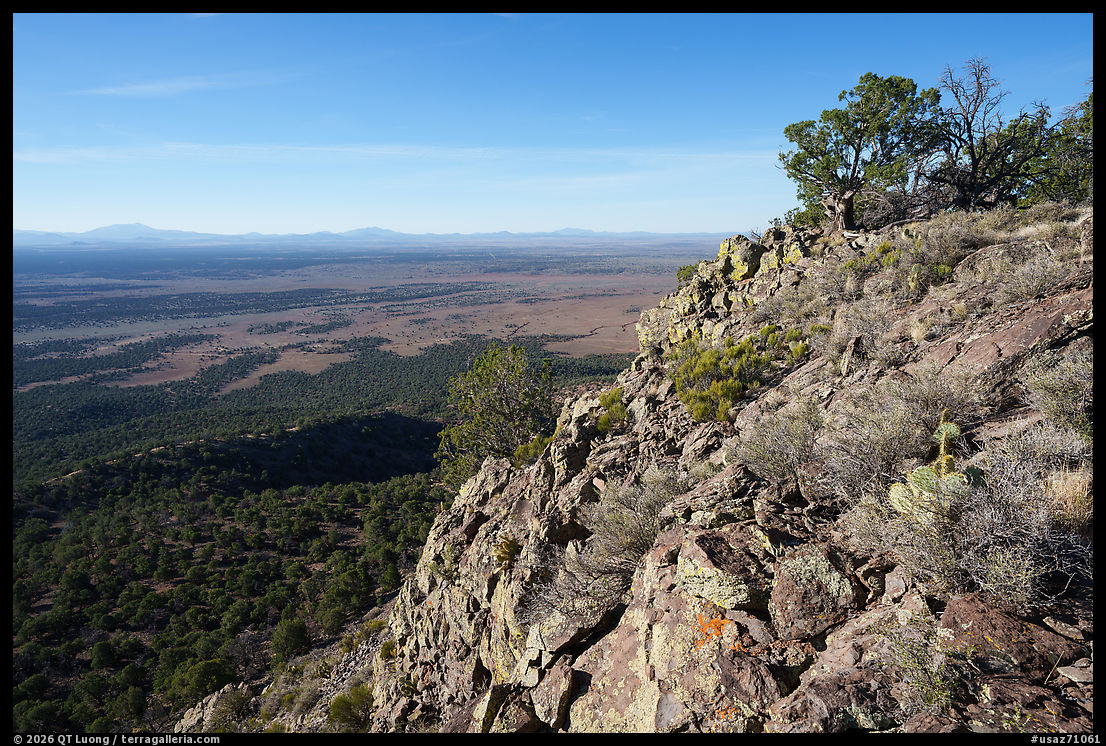
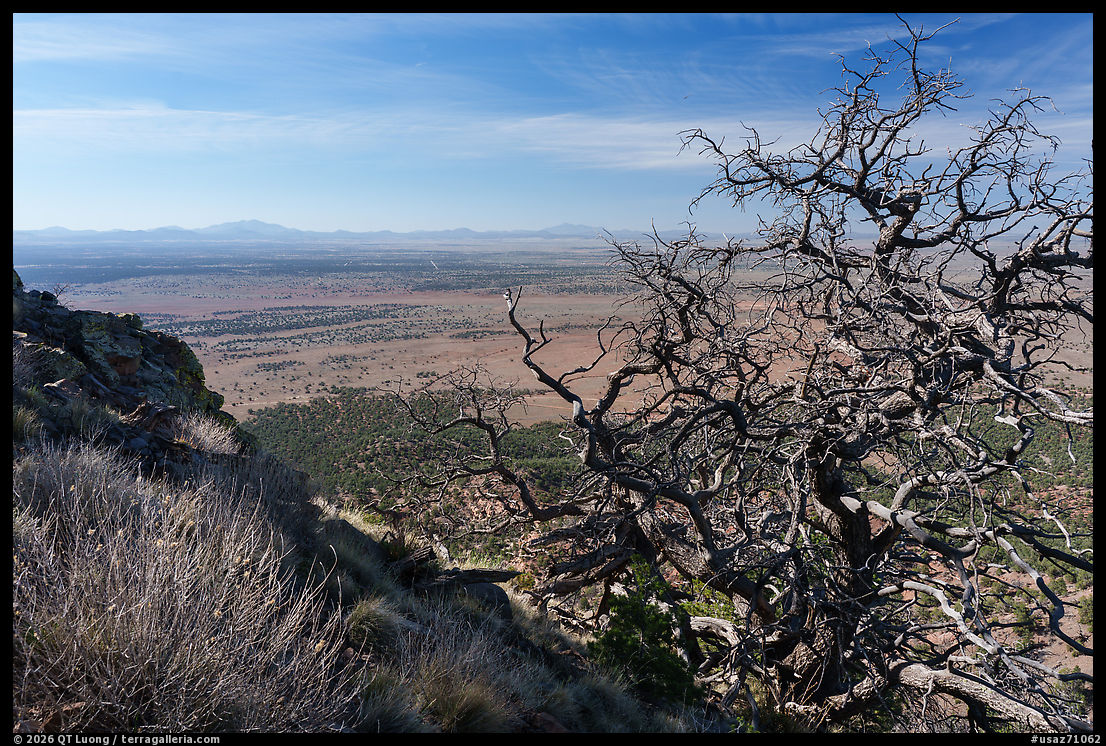
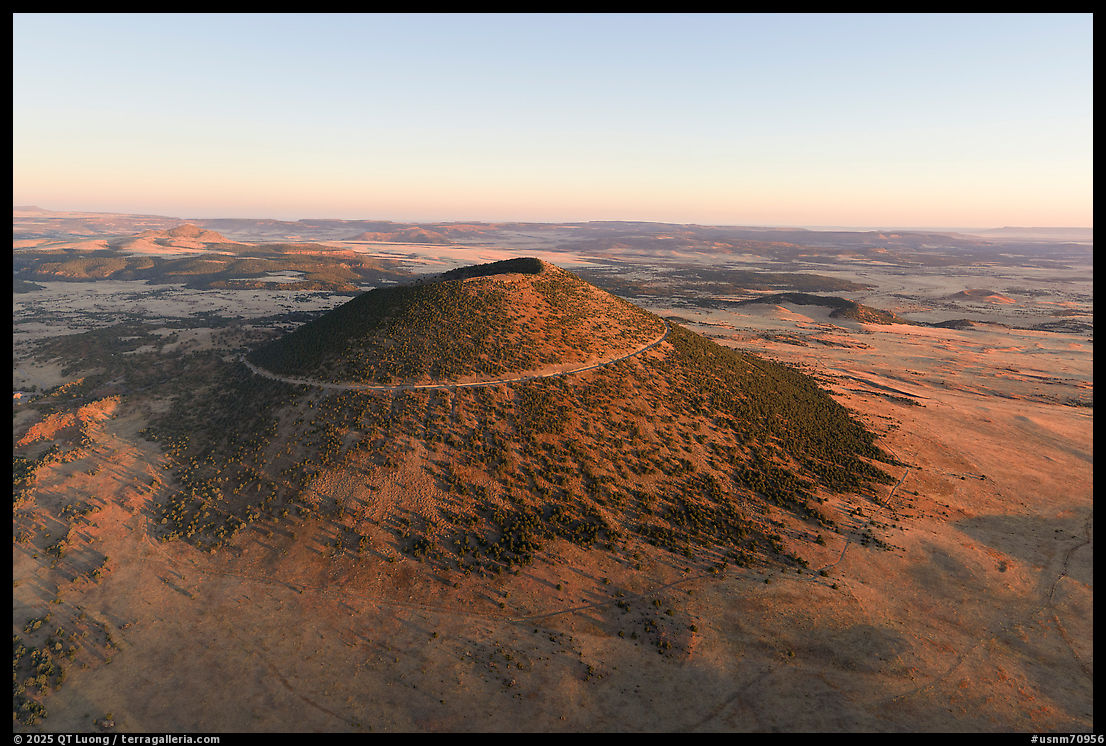
4. Aerial view of Comb Ridge and Comb Wash, late afternoon
The 80-mile Comb Ridge forms the eastern edge of Cedar Mesa. This immense tilted monocline is cut by numerous box canyons and alcoves where Ancestral Puebloans found shelter. While the ridge remains within the 2026 boundaries, parts of Comb Wash have been newly excluded.
Nine years of warning
There is another reason this second reduction is harder to accept. In 2017, the scale of the attack was unprecedented. Afterward, nobody could say the vulnerability was unknown. The restoration in 2021 was a victory, but not a durable one.
On July 12, one day before the proclamation, Diné scholar Len Necefer published “Bears Ears Is About to Be Cut Again. The Environmental Establishment Had Nine Years.” His argument is uncomfortable but important: the national environmental movement had ample warning, substantial resources, legal expertise, national attention, and broad public support, while Native-led capacity remained comparatively underfunded.
Public support was not an obstacle. A December 2024 survey of Utah voters found 71 percent support for preserving Bears Ears as a national monument, 89 percent saying Tribes should have a strong role in managing ancestral lands, and 80 percent saying the incoming administration should uphold the existing Tribal agreement. Money was not an obstacle. During those nine years, the five main national environmental organizations (four of which I have supported directly) who participated in the fight reported $91 million in senior compensation.
The national environmental organizations did conduct work in litigation, advocacy, and organizing. Still, results matter. If the objective after 2017 was to restore Bears Ears when political power changed, we succeeded in 2021. If the objective was durable protection, we failed. In the days after the new reductions, the emails I received were overwhelmingly denunciations accompanied by requests for donations. Fundraising is necessary, but after nine years of warning, another emergency appeal cannot substitute for asking why the protection was still so fragile. Necefer asks us to examine not only how much money conservation has, but where it goes and what kind of power it builds. Utah Diné Bikéyah operates on a shoestring budget. Bears Ears originated with Native organizers. Now the Bears Ears Commission itself has been abolished.
The Antiquities Act under threat
The danger extends beyond Bears Ears. The Antiquities Act itself is under attack. For 120 years, presidents of both parties have used the 1906 law to protect places of historic or scientific importance. Half of national parks first received federal protection as national monuments.
Project 2025 did not merely call for another review of national monuments. It provided a roadmap which is unfolding. Its Interior chapter described the 2017 reductions as insufficient, urged a future administration to defend further reductions so the Supreme Court could rule on presidential authority to shrink monuments, and called for repeal of the Antiquities Act.
In 2021, when the Court declined to hear a challenge to a marine national monument, Chief Justice John Roberts wrote separately to question whether the Act’s requirement that reservations encompass the “smallest area compatible” with protecting their objects still imposed a meaningful limit. No other justice joined his statement, but he suggested that a better case could present the issue. Then, on June 23, 2026, less than three weeks before the new reductions, the Tenth Circuit revived Utah’s challenge to President Biden’s Bears Ears and Grand Staircase–Escalante proclamations. It held that courts may review claims that a president exceeded statutory limits under the Antiquities Act and sent the case back for further proceedings.
Downloads from Our National Monuments
I created Our National Monuments in response to the 2017 review of national monuments. The Bears Ears chapter brought Utah Diné Bikéyah’s essay together with my photographs, map, and notes. With Bears Ears diminished again, I am making that chapter freely available, along with the expanded mobile field guide, in the hope that they will help readers better appreciate this extraordinary landscape, and, ideally, experience it for themselves with care and respect.
Original Bears Ears book chapter (PDF, 4.7MB)
Preserves the Utah Diné Bikéyah essay, photography, sequencing, map, and design of the book.
Bears Ears mobile field guide (PDF, 18.8MB)
Expanded maps, directions, coordinates, and location notes for visitors and photographers.
My companion post, Grand Staircase–Escalante, Dismantled, shows what the same July 13 action removed from that monument. Bears Ears raises an additional question. The first dismantling in 2017 was a warning. Nine years later, Bears Ears is smaller still, its Tribal commission has been abolished, and the law that made its protection possible faces a broader challenge. The question is no longer only how Bears Ears can be restored again, but rather what must change before the next restoration so that it can last.