Photo Spot 28: North Cascades National Park – Cascade Pass
Despite preserving some of America’s most beautiful mountain landscapes, only three hours from Seattle, North Cascades National Park remains one of the two least visited parks in the lower 48 states. It receives less than 20,000 visitors per year, the same amount as Yosemite receives in two days.
The greater unit, referred to as North Cascades National Park Service Complex, includes the North Cascades National Park North Unit and North Cascades National Park South Unit, separated by the Ross Lake National Recreation Area, and flanked in the South by Lake Chelan National Recreation Area. Facilities can be found only the the two National Recreation areas. The North Cascades Highway (Washington State Route 20) runs in Ross Lake National Recreation Area. For that reason, most of the visitors to North Cascades actually stay in Ross Lake National Recreation Area. Visitation statistics for North Cascades National Park and Ross Lake National Recreation Area are separate. North Cascades National Park, as a rugged mountain kingdom, a wilderness playground for backpackers and mountaineers, needs to be explored on foot by climbing over steep passes.
There are only two roads that reach North Cascades National Park. One of the them starts from Stehekin, in Lake Chelan National Recreation Area, a community so remote that it can be reached only by boat or floatplane.
The other, which is the subject of this post, is the Cascade River Road, which branches of highway 20 in of the town of Marblemount. Where highway 20 makes a sharp turn, cross the bridge instead, and you will be following the Cascade River Road. The first third of the road is paved. Beyond that, a well graded section, passable by any car, leads past two campgrounds to the Cascade Pass Trailhead, 23 miles from Marblemount, of which only the 5 last miles are in the park. The road typically opens by the end of June, except in heavy snow years when it may not open until early July. It closes after the first winter snows in October. This is a very short season. High in the mountains, fall colors succeed summer wildflowers within a few weeks.
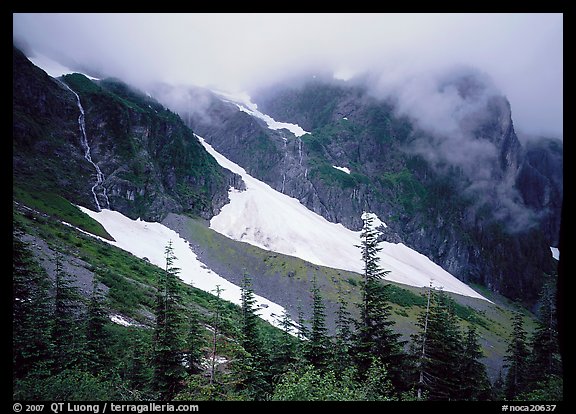
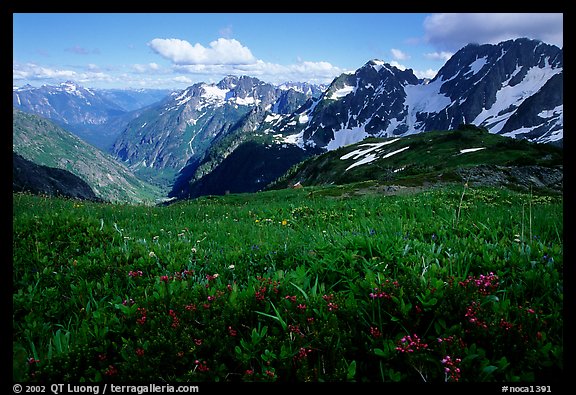
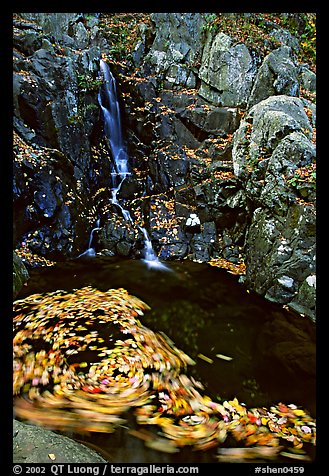
From the trailhead parking lot, look for tall waterfalls (after which the park is named) descending like ribbons from ridges below jagged peaks. The Cascade Pass trail provides the shortest and easiest access in the park to the alpine environment. The distance from the trail head to Cascade Pass is 3.7 miles, with a elevation gain of 1700 feet. But once you’ve finished the steady climb to the pass, why stop here ? You can continue on the Sahale Arm Trail for 2.3 more miles, and an additional elevation gain of only 500 feet. Alpine meadows, and spectacular views of peaks and glaciers surround you. Deer and marmots can easily be spotted.
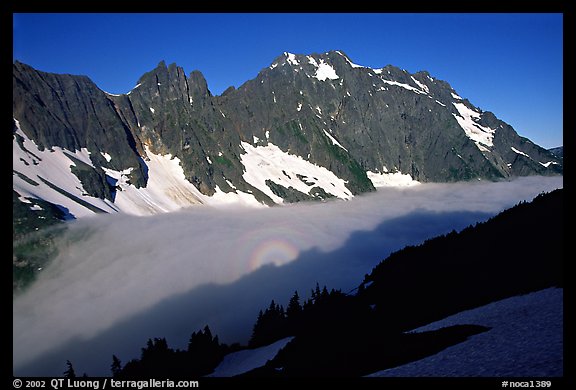
While the trail could be done as a day hike, you may find it preferable to camp in the backcountry. Because of its relative ease of access, the Cascade Pass trail is one of the most popular backcountry destinations in the park, therefore permits can be difficult to obtain during busy periods. Such permits are required, and can be picked up at the North Cascades National Park Wilderness Information Center in Marblemount. When hiked towards Cascade Pass in raingear, in early July, we met a ranger on the trail, and she checked our permits. On the first day, clouds enveloped us, a thick fog reducing visibility to a few dozen yards. However, the next day, we found ourselves above that layer of clouds, treated to the view of the peaks that we missed the first day.