Revised Sept 2020.
With their tremendous diversity of environments and pristine scenery,
the National Parks are a great place – although not always the best – to see and photograph fall
foliage color. Here is a guide to fall color highlights in nearly each of the
National Parks, which lists the best time to be there to catch the
color at its peak. For some parks, I have written a more detailed post which is linked. For inspiration, check the links under the names of the national parks, they point to a gallery of photos, part of
images
of National Parks Fall color foliage.
Eastern Hardwoods
When one thinks about fall colors, the Eastern parks are the first
that come to mind. Rightfully so: the variety of deciduous trees there
produce extensive displays of color unmatched in their variety. In
particular red maples add a bright accent which is not generally found
in western forests. It sometimes feels that every tree in the landscape
has turned a different color. The colors start in the Mid-West parks
in late September and move progressively South, where they peak in
November, with elevation changes causing variations of as much as two
weeks.
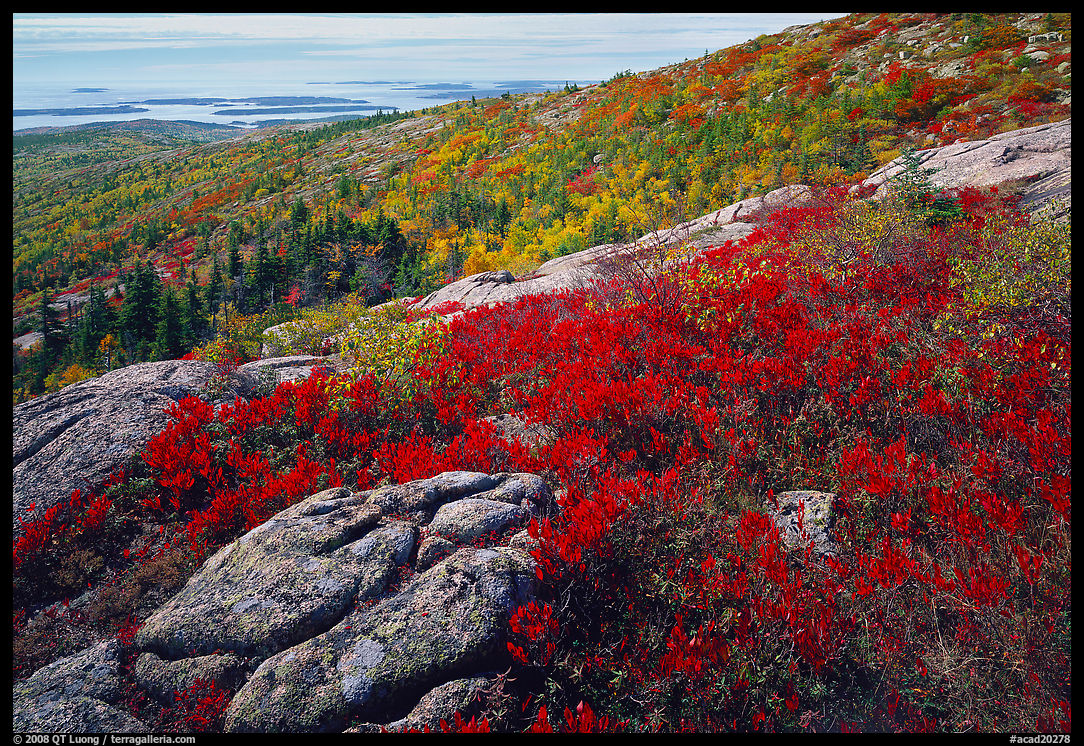
Acadia: This compact park packs a lot of variety. You’ll find in a few other national parks the mix of northern forest evergreens and temperate forest hardwoods, here they grow on steep slopes reflected in ponds and lakes.
At higher elevations, patches of berry plants similar to those found on the Alaskan tundra color red the bare top of Cadillac Mountain. Colors start in late September, peaking by the
second week of October, a bit later than latitude would suggest because of the overall lower elevation and coastal location.
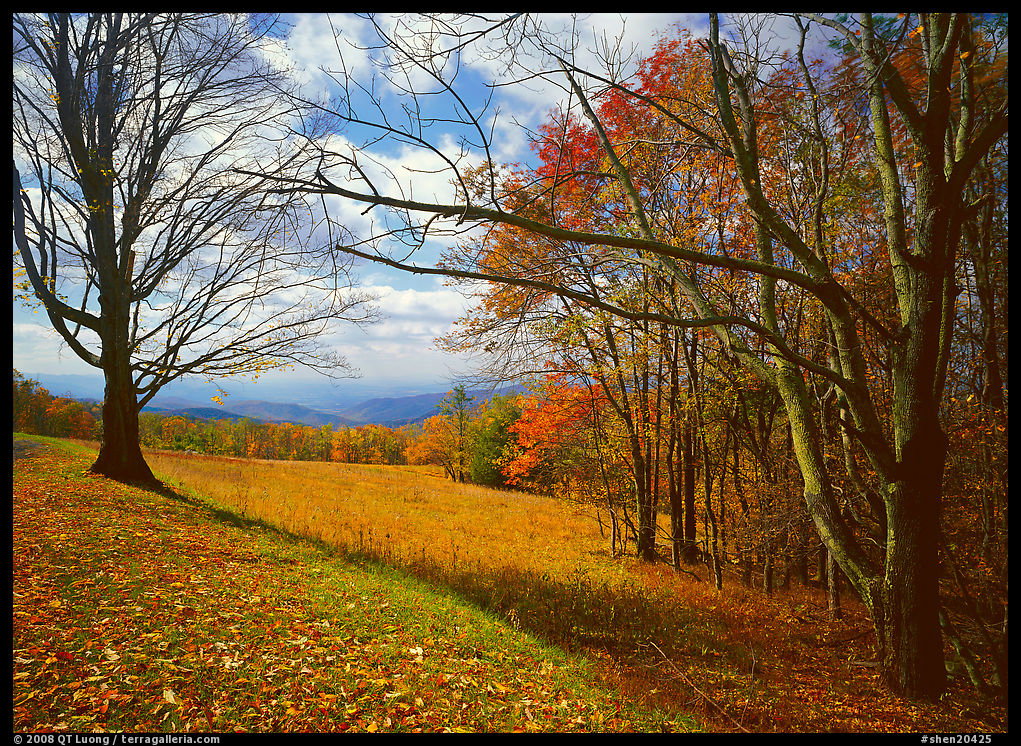
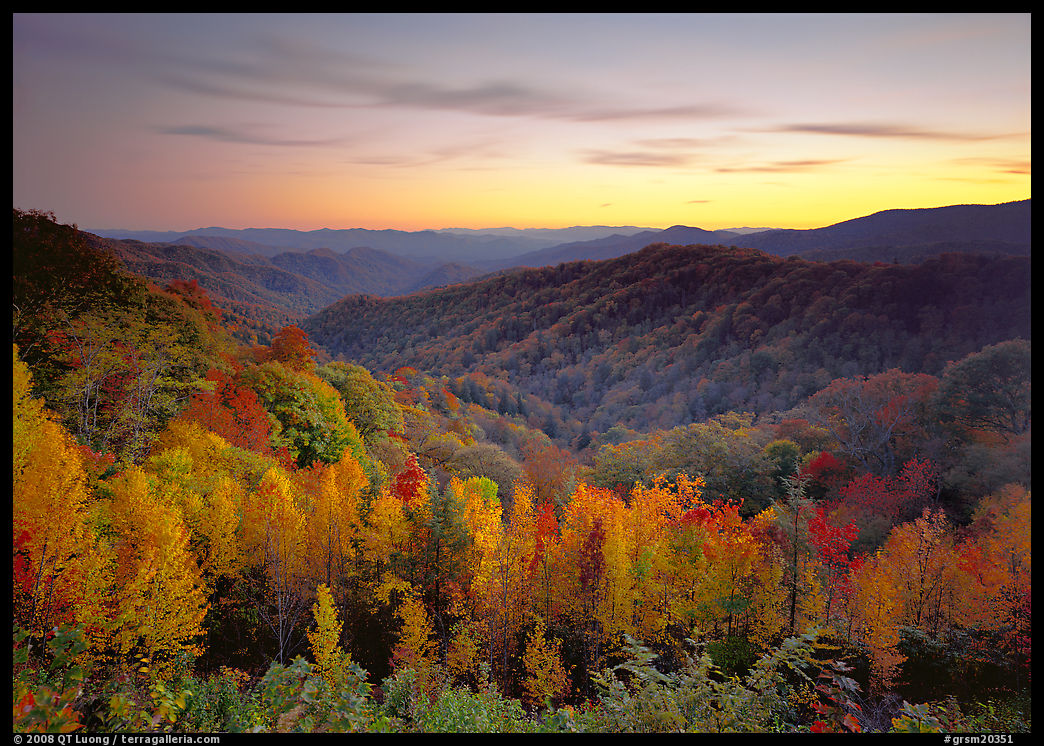
Shenandoah,
Great Smoky Mountains:
The Southern Appalachian mountains are home to some of the most varied deciduous forests on the planet, resulting in some of the best
foliage displays anywhere. Moreover, the Blue Ridge Mountains offer great ridge-top scenic drives,
from the 105 mile-long Skyline Drive in Shenandoah to the Newfound
Gap Road in Great Smoky Mountains, with the 469 mile Blue Ridge
Parkway in between. The combination of the highest mountains in the Eastern US with spectacular foliage is difficult to beat. From the numerous overlooks, it is easy to
capture vast vistas of kaleidoscopic hillsides and ridges. With the proximity of
the Eastern urban centers, those drives are very popular during the foliage season, so it is best to visit during weekdays. Colors are at their best on the two last weeks of October but will be present (depending on elevation) from late September to mid-November.
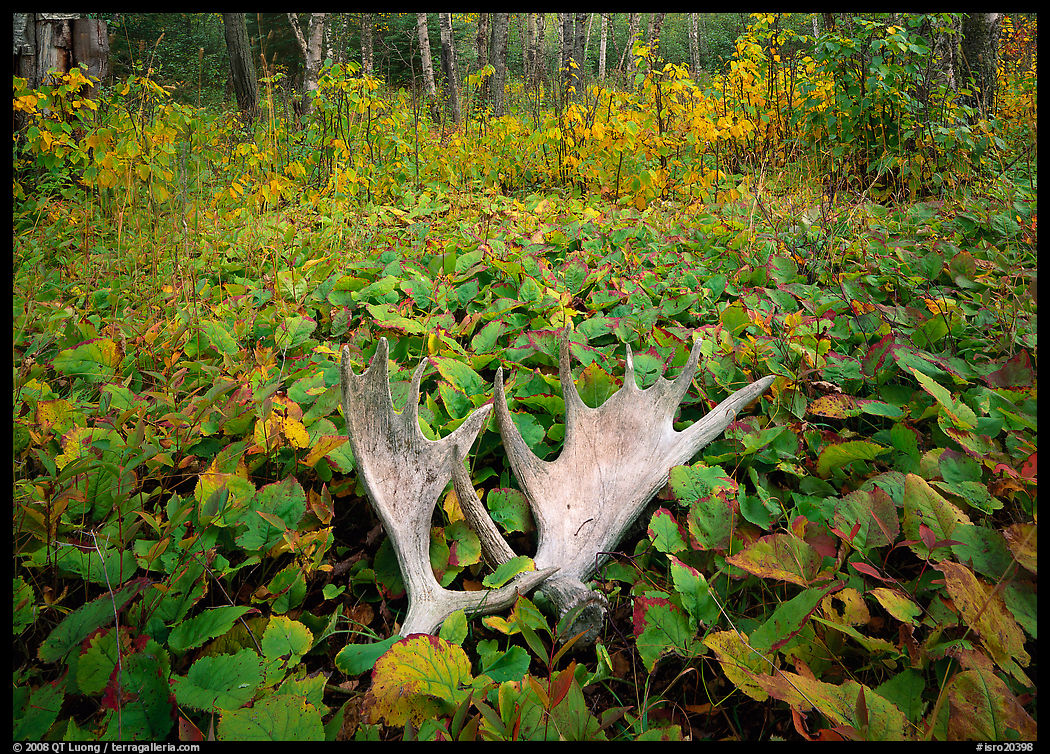
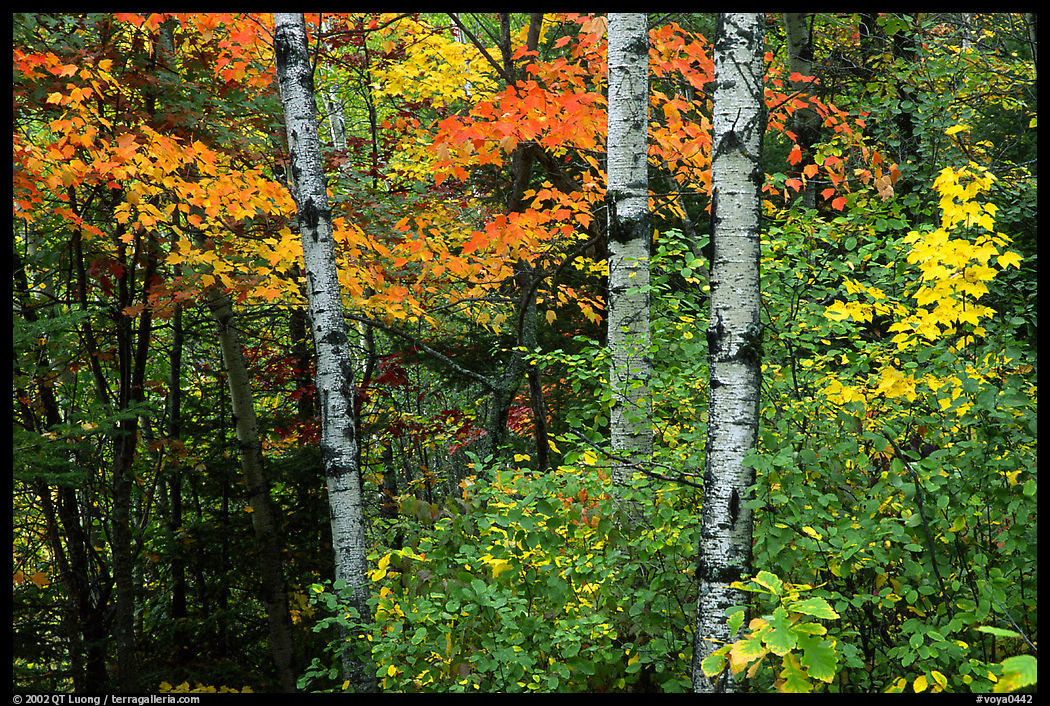
Isle
Royale,
Voyageurs: Those more northern locations offer a foliage
peak in late September, with deciduous trees mixed with
northern evergreens. Both parks see very light visitation.
The Western end of Isle Royale, near Windigo, has more maples and other deciduous trees
than the rest of the island, but like in Voyageurs, there are not too
many views outside of the forest. The center and middle of Isle
Royale offer to the backpacker extensive views, but they have less
color.
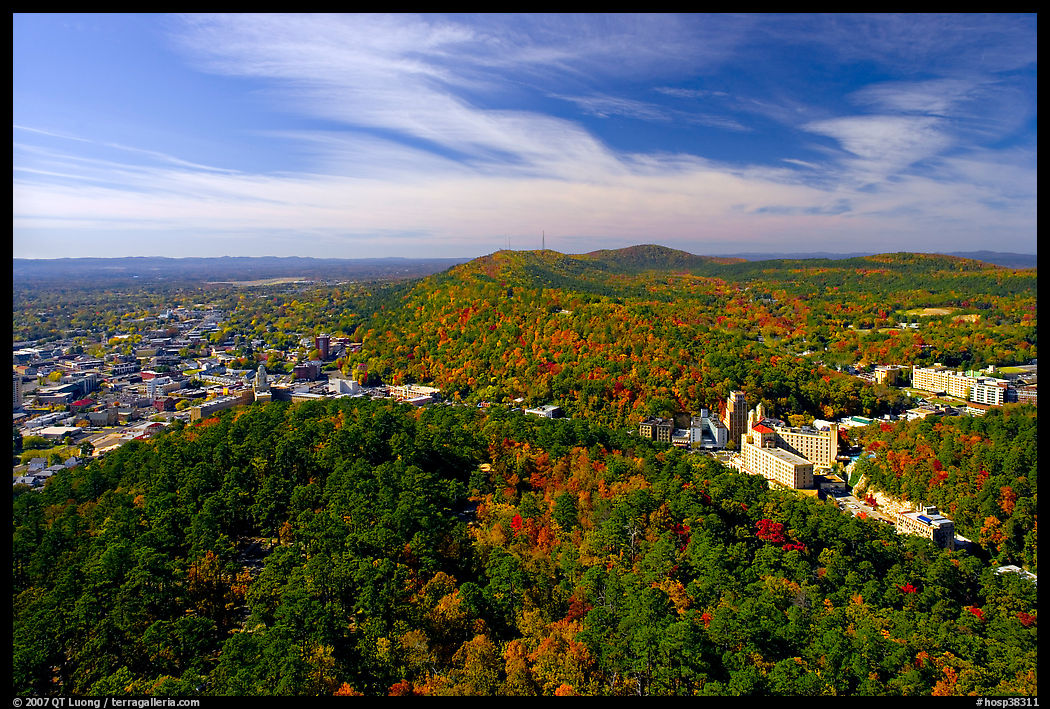
Hot
Springs,
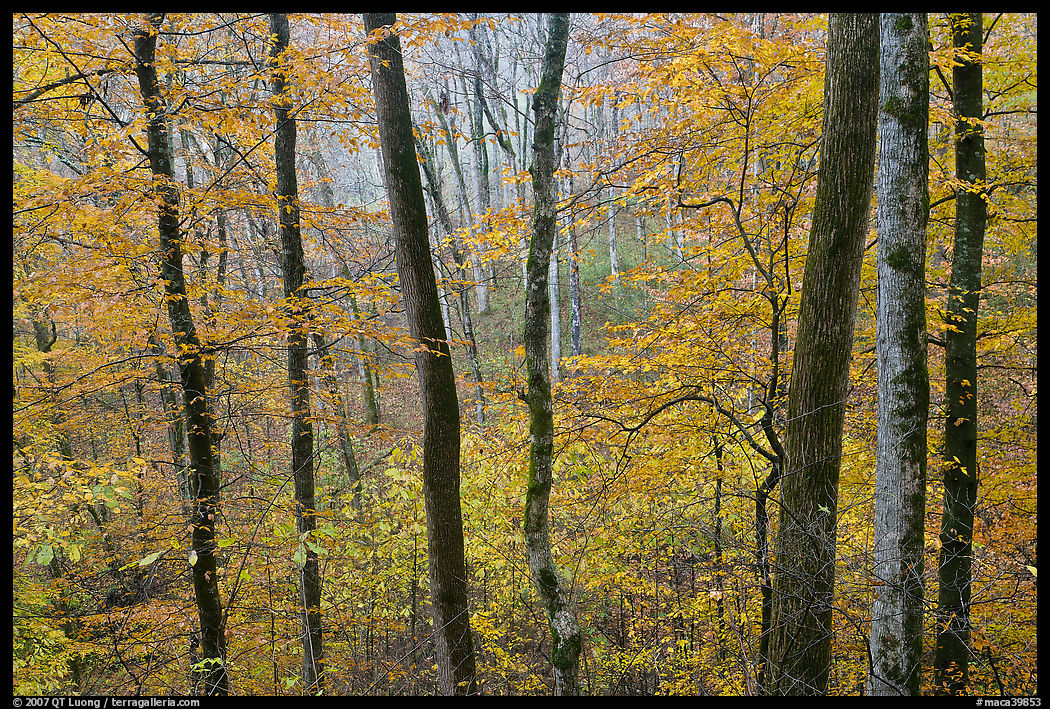
Mammoth Cave:
Those more southern and lower-elevation locations offer a foliage peak that occurs later than in the Appalachian mountains,
at the beginning of November, lasting through the middle of the month. Despite being known for other sights (bathhouses and cave),
there is also a nice woodland landscape amidst the gentle hilly
scenery. Check the Green River Bluff Trail in Mammoth Cave, and the
Gulpha Gorge in Hot Springs.
Crowds are much thinner
than in the better-known parks.
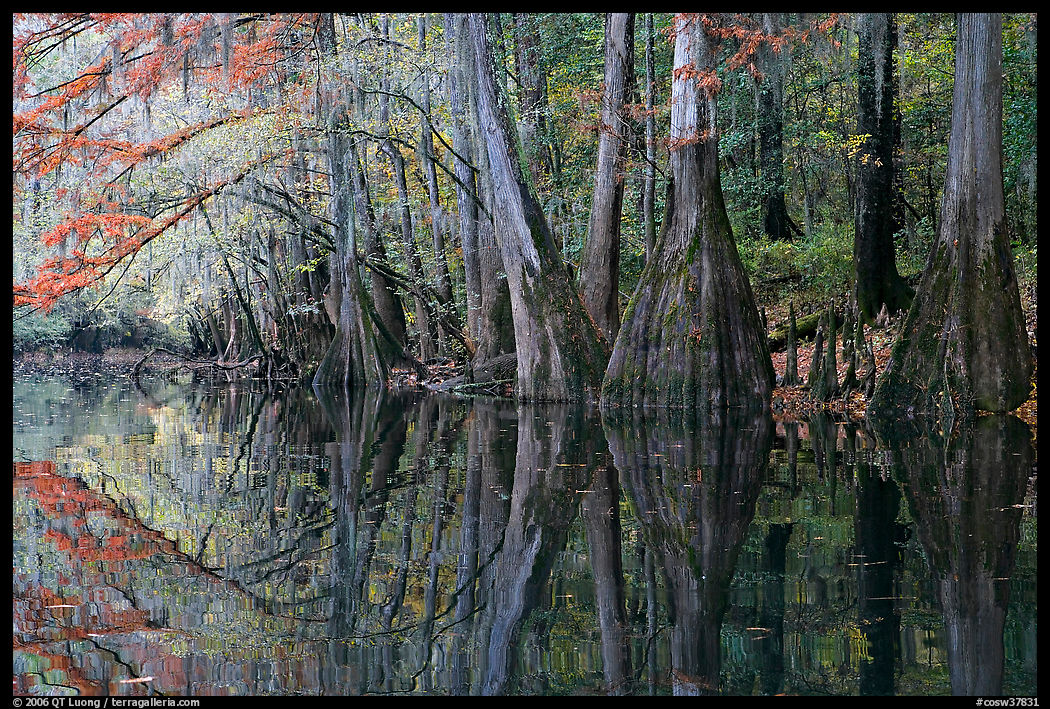
Congaree:
The park offers the opportunity to explore a swamp forest in the fall
through a very long elevated boardwalk. The abundance of water
provides for nice reflections.
Although there is no variation in elevation, the various tree species in the park peak at a different time, so some
color is to be found anytime from late October to November, with the most interesting
foliage color occurring later in the month.
Rockies
Unlike the Eastern mountains, the tops of the Rocky mountains are too
high and rocky to support deciduous forests, which are rather found
in the lower elevation valleys. Those forests do not offer the color variety
of the Eastern Hardwoods. However, the groves of aspen shimmer with an
incredibly bright yellow color at their peak – which is much more brief than in the Eastern forest, as high winds can cause all the leaves to
fall overnight to the ground.
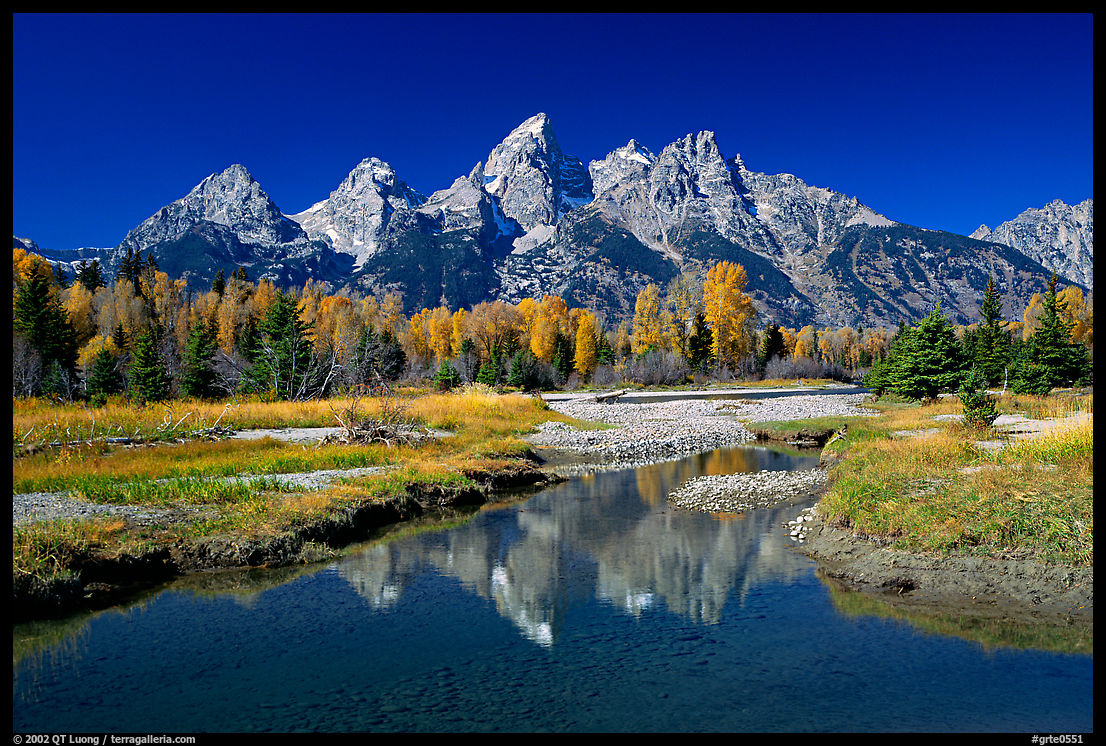
Grand
Tetons Spectacular groves of aspen peak in the last two weeks of
September, centered in the broad and flat Jackson Hole Valley. Particularly scenic locations include Jenny Lake, and Oxbow bend, where the trees are reflected in blue waters, with towering peaks in the background. It is also a great time to observe Elk and Moose amongst the crimson brush and willows.
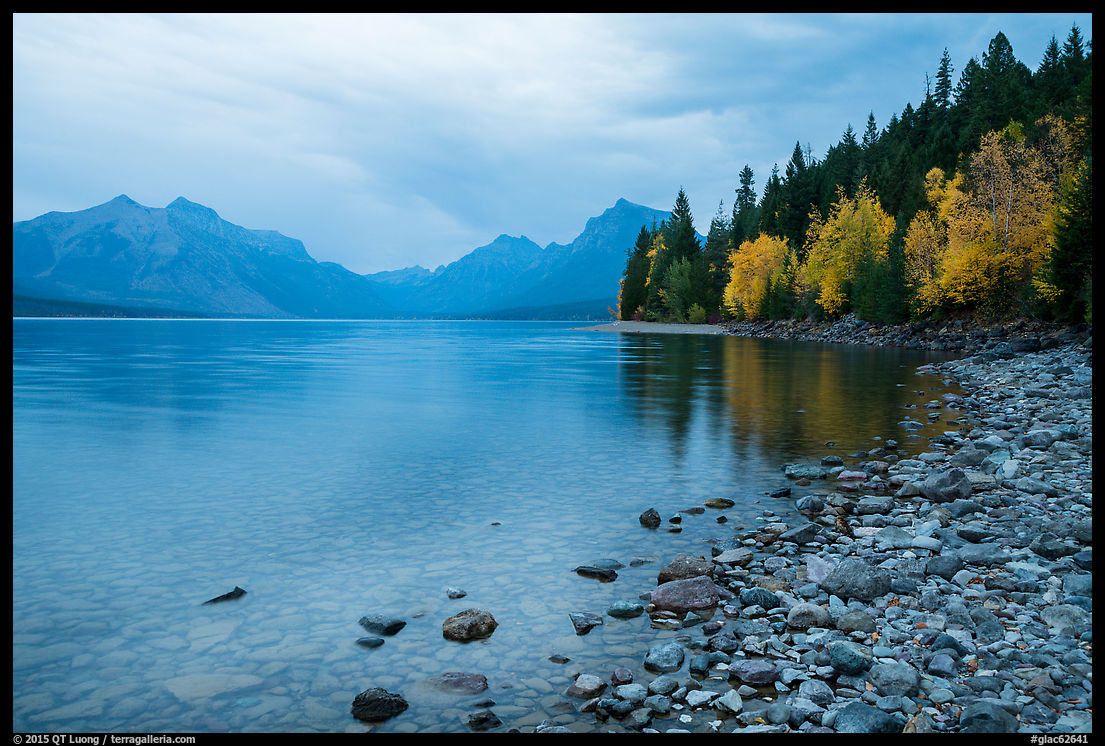
Glacier: Fall foliage is found throughout the park, and there is a larger variety of trees than in other
Rocky Mountain parks, including Rocky Mountain maple and Western
larch. The west side of the park changes color starting in mid-September, with deciduous trees mixed with evergreen, while on the dryer east side, more solid color patches appear towards the end of September. In mid-October, the larch trees growing at higher elevation turn gold. More: Photographing Fall Foliage in Glacier National Park.
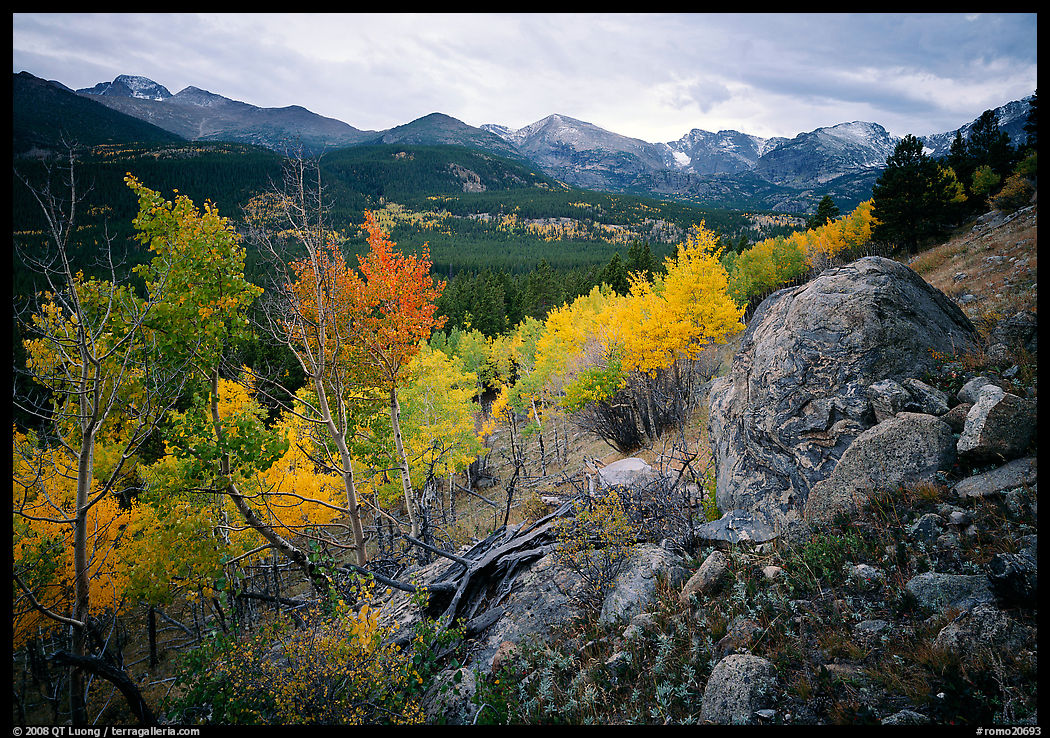
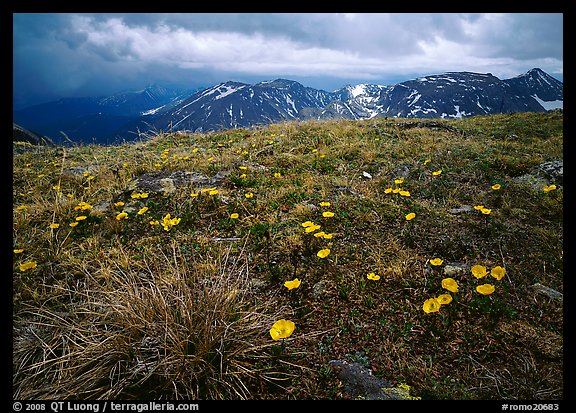
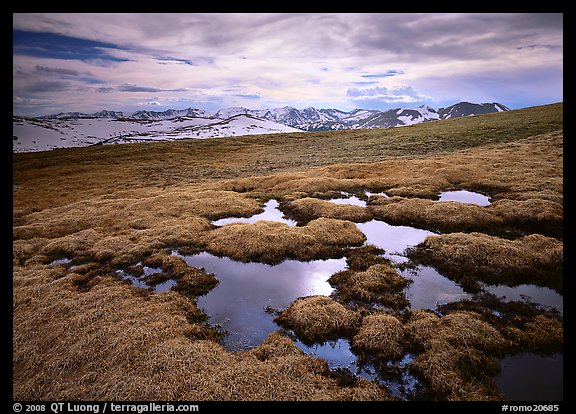
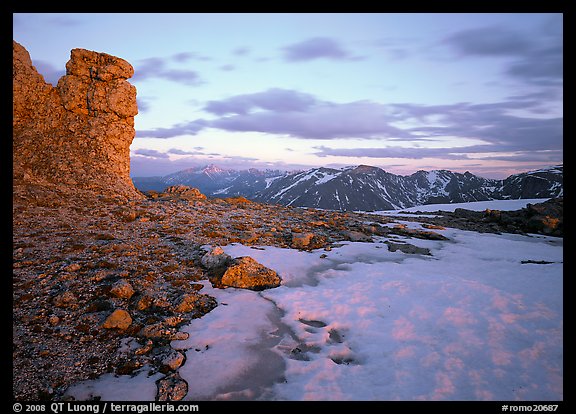
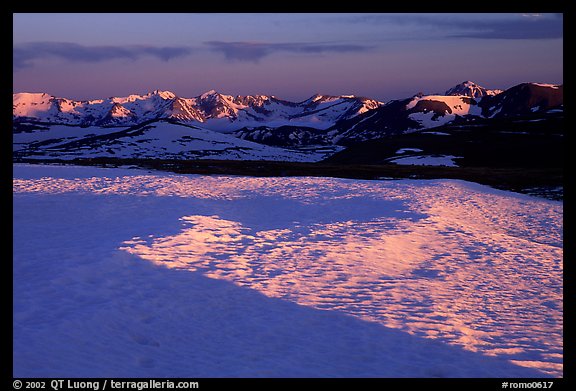
Rocky
Mountain: Groves of aspen, alternating with vast stretches evergreens, color
the flanks of the mountains at lower elevation during the two last
weeks of
September. Places to look for color include Glacier Basin,
the slopes that border the meadows (locally called “parks”), and
opposite the Old Fall River Road. More: An Iconic Lake and Nondescript Aspens: Revisiting the Bear Lake Road.
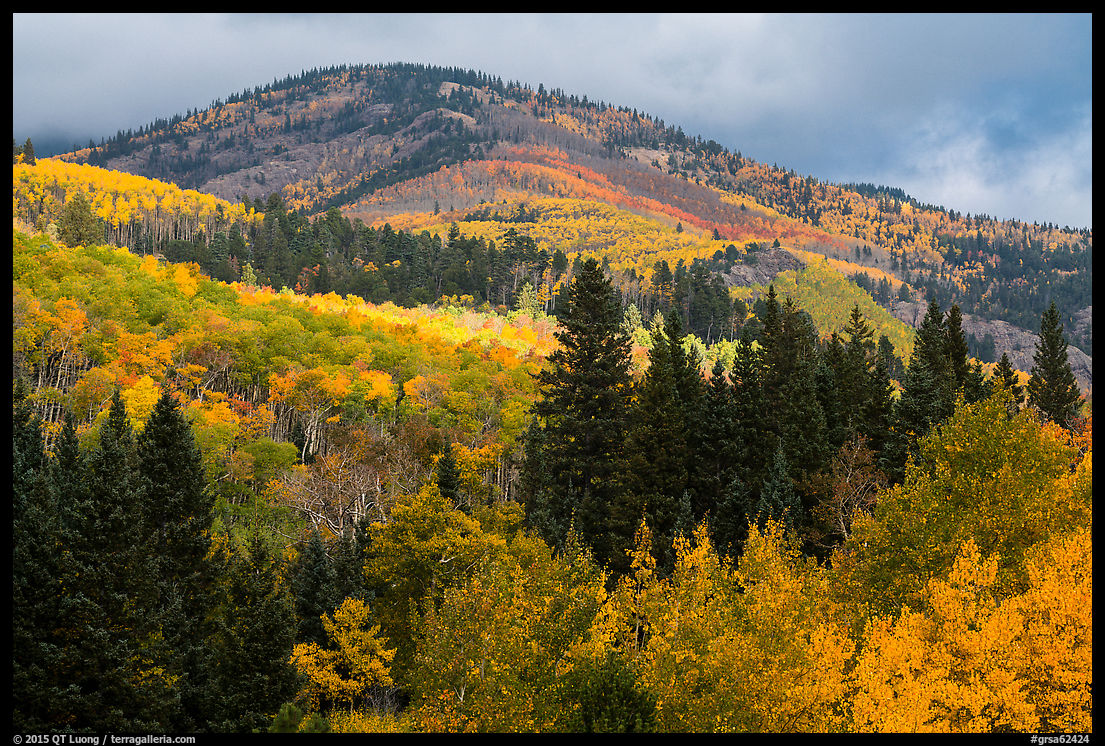
Great Sand Dunes : Cottonwoods grow along the Medano
Creek along the dunes. Aspens are found at higher elevations on the Sangre De
Cristo Mountains in the National Preserve. They are accessible with a high-clearance 4WD vehicle
through the Medano Pass road. Colors peak late September to early October. More: A Most Tricky Scenic Drive: the Medano Pass Road
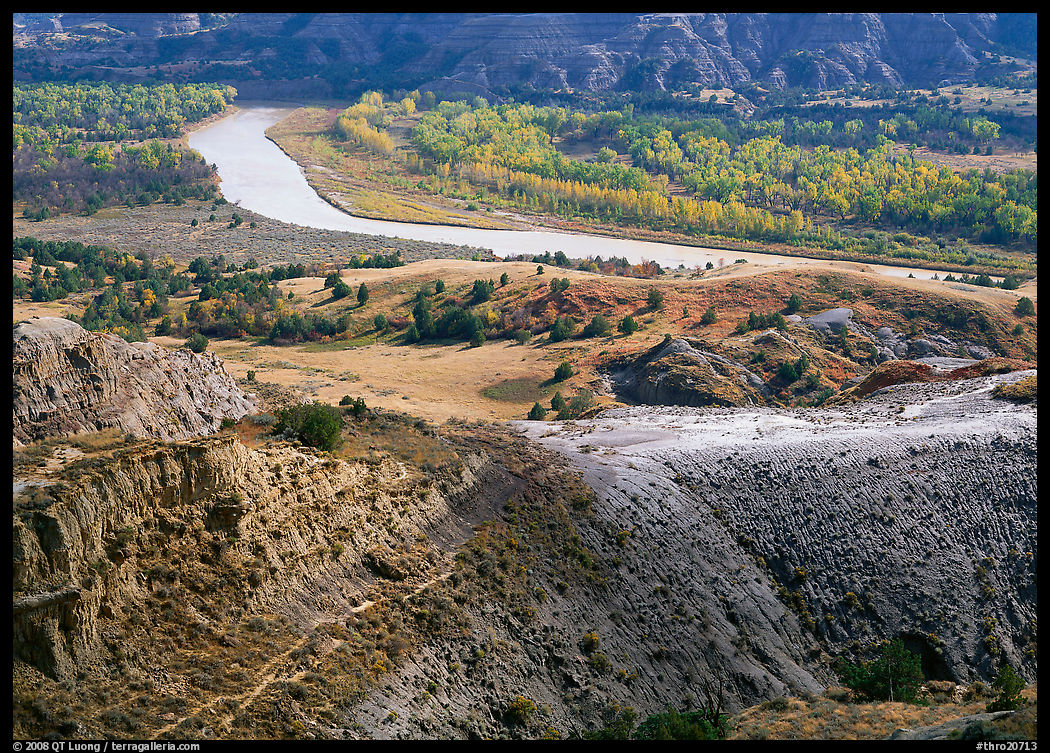
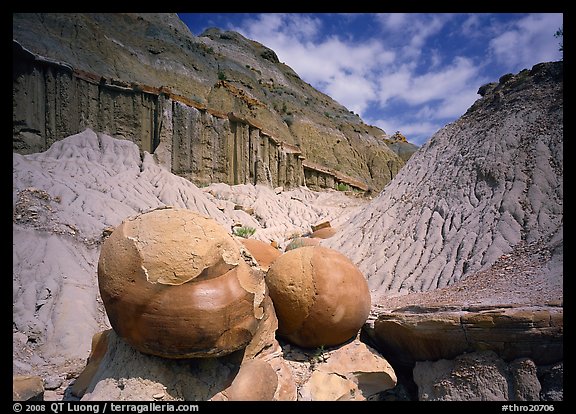
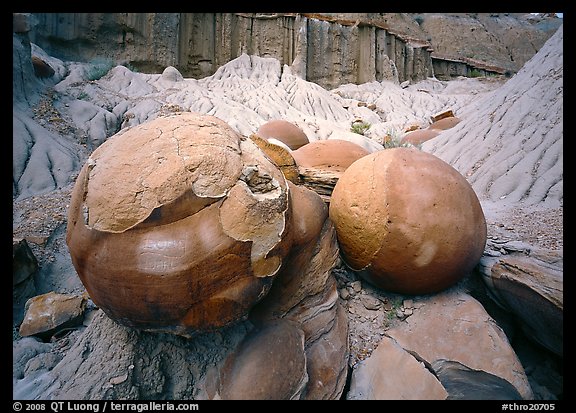
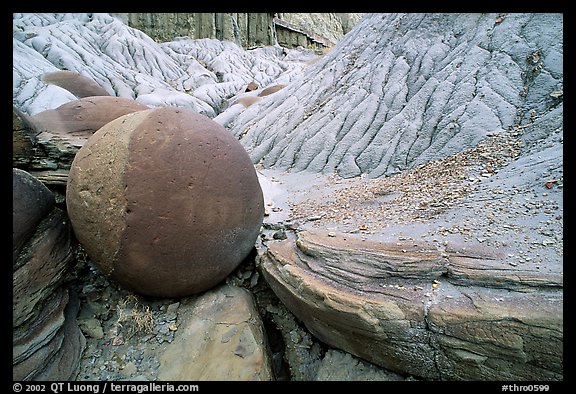
Theodore Roosevelt:
Unlike in the barren South Dakota Badlands, trees grow in the rugged
North Dakota Badlands. In particular, the shores of the Little
Missouri River, in the North Unit, are lined with
aspens that turn yellow by the end
of September.
Southwest
The Southwest is a desert, which at first does not sound like
such a great place to look for trees. Indeed, many of the parks
of this area do not feature any significant color, apart from cottonwood trees in washes, canyon bottoms, or along rivers.
However, some narrow canyons
create micro-climates that sometimes allow a surprising variety of
deciduous trees to thrive. If you add to this the fact that higher elevation plateaus and mountains are often doted with aspens, the icon of the Western fall foliage, some of those parks unexpectedly harbor the most diverse foliage color in the West.
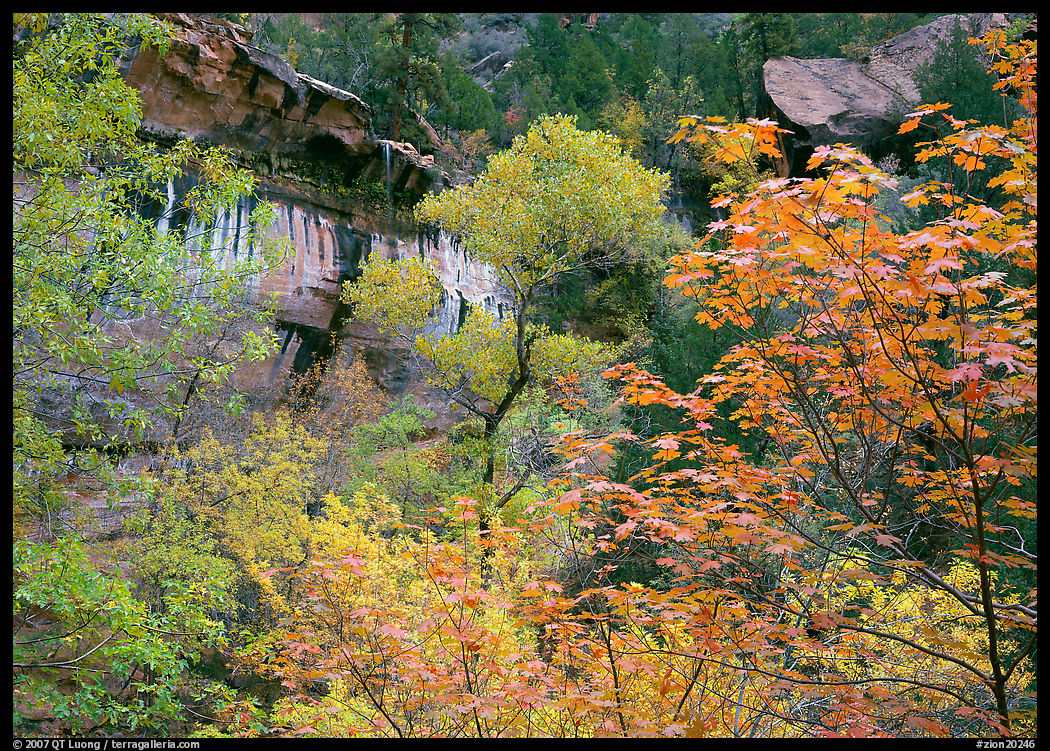
Zion:
Thanks to the Virgin River and other streams, Zion is an oasis in the desert.
The aspens on the high plateaus turn yellow at the end of September,
however the most interesting display occurs later in the deeply shaded canyons. Unlike most of places in the West, red and maple trees grow there, adding a
bright touch by late October to early November. The lower water level makes it easier to hike the Narrows, where trees grow on the tiny banks of the Virgin River. The Emerald Pool area is another good place to look for varied colors.
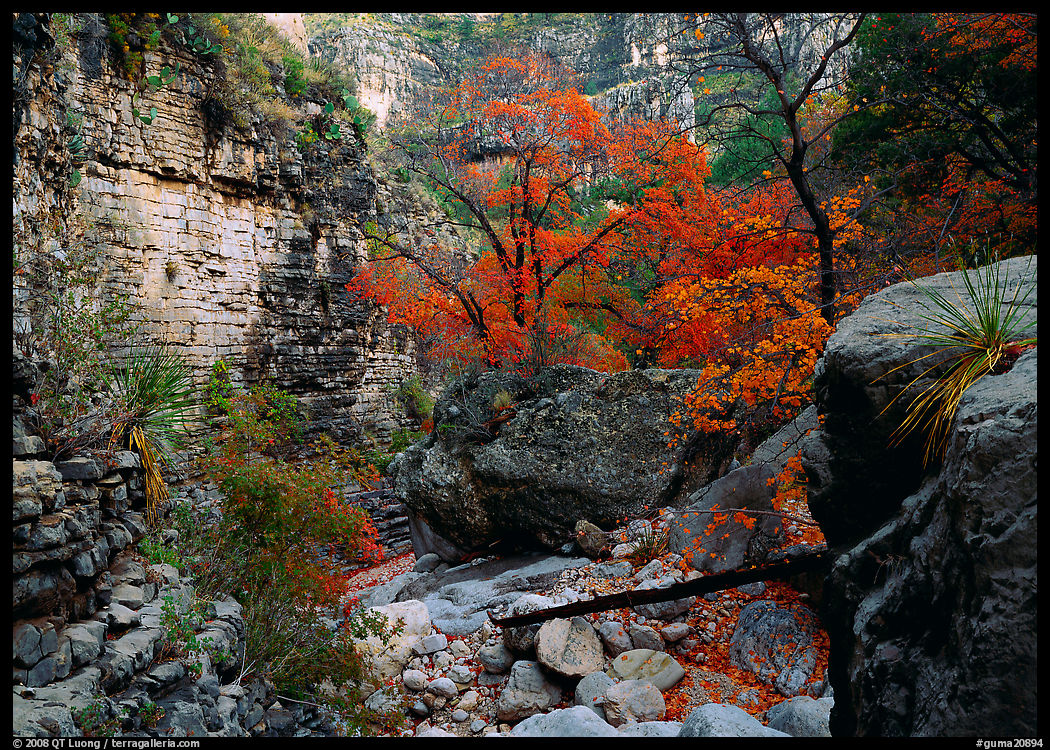
Guadalupe Mountains
Within its canyons and oases, in particular, Pine Spring Canyon,
McKitterick Canyon, and Smith Springs, a surprisingly large variety of trees
with bright red, yellow, and burgundy colors rival the eastern
hardwoods. They make an odd
juxtaposition with the desert vegetation when the color peaks, at the
beginning of November.
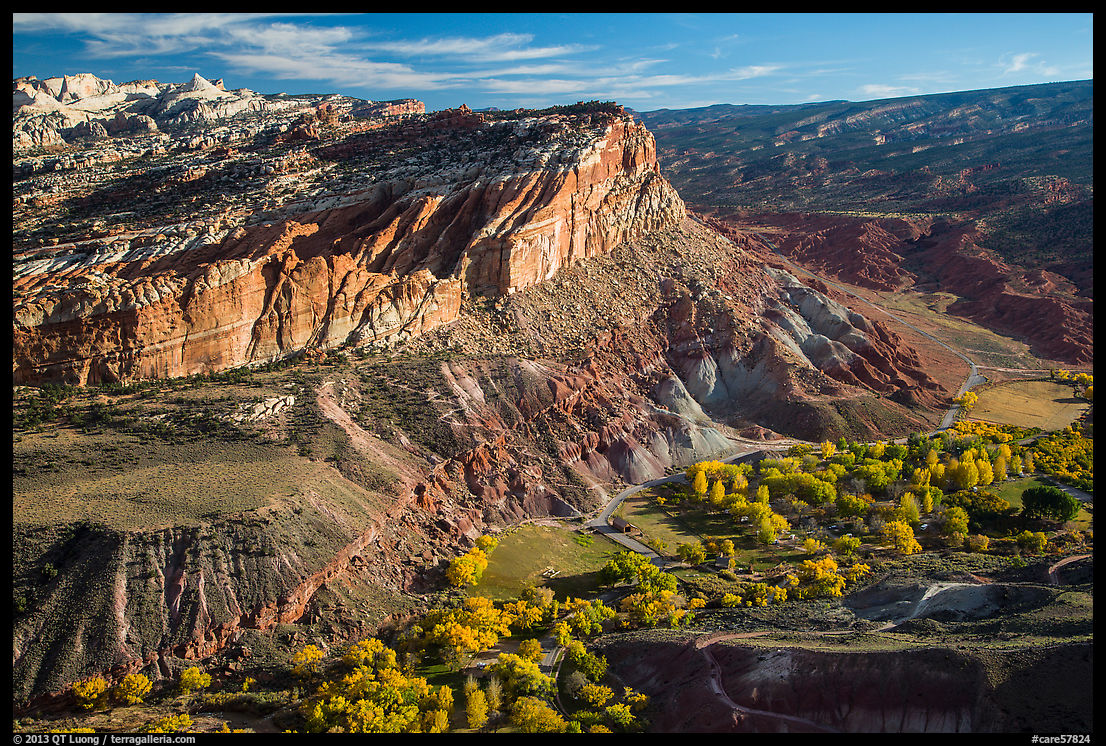
Capitol Reef:
Although the park is more known for its variety of geological formations revealed by the bare terrain (fall provides the best conditions for exploring backcountry roads), it is also an oasis in the desert with the historic orchard at Fruita and cottonwoods along the Freemont river. Their color, which peaks in early November,
harmonizes with the red sandstone cliffs.
Great Basin:
During the last week of September, pockets of aspen groves are found
on the upper portion of Wheeler Peak drive, as well as in side
canyons such as Windy Canyon.
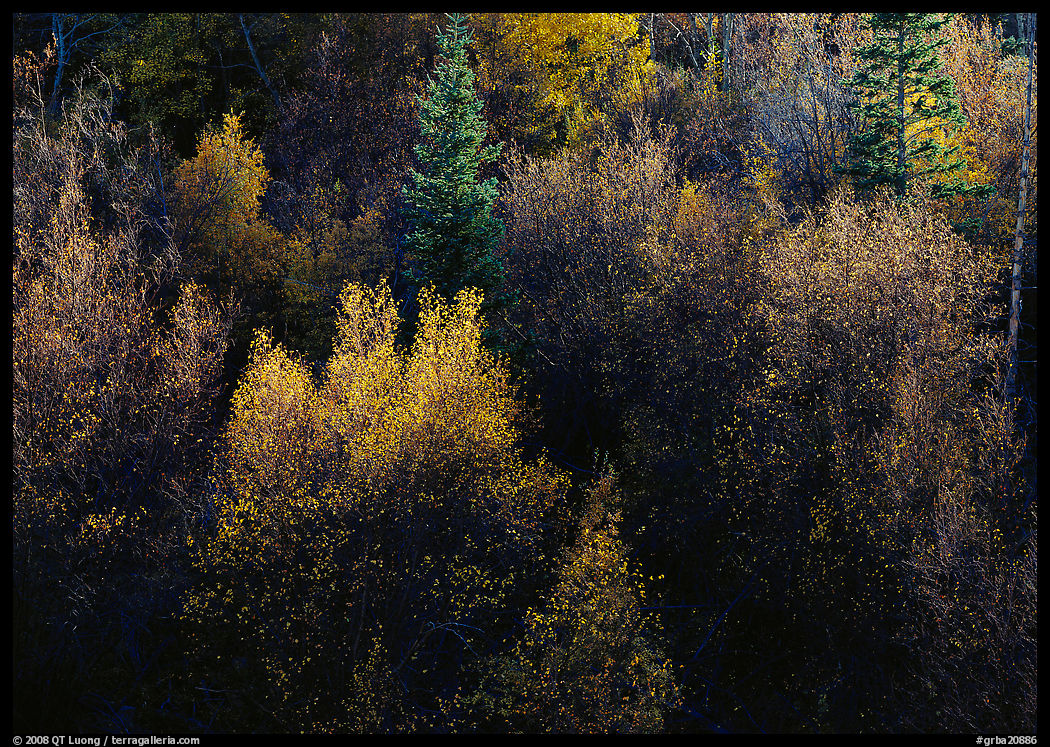
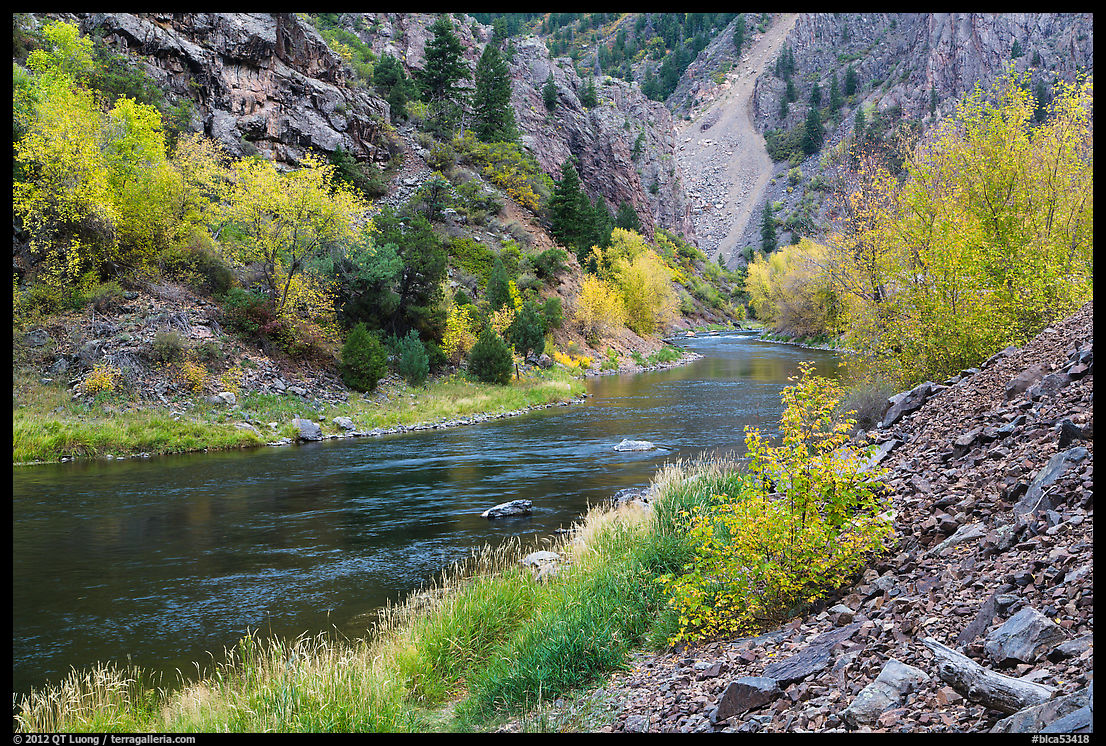
Black Canyon of the Gunnison: Shrubs (such as oak scrub) growing
along the rim turn in late September. There are also a few isolated aspen groves along the Oak Flat loop trail and the drive to East Portal. More: Photographing Oak Flat and Warner Point Trails in Black Canyon of the Gunnison National Park.
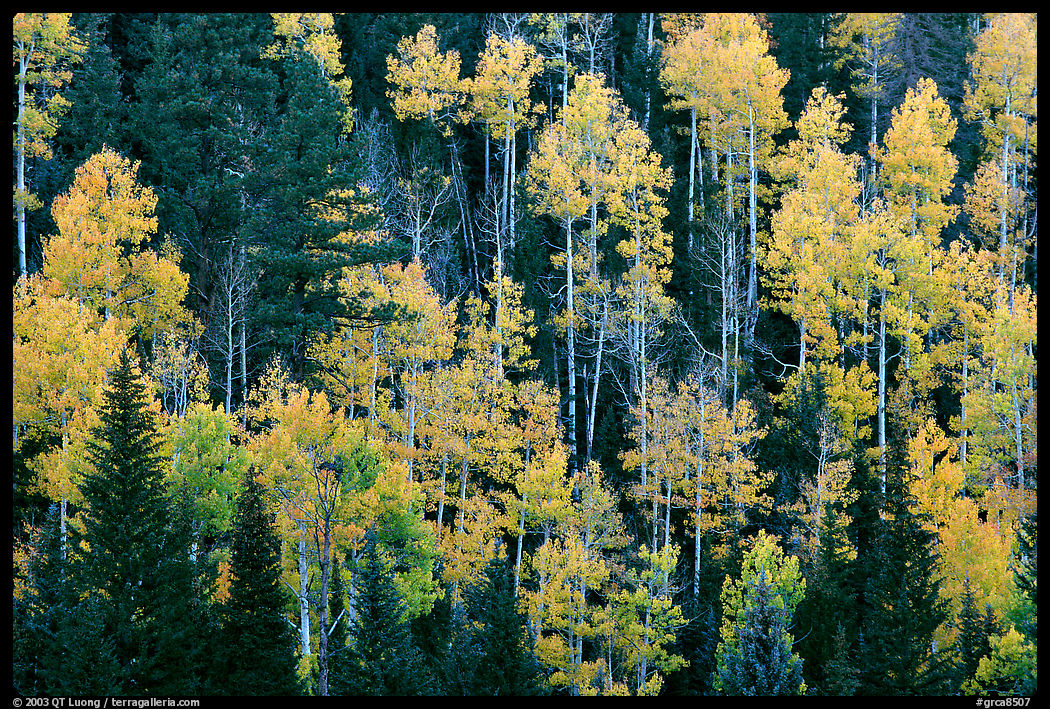
Grand Canyon:
While the South Rim vegetation of pines and junipers is not deciduous,
the higher North Rim is rimmed with aspens that turn yellow during the second
half of September.
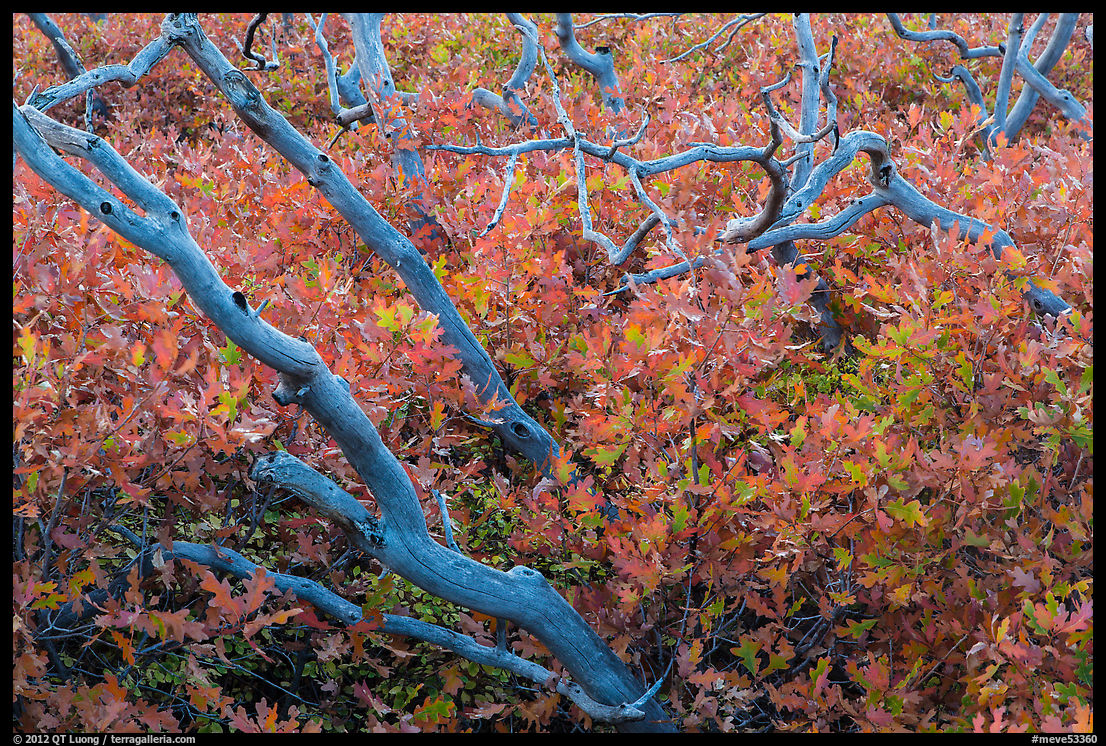
Mesa Verde: Certainly not a place you’d think about for fall foliage, especially since due to high elevation, the mesas that are home to the ruins are dominated by conifers. However, the mesas at lower elevation, from the park entrance to Far View, are covered with shrubs that unexpectedly turn the whole landscape crimson towards the end of September. More: Looking for fall colors in unexpected places.
Arches: The desert vegetation around the arches is not deciduous, but there is one canyon experience in the park, at Courthouse Wash. The riparian plant communities along the stream include cottonwoods that peak from late October to early November. You can photograph them from the bridge, but for a much more rewarding experience, follow the wash downstream using a social trail that you are likely to have all to yourself.
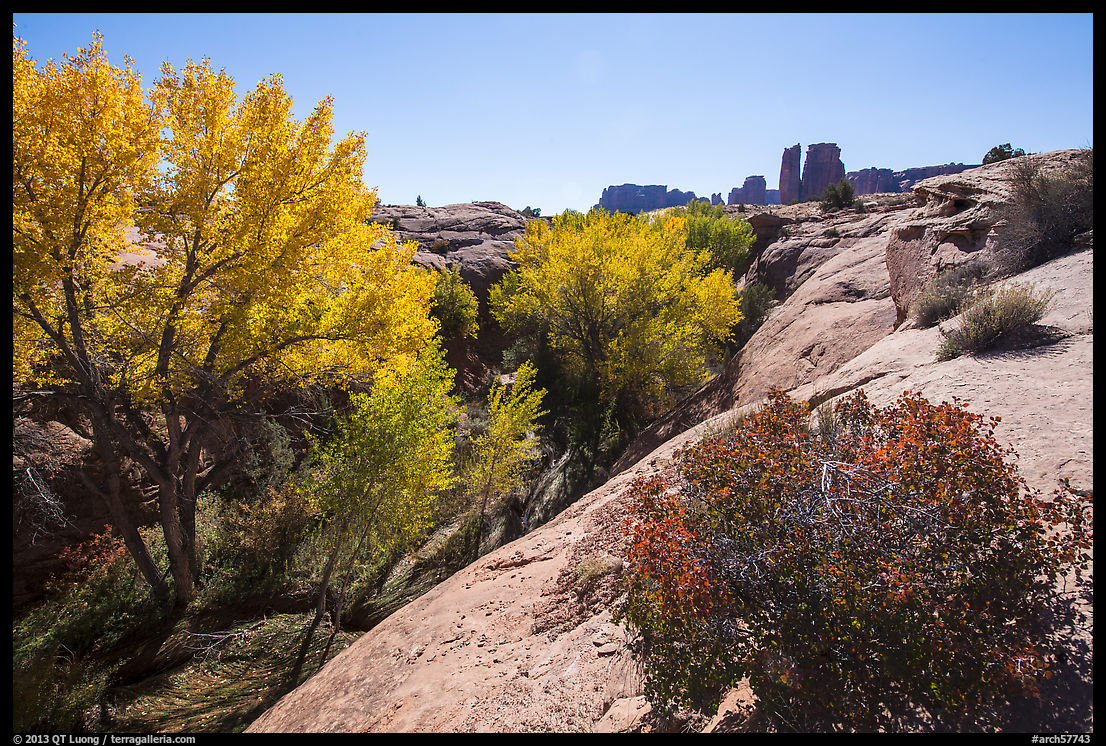
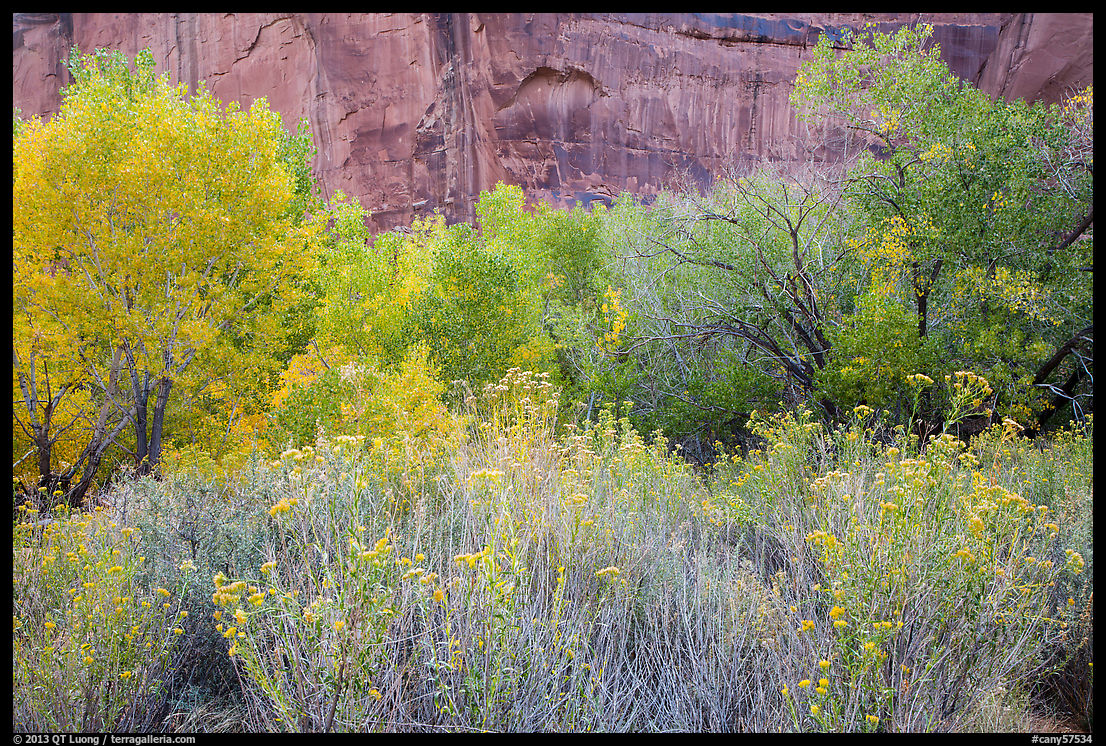
Canyonlands : The desert vegetation on the plateaus is not deciduous. However, the Green and Colorado River are lined up with riparian plant communities that peak in late October. It is a tough hike or 4WD drive to get to the river, but it is easily accessed by jetboat from Moab. Canyon bottoms such as Horseshoe Canyon and the Maze contain stands of cottonwood trees as well.
Bryce Canyon:
Due to high elevation, the park is dominated by conifers, however, with a lot of hiking, a few pockets of deciduous trees can be found, mostly along the creeks below the rim.

Pacific Coast and Mountains
The western mountain forests are generally dominated by conifers. In the Sierras, large aspen groves tend to grow in the dry Eastern flanks, outside of the National Parks, while the same can be said of Western Larch trees in the Cascade Mountains. Tree colors are mostly confined to small pockets. However, at more northern latitudes of Washington, the berry plants can turn the whole ground red at sub-alpine elevations, while at lower elevations vine maples provide orange touches not found in California. Lower elevation forests comprise deciduous trees that provide brilliant but localized, pockets of color.
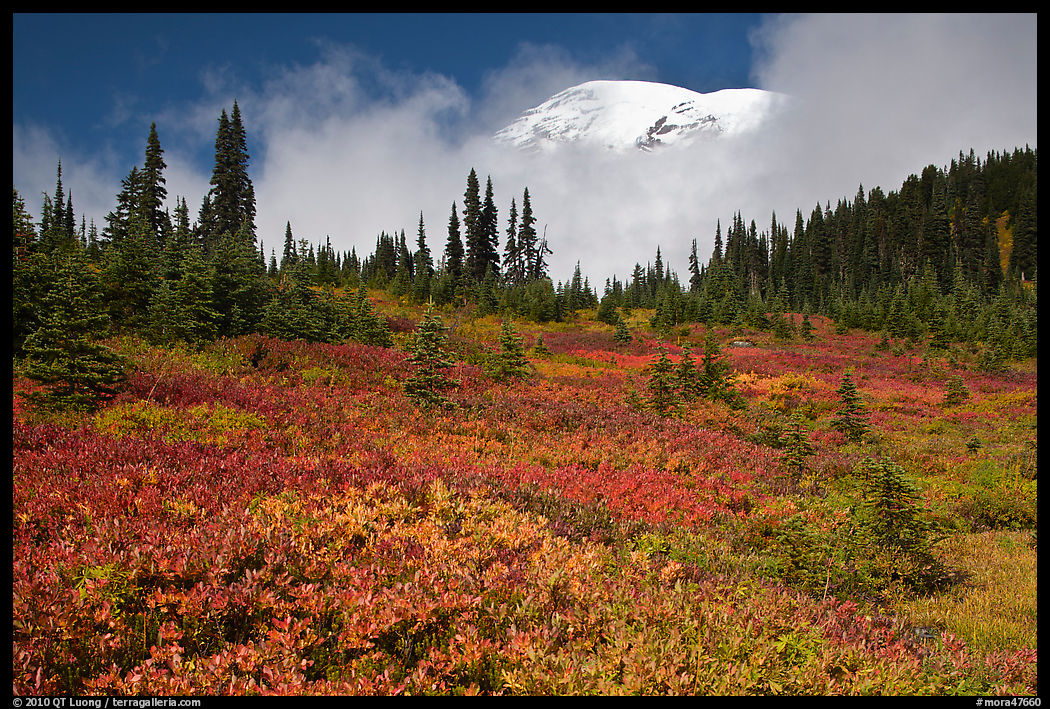
Mount Rainier: Alpine meadows such as Paradise are full of berry plants that peak on the last week of September, rivaling in color the wildflower displays of the summer. Vine maple can be found at lower elevations, for instance along Stevens Canyon. More: Mount Rainier National Park new images: fall foliage,
Autumn in the Rain, Mount Rainier NP.
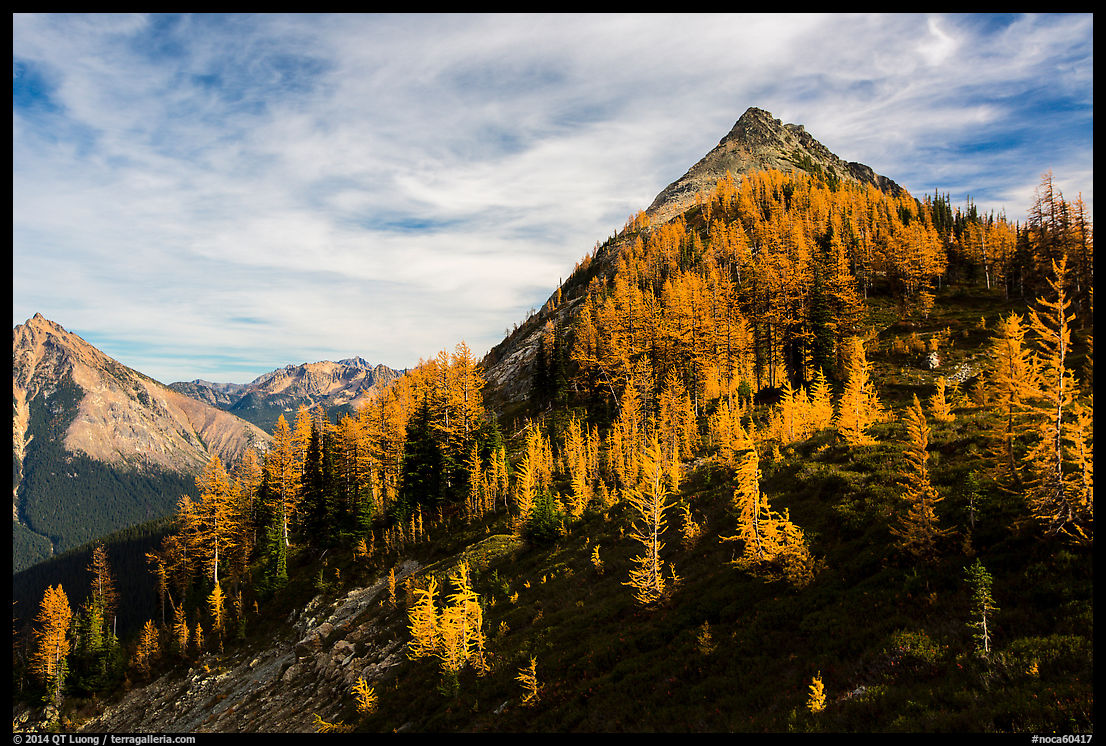
North Cascades: Berry plants at higher elevations, and maple at lower elevations peak on the last week of September. During the month of October, the needles of the Western Larch, a deciduous conifer with a narrow geographic range, found on the eastern side of the park, turn a bright yellow. More:
North Cascades National Park New Images- Fall Foliage, An Autumn Visit to Stehekin,
North Cascades Alpine larch at night.
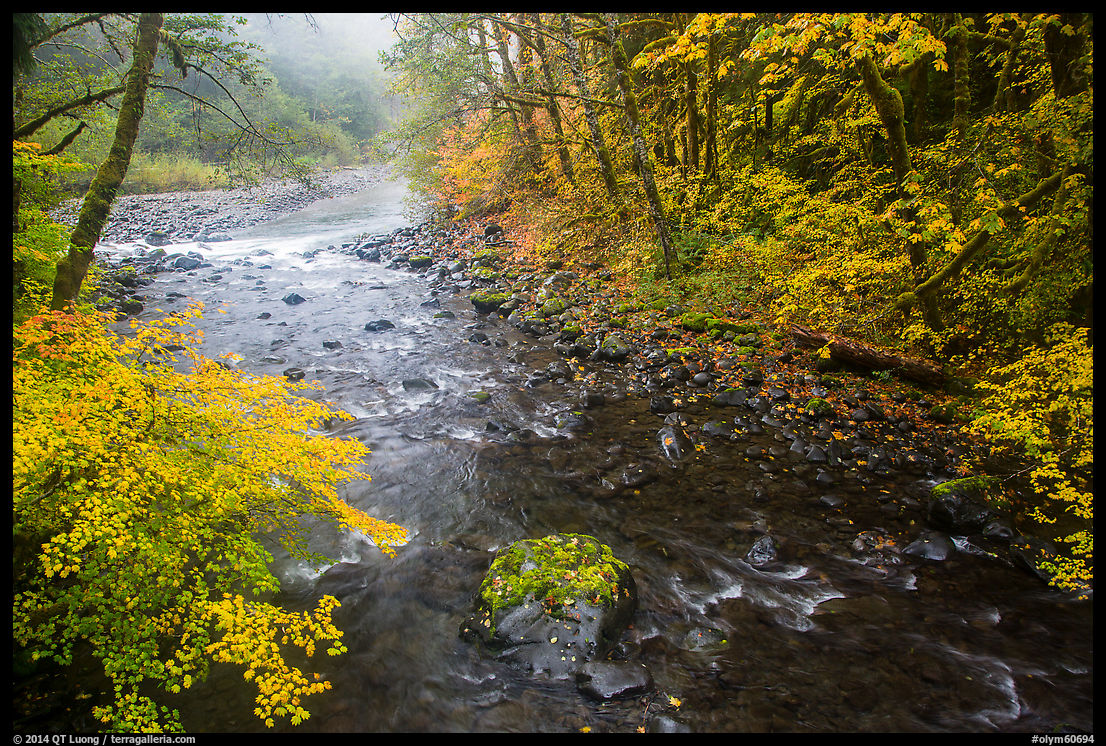
Olympic: The subalpine meadows
are thick with bluberries, whose leaves turn a deep scarlet at the beginning of October. In mid/late October, maples (both bigleaf and vine) add a powerful color accent to the dark west side rain forests. Sol Duc has also beautiful color that can peak a bit later. More: Photographing Fall foliage in Olympic National Park.
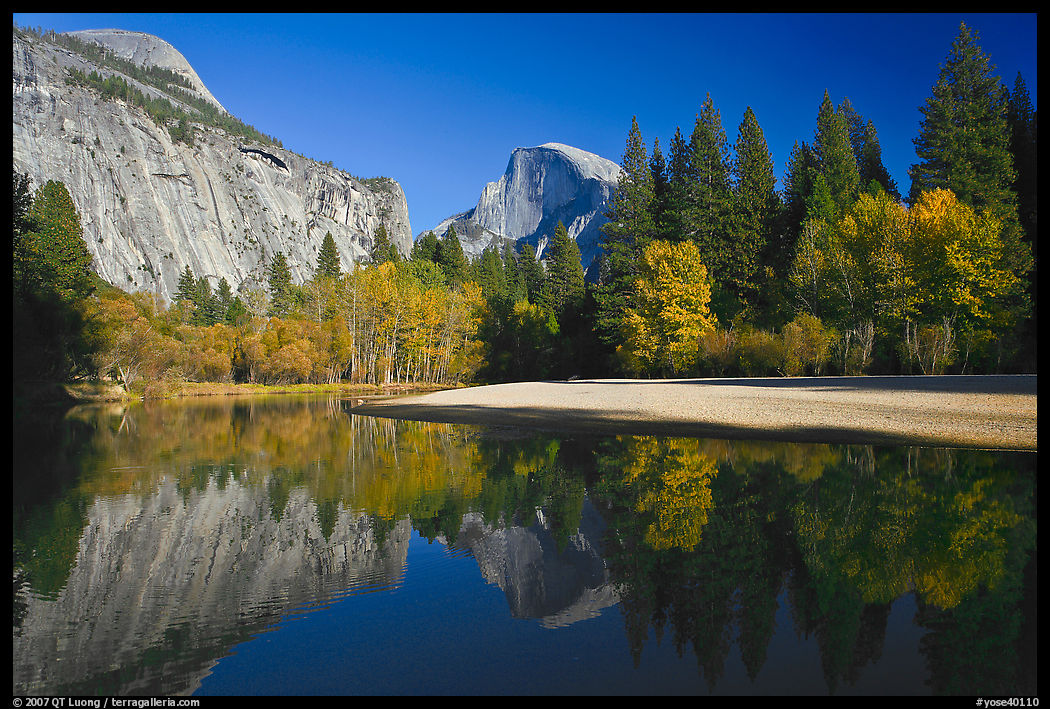
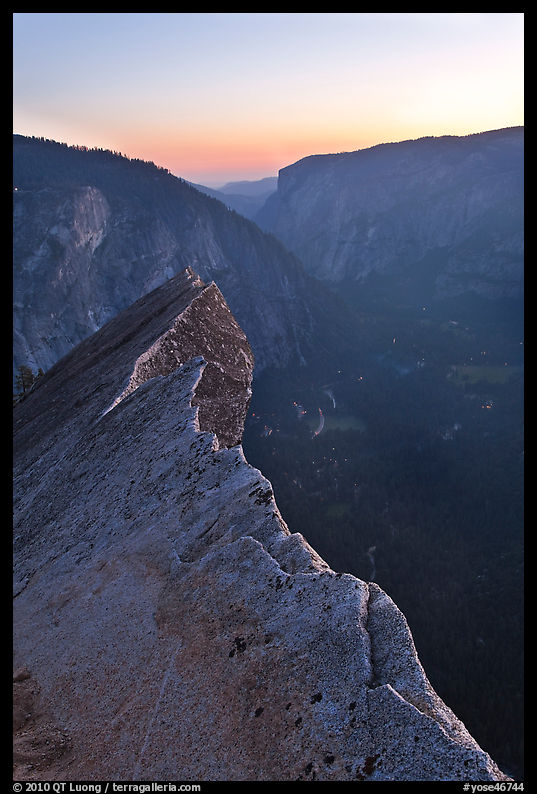
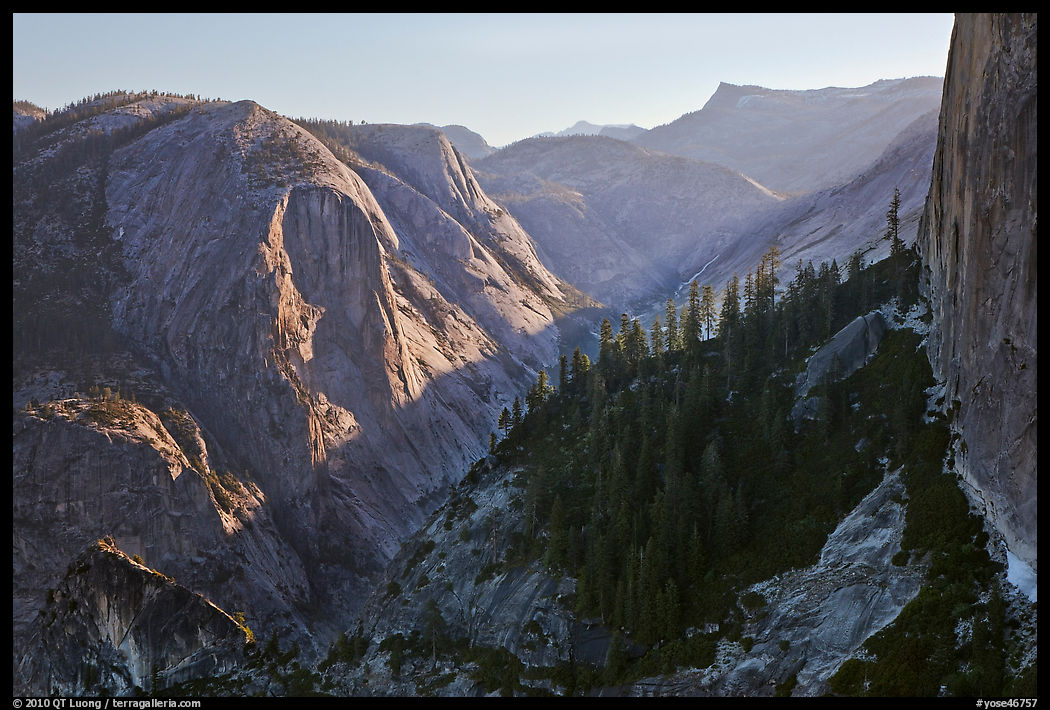
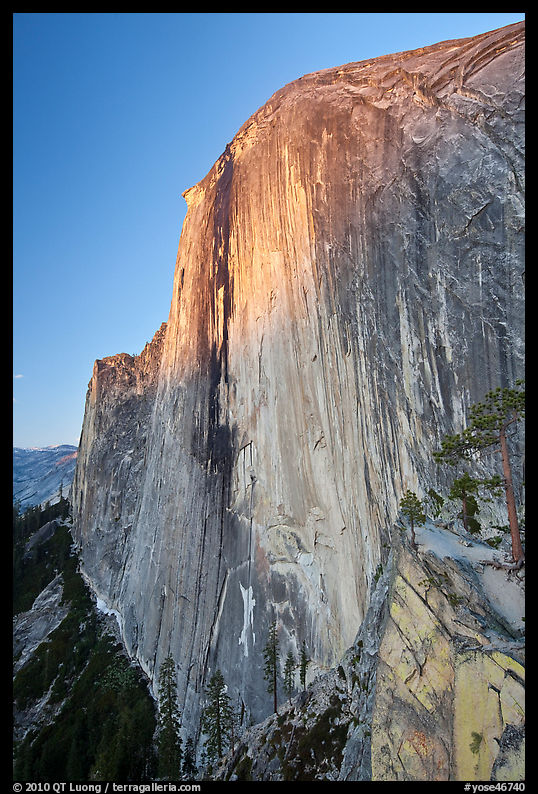
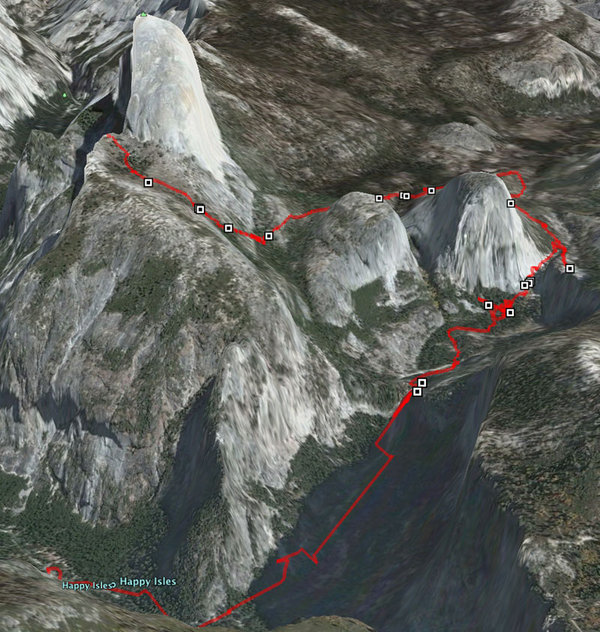
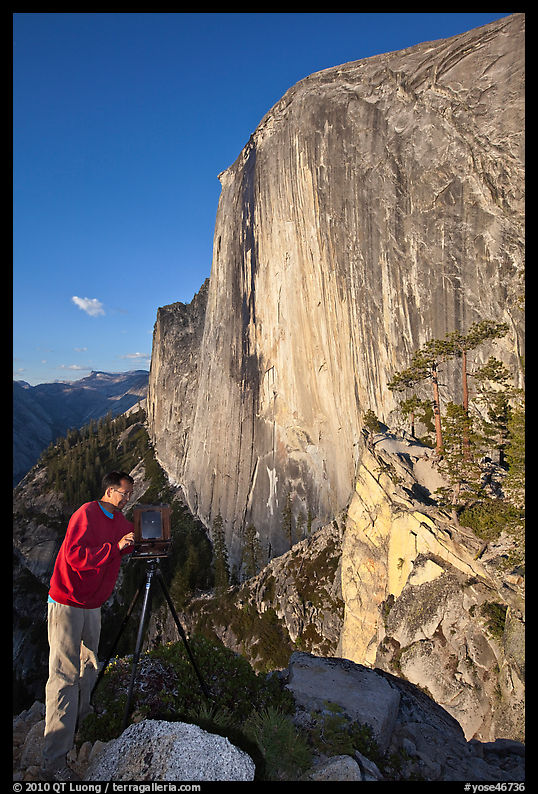
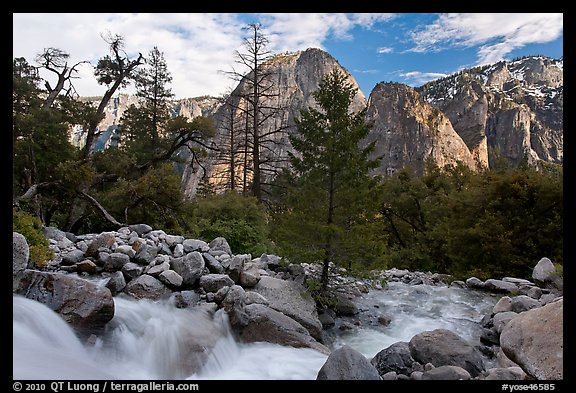
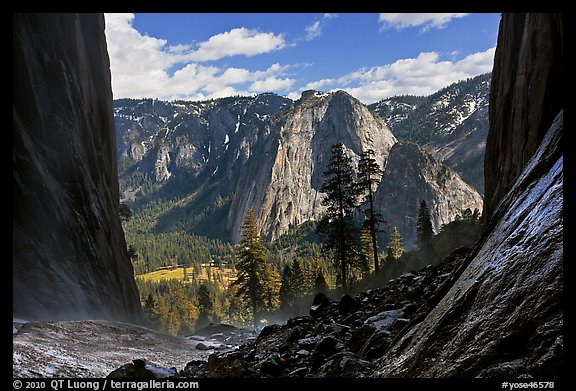
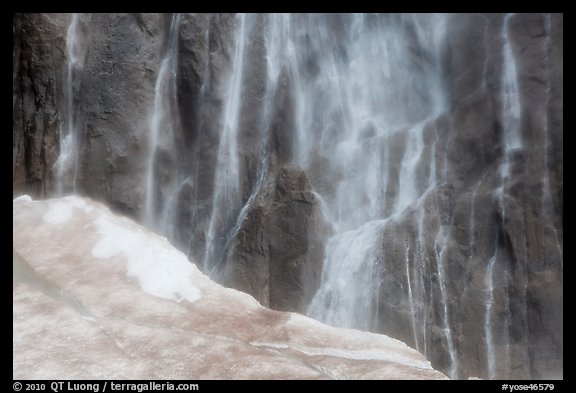
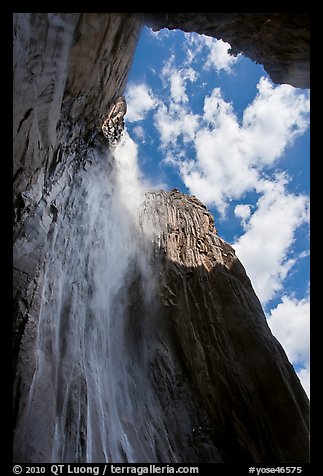
Yosemite: Besides a couple of often-photographed
non-native trees, colors in the Valley are mostly provided by yellow
maples, red dogwoods (peaking early October), and the oak trees
(peaking early November) that line up some meadows, my favorite being El Capitan Meadows. Except for sparse maples and dogwoods, and the berry plants in places such as Siesta Lake, there isn’t much foliage color in the high country.
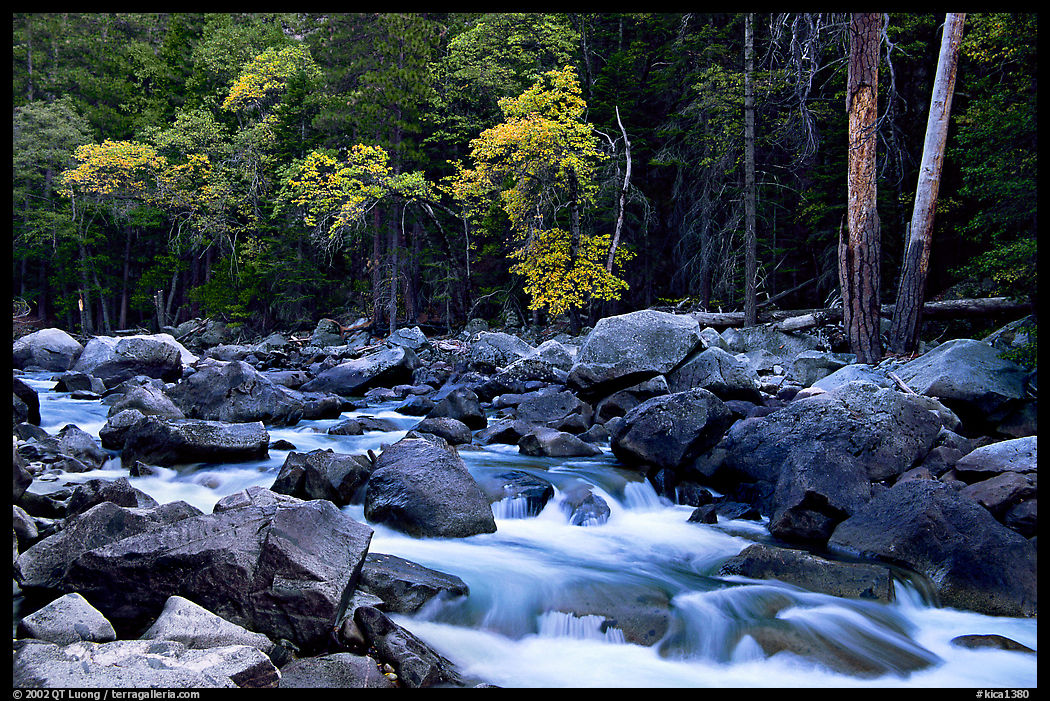
Kings Canyon: The Cedar Grove area of Kings Canyon is somewhat similar to Yosemite Valley, with generally less fall color. Pockets of maples and dogwoods add a color accent to the forests in October.
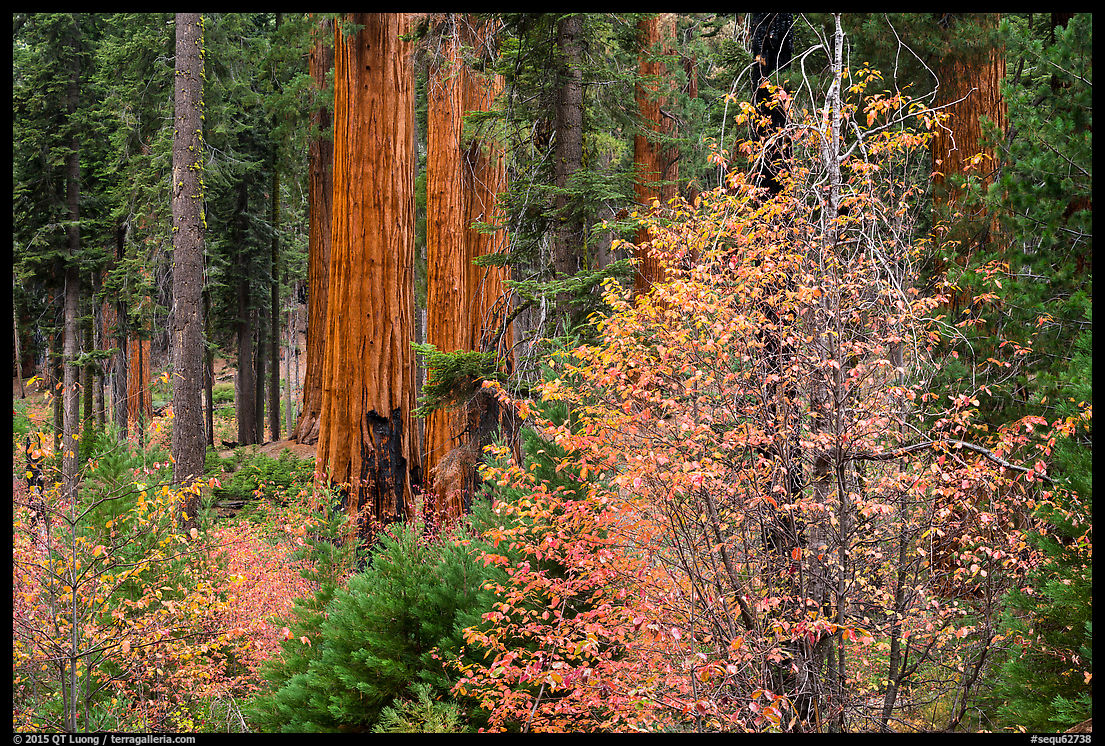
Sequoia: The lower elevation foothills are covered with many blue oak trees that peak in November. In late October, dogwoods add a color accent to the groves, while ferns color the meadows within Giant Forest. More: Photographing Fall Foliage in Sequoia National Park
Pinnacles: The park has no large deciduous forests, however good places to look for pockets of colors include Chalone Creek in Bear Valley (cottonwoods) and Bear Gulch between the nature center and Bear Valley (sycamores).

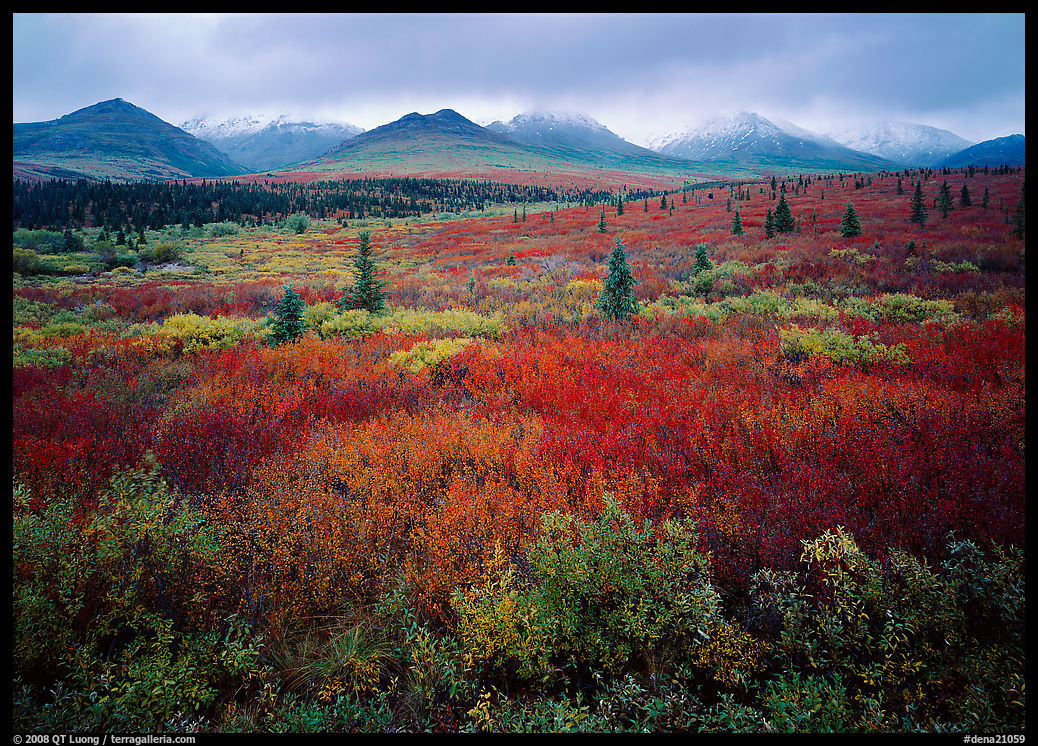
Alaska
At the Arctic circle, spring, summer, and autumn last about one month
each, with the rest of the year being winter. Fall arrives earlier
than elsewhere on the continent, as early as mid-August at higher
elevations in Gates of the Arctic National Park. What distinguishes the
Alaska autumn is the vast expense of tundra. While at more
meridional locations, the color is mostly on tree leaves, in Alaska,
the entire ground can turn shades of yellow and red.
Denali:
Autumn comes between the last week of August and the first week of
September with particularly spectacular tundra colors, in particular towards the end of the paved road, and past Elieson Visitor center up to Wonder Lake. Look at the tundra to see how the size of the plants diminishes as the elevation increases.
The Riley Creek drainage near the entrance of the park has many aspens mixed with evergreens.
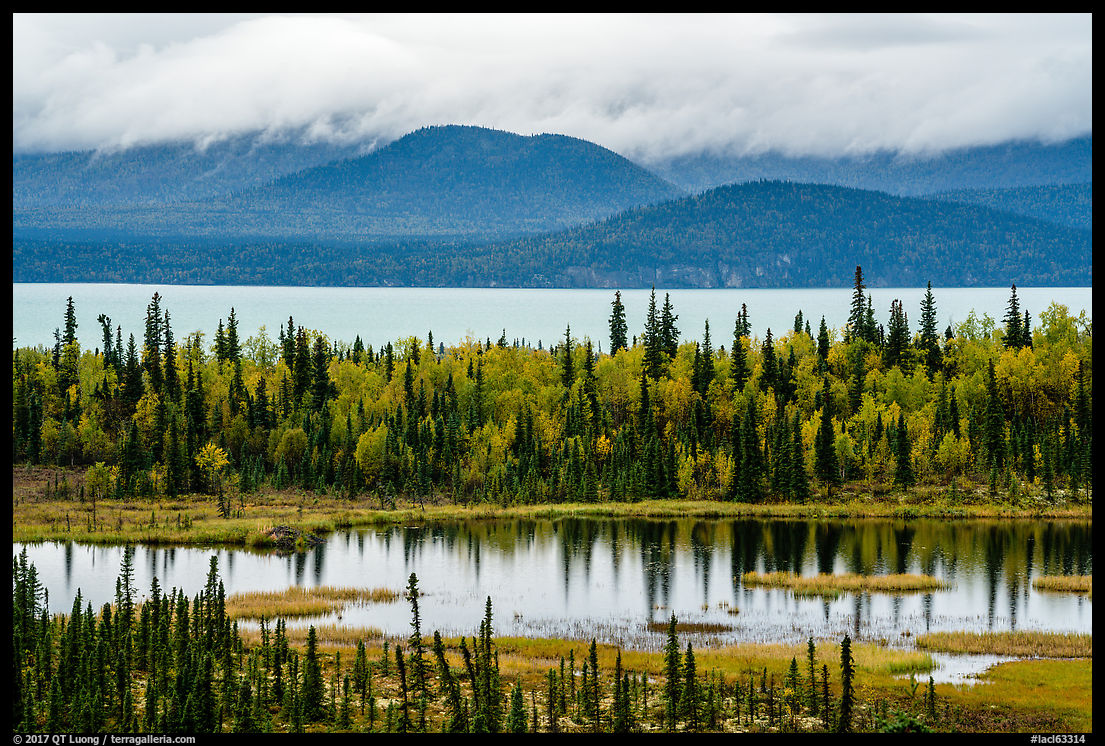
Lake Clark: The eastern part of the park features extensive tundra terrain that turns burgundy in the first week of September, followed by birch trees at lower elevations. However, the weather on the Alaska Peninsula can be quite wet in the fall. More: Lake Clark National Park on the Go
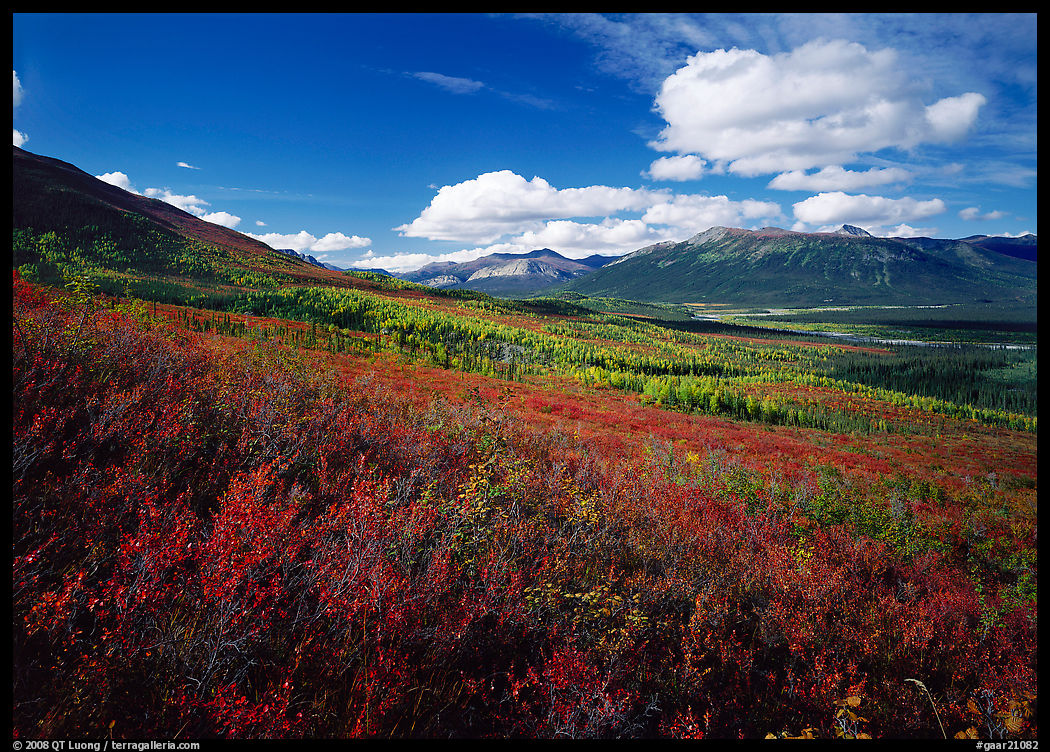
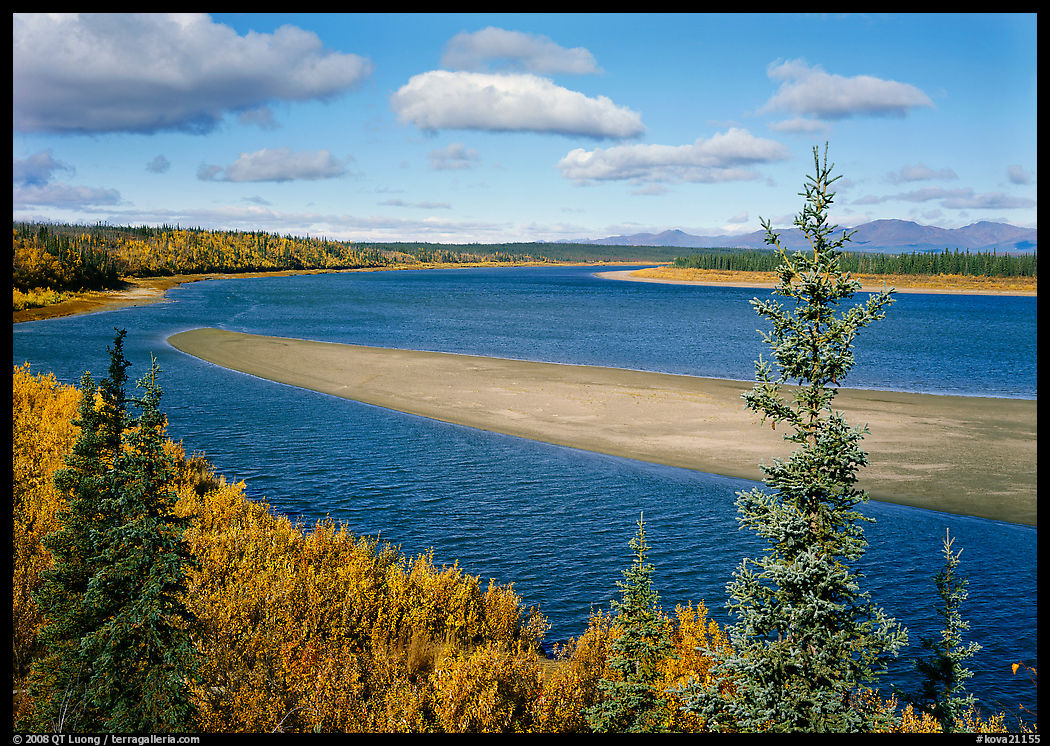
Gates
of the Arctic,
Kobuk Valley,
By mid-August, the tundra turns red at higher elevations,
lower elevations (such as the Kobuk River Valley), which also include aspen, peak at the end of the month, which coincides with the fall caribou migration, one of the great wildlife happenings in Alaska. More: A Backpacking trip into the Arrigetch Peaks, Gates of the Arctic National Park.
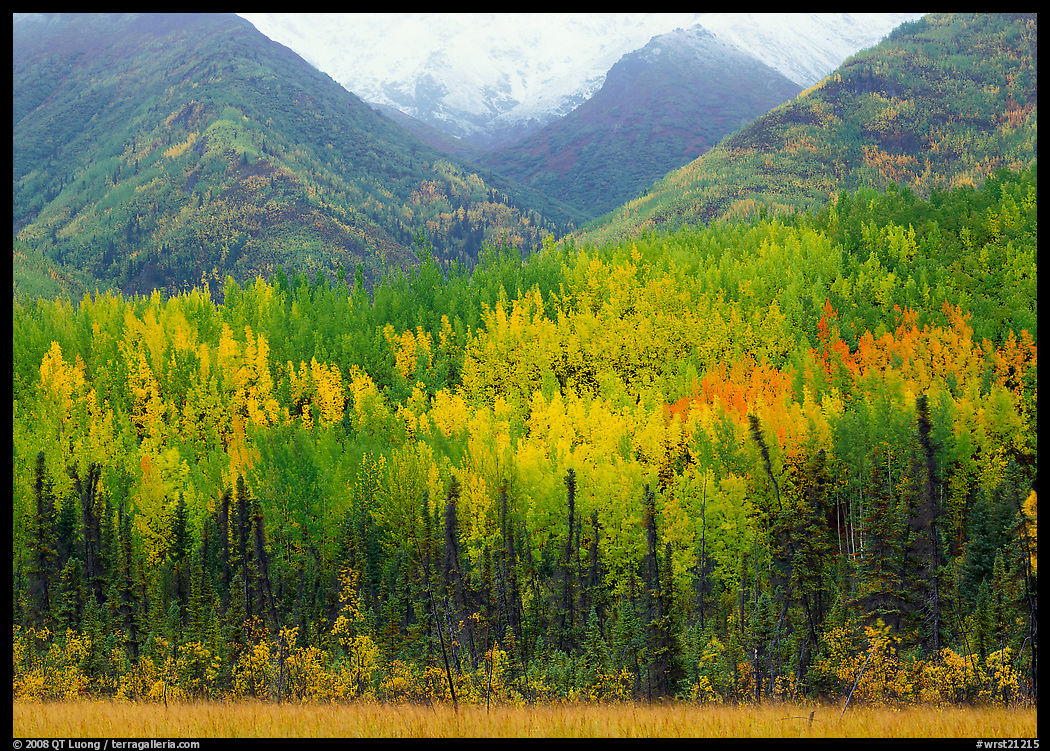
Wrangell-St.Elias: Numerous aspens can be found along the
last section of the McCarthy Road, either on mountainsides or in the
valley. They turn yellow at the beginning of September.
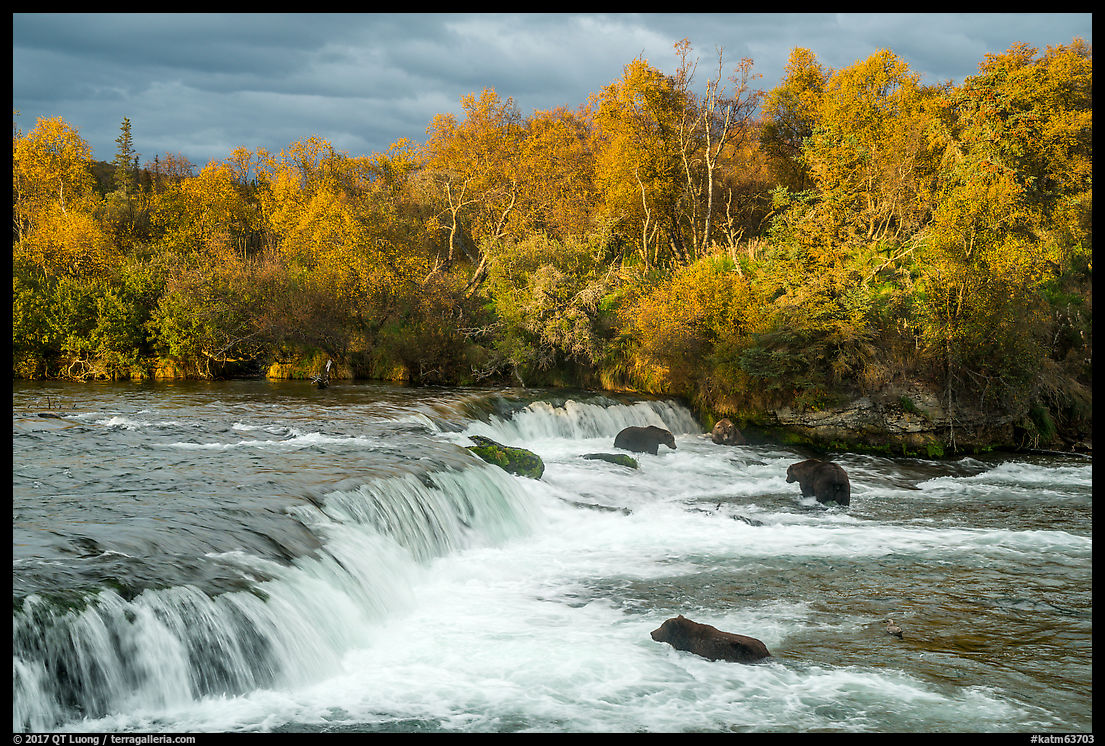
Katmai: Although the Valley of Ten Thousand Smokes is barren, the area around Brooks Camp is riparian with plenty of deciduous vegetation that peak in the middle of September – a good time to see the bears without the crowds. The trail to Dumpling Mountain provides easy access to the tundra that turns at the same time. More: More Than Bears at Brooks Camp: the Dumpling Mountain Trail, Katmai National Park.
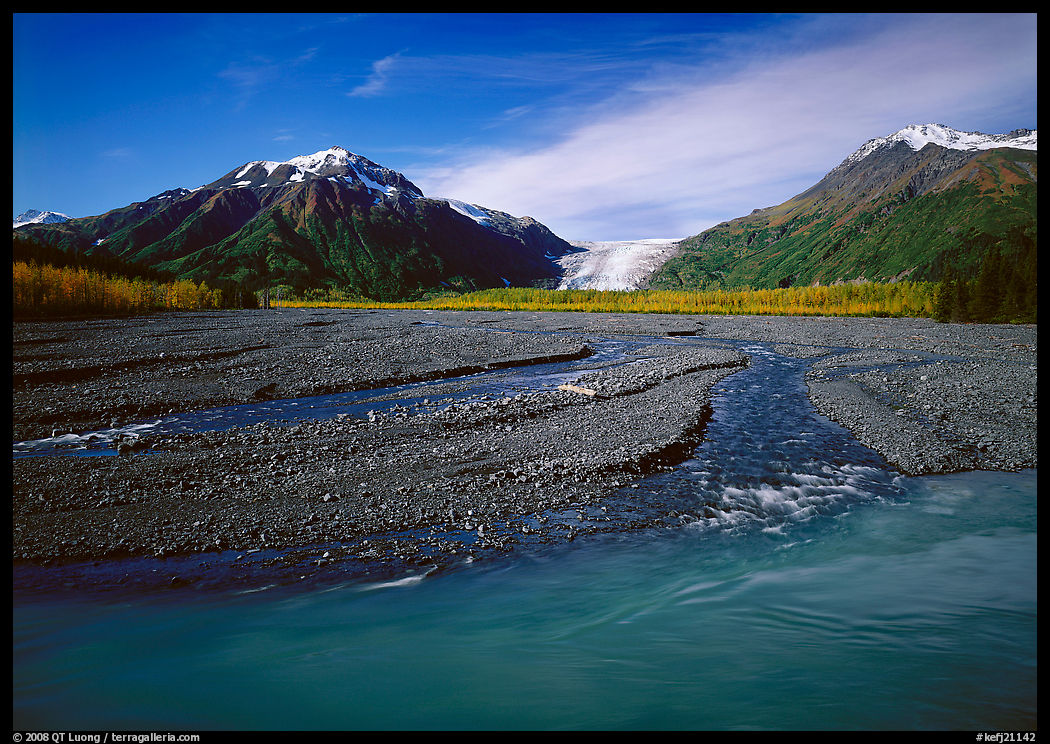
Kenai Fjords: Exit Glacier is one of the most accessible spots in all of Alaska’s national parks, and aspens on the floodplain and at its base turn in early September.
See
pictures of National Parks Fall color foliage.
Any favorites that I missed? Please comment!


