This year has seen promising new apps for visiting the national parks. In this survey, I review all top national park apps, new and old, with an emphasis on the features that set each of them apart, so that you can find the app best suited for your style of visit.
Chimani
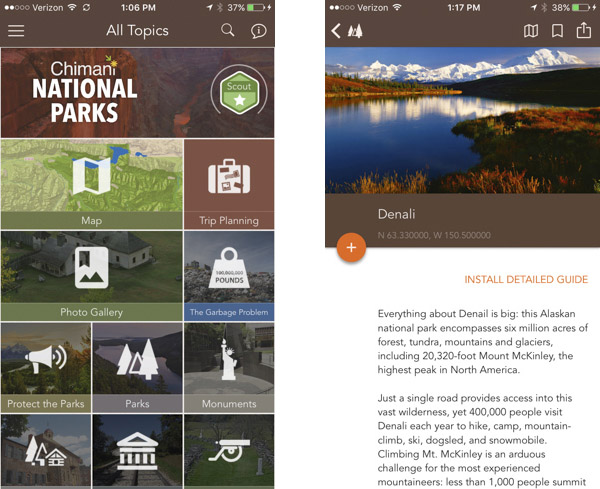
Since 2010, Chimani focuses only on mobile apps for the outdoors, and in particular national park locations. Their entry-level app (free) is “National Parks”, a survey of each of the 400+ national park service units, organized by NPS designation such as National Park, National Monument, National Historical Site, etc.. Each of the 400+ units is introduced by a picture (I provided those for the 59 national parks), and a brief general description. The interactive features include:
- A “trip planner” offers suggestions for point of interests depending on length of stay, your interests, and outdoor proficiency.
- A mechanism to bookmark locations you want to go to, keep track of those you’ve visited, and earn badges and share on social media if you’re into this sort of thing.
- A zoomable map which can be used offline, with each parks keyed to an icon which you can tap to obtain the relevant information.
In addition, for some units, a the app provides a link to install a detailed guide. That’s where things get meaty if you plan to visit a park. Chimani has developed for a while individual apps for popular national parks and other NPS units. Those apps were initially for purchase ($2 each), but apparently a partnership with Subaru has made them free, and Chimani have upped their game this year by releasing one app for each of the 59 national parks, making them so far the only company to have done so. I have checked the information for the most remote and seldom visited parks, and can report that it is very accurate and quite complete. All the apps use the same format, so once you are familiar with one app, using the others is easy.
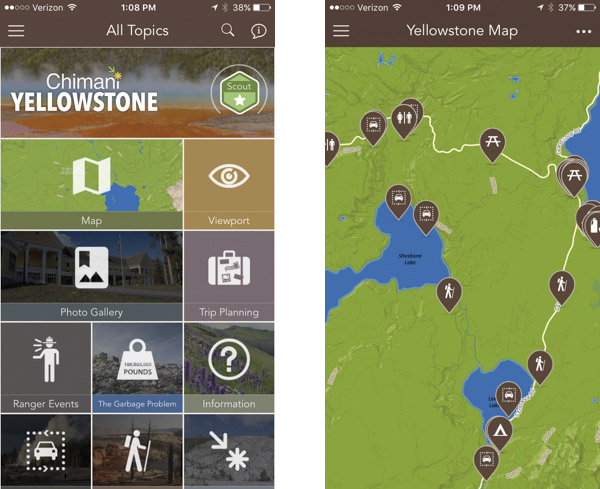
The informational content of the app encompasses (and occasionally follows closely) what you’d find on the NPS website. A big difference is that the information is organized by categories (such as point of interest, camping, hiking, bathrooms) in a format easy to browse on a mobile device. Each of the locations are illustrated with a photo, so the app gives a good idea of the terrain of the park.
Being designed for outdoor use, all the information is accessible offline, without the need for a data connection. However, be aware that after you download the app, you still need to open it with a data connection one time to load the maps and photos before you can use it entirely offline. Maps can be downloaded at two resolutions. The highest one represents a lot of data to transfer and store! As an integrated app, they offer the same interactive features as the global app: trip planner, tracking, map integration.
The maps, which are based on the crowdsourced and excellent openstreetmap.org and custom-rendered by Chimani, have a good amount of information (including trails), topographic-level detail, and park locations. They are GPS-enabled, meaning that when you are in the park, you can see your own location as a marker on the map, which alone makes it worth the download.
Verdict: Only apps with detailed information for all the 59 national parks. Offline, easy to use, enhanced version of the NPS websites, with a solid and useful map.
REI
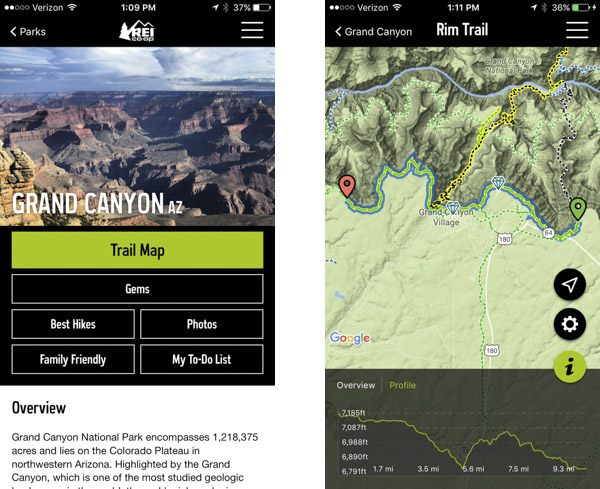
REI’s National Parks free app is the latest offering, released this year to celebrate the NPS centennial. REI’s app traces its roots to the acquisition of Adventure Projects, a small company who created specialized apps and websites gathering crowdsourced information for multiple outdoor activities including hiking, trail running, mountain biking, climbing, and skiing.
Unlike the Chimani apps, REI’s is a single app that includes all the parklands, which are not limited to national parks. As of this writing, 36 of them are covered, with an odd mix including locations such as Rock Creek DC, or New River Gorge, WV, but not Great Smoky Mountains, the most visited of the national parks!
With that much data, like for the Chimani apps, you need to download the maps and photos before you can access them offline, which is simply done by opening them – much easier than with the Google Maps app on which the maps are based. Once you’ve done this, the maps are GPS-enabled and work without a signal. They are based on the excellent “terrain” maps of Google, which provide greatly rendered topographic-level detail, and in addition there are icons for park locations. The main draw on the maps are clearly outlined hiking trails with overlaid icons of geotagged photos which open to larger, captioned versions when you tap them.
Although the app has the all the basic general park information you’d expect, its main strength is its great collection of hiking trails (the database lists 4,823), thanks to the inclusion of crowdsourced information from the Hiking Project – one of the Adventure Projects creations. For each trail, there is a detailed map, elevation profile, detailed description, photos (of varying quality since user-supplied), and even user ratings. As a crowdsourced project, everybody can contribute to the database by sharing their itineraries, so this has the potential to become an extremely extensive database.
In order to broaden its appeal to non-hikers, the app also includes a developing category called “gems” (currently 235), which are roadside attractions requiring only a short stroll, for which information is provided in a format similar to hiking trails. Last, a “family friendly” category attempts to identify those gems and trails that offer maximum rewards for least effort.
Verdict: Extensive digital trail guide and maps for offline use, particularly good for hiking thanks to great crowdsourced information.
National Geographic
Since National Geographic publishes the
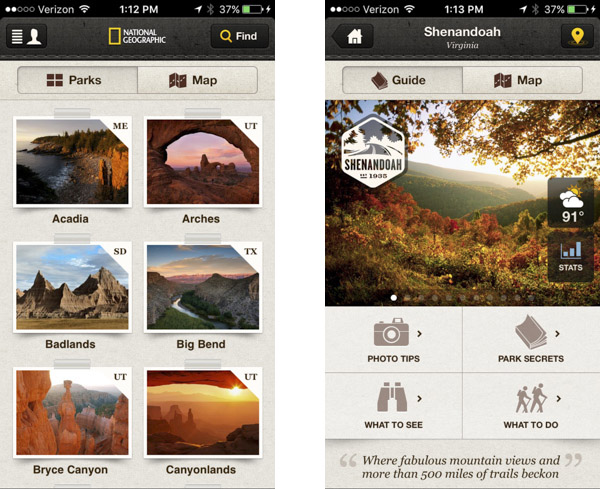
best selling guidebook to the national parks as well as an excellent collection of national parks maps, it is no surprise that National Parks by National Geographic was one of the first mobile apps dedicated to the national parks. It currently covers the 27 amongst the most popular parks.
The base version of the excellently designed app is free, and includes a brief guide with general park information, current weather, a map, and a photo gallery. The map consists of pins overlaid over a satellite background (data link required), but except for campgrounds, the pins do not link to more information, only place names, limiting the practical usefulness. The photos have the curated quality expected from National Geographic, however there are only 3 per park in the free version.
Detailed guides to the parks are available as in-app purchases of $2 for individual parks or $14 for the whole set. This buys you:
- A dozen more photos, some of them under the category “photo tips” including detailed location and information on how to get the shot, others under the category “what to see”, which come with extended captions.
- A list of interesting facts (called “park secrets”).
- A list of recommended activities, each with a well-written detailed description (“what to do”).
Verdict: High quality editorial content, including expert recommendations and excellent photography.
Passport to your National Parks
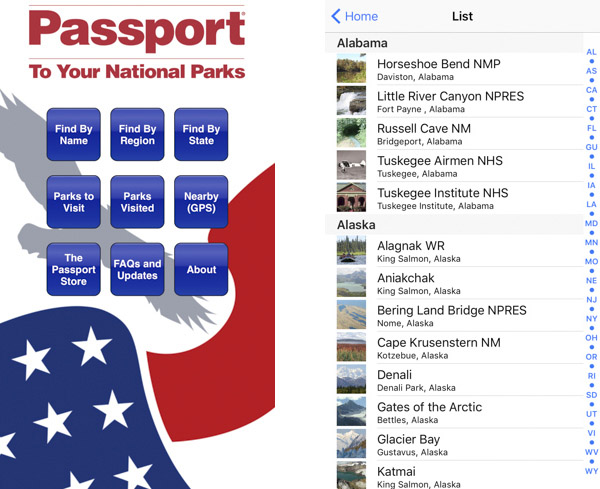
Eastern National issued in 1986 the “Passport”, a booklet to help visitors collect cancellation stamps in each of the 400+ NPS units. The companion free app main function is likewise to help visitors find parks, plan and record visits. Parks can be searched by name, region, state, or nearby location. For each of them there is a picture, very brief description, and links to the nps.gov website for additional information.
Verdict: electronic version of the popular “Passport” booklet for NPS Units
Oh, Ranger ParkFinder
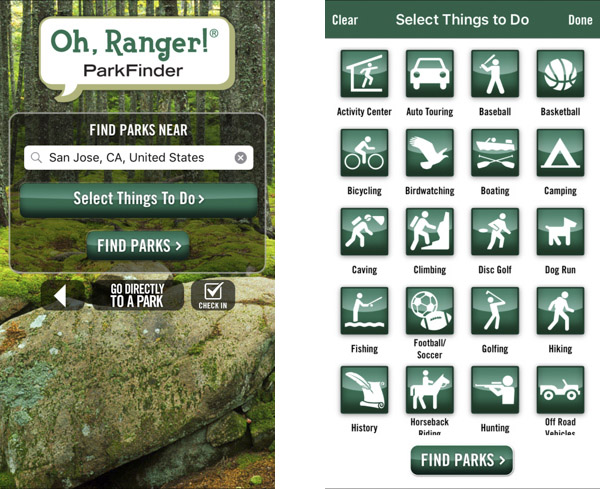
American Park Network has for decades made available free printed park guides with a familiar green cover. The main purpose of the free
Oh Ranger Parkfinder app is to help visitors find parks. Unlike other apps surveyed here, those are not limited to NPS units. Instead, they include not only other federal public lands such as national forests, national wildlife refuges, BLM sites, but also parks at the state, county, and city level. Within 100 miles of San Jose, CA, no less than 3001 parks were found!
You can locate parks by proximity to a city or zip code, and filter them by any of 20 type of activities. For each of them, there is a brief description and activity list, phone number(s), a link to the park’s website, map link, and sometimes user reviews and a photo gallery.
Verdict: extensive database of public lands for finding your park
Maplets
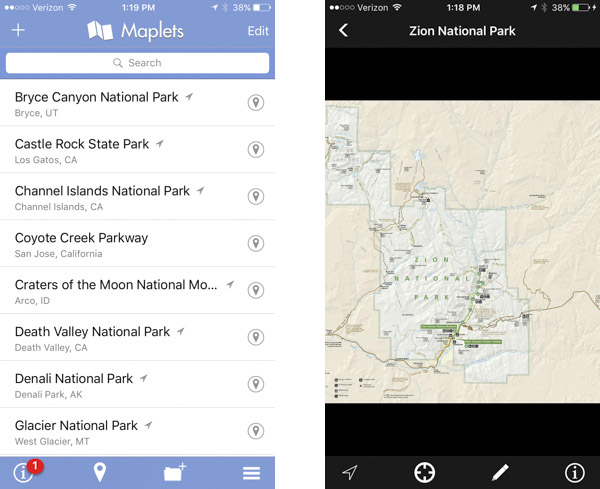
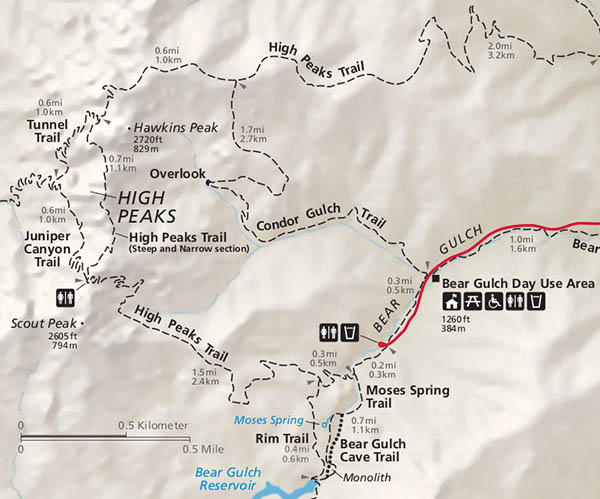
Maplets ($3) is a universal map viewer rather than a national park app, but I mention it on this list because it is one of my favorite apps to use when visiting a national park. I recommend it to people who do not want to bother with a complex GPS app (Survey here) because it is so easy to use and is based on what I consider to be the best general-purpose maps of the national parks, the NPS official maps. Those maps are not topographic, but instead are graphical representations that offer the exact right amount of information for most visitors, enough for driving around and hiking on maintained trails.
After you download maps for the parks you intend to visit the app simply indicates your location on the zoomable map with a dot without the need for a cellular connection. When the park includes detail maps for some areas, you download all of them at once and can switch between them with a pull down menu. In addition to the official NPS maps, Maplets can show your location on any calibrated map, and those will appear when you search for the location. For instance, when hiking the Subway in Zion National Park one-way, one of the difficulties is not to miss the exit trail. In searching for “Zion”, I found a calibrated topo map of the entire route, which made navigating it a child’s play, even in the dark.
Verdict: Useful offline viewer for the official NPS maps and others.