Terra Galleria Photography

Lessons From Losing a Week of Photos to Memory Card Failure

Summary: One of the photographer’s greatest fears is to lose a significant chunk of images from a big trip or event. In this long-form article, find out how a memory card failure caused a week of photographs to disappear, what I did to try to recover them via software, then physical data services, and the valuable lessons, counter to common knowledge, to be learned about memory cards, dual card slots, and backups to prevent such a nightmare scenario from happening to you.

Landscape expeditions can be taxing in the long days of summer, even more so if you are also doing night photography. After flying to Seattle, I arrived at the coast of Olympic National Park around 11 PM – many view Treasured Lands as a culmination of my work in the national parks, but I am far from being done with them! Seeking stars, I woke up before 2 AM for the short window between moonset and astronomical twilight. However, the marine layer had rolled in while I was hiking to the beach, and I shivered until past sunrise time without even seeing a sliver of sky. The next day, since I had to drive from Heart of the Hills Campground and hike 45 minutes to Hurricane Hill, I rose before 1 AM.

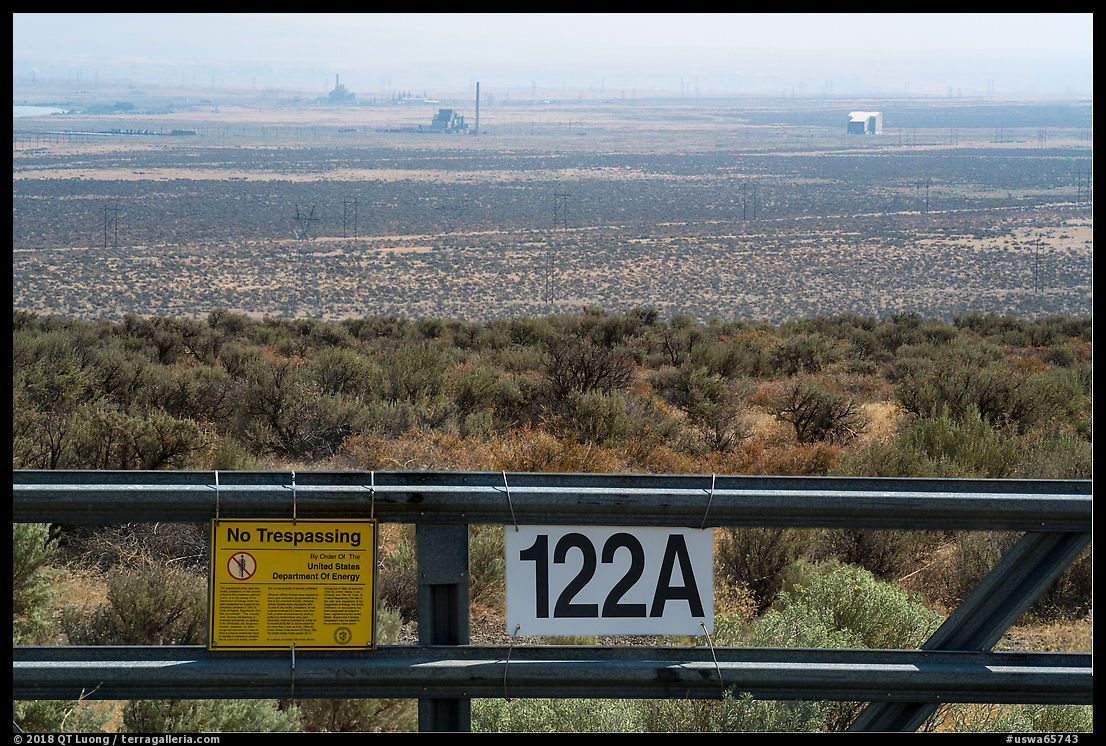
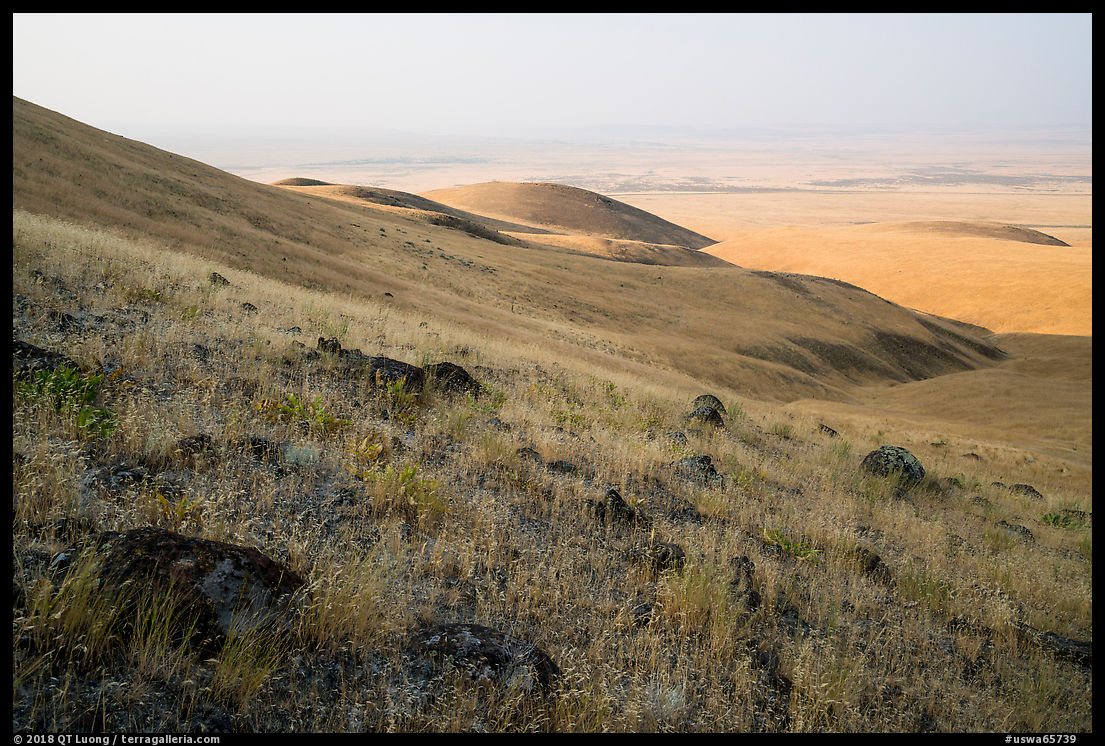
On the last day, temperatures in the inland plains of Hanford Reach rose above 100F. When I came home from the week-long trip, I went straight to bed. The next morning, I reached for my cameras, took the memory card out, and inserted into the card reader. This resulted in the dreaded:

Attempting to read the card with software

I reacted with mere annoyance at the computer, and tried to read the card from the built-in memory card slot of a laptop. The same message appeared. Growing worried, I inserted the card into a standalone backup device, and it said “Memory card not found”. Surely I would be able to see the files in the camera, since the last time it had been turned on, less than a day before, everything was normal and I was able to scroll through some images? Nope, like the computer, the camera said “Unable to use memory card. Format?”

The PhotoRescue software installed on my computer had been successful at rescuing files from a corrupted card in the past, however, it did not uncover a single file this time. Hoping for better luck with Lexar’s own Image Rescue software that came with the card, without the activation code handy, I contacted Lexar’s customer support. They were quick in providing me a download, but it did not help:

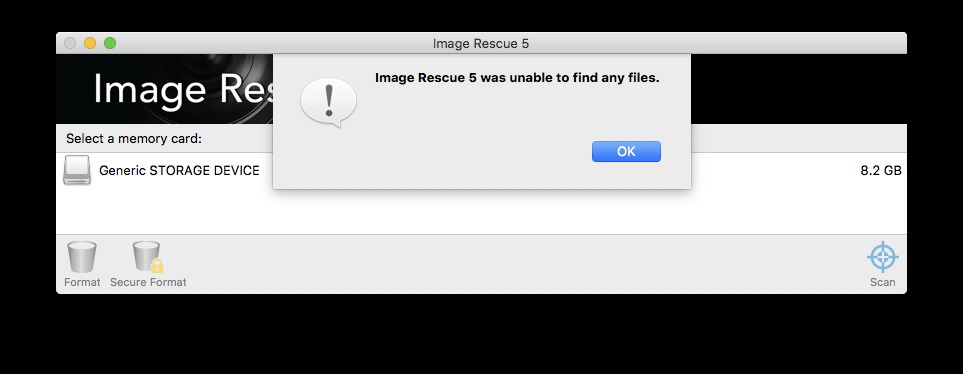
Note that the computer sees 8.2 GB, but it was a 64 GB card. Lexar support suggested several other apps, including Ontrack® EasyRecovery which has a “technician” version with a $500/year licensing cost. As those apps include a trial mode that allow you to attempt to discover files, and require you to pay the fee only to actually recover them, I took each of them for a spin without success. There are a lot of recovery programs around, but if the error is hardware rather than software, you can try all the programs in the world, and they won’t do you any good.

Dealing with physical data recoveries services

It was time to contact a physical data recovery company. All those companies have a similar mode of operation. You send them your media with pre-paid overnight shipping at their cost, they diagnose it and provide an estimate. If you approve the estimate, they attempt to recover files and charge you if the recovery is successful. Seems fair, right? The problem was that the quote from the Lexar-recommended company was quite a bit higher than I expected:

After a bit of shopping, I found another company which provided me a lower quote. I sent them the card via Fedex overnight and got the following diagnosis:

Despite numerous attempts to identify the source of the problem, we were unsuccessful in reaching a solution. At this stage it is clear that this is an extremely complex case that will require extensive research, time & use of in-house donor parts. Your media will be passed to our Research and Development department; They will be able to research & execute techniques such as safe removal, reballing and replacement of the core processor and other components containing device specific information and repairs to fractures in the tracks of the logic board.

The work we would attempt is a highly skilled process that is not infallible. The chance of a successful recovery once these processes are completed is approximately 74%. At this point most Data Recovery services would send the media back to you as they don’t have the ability to do such complex work, let alone any sort of R&D department. Our R&D department is one of the best in the world, and they are responsible for creating new techniques and ways of recovering data that allow us to sustain an overall 92% recovery rate. Currently, we have two options for you:

Option 1. You allow our R&D department to use the lab time, parts & cleanroom facilities needed to gain access to your data. This is a standard process that will be completed within 15-20 business days. To go ahead with Option 1 an upfront payment of $800.00 is required, and this covers everything the R&D department will need to provide you with feedback: all lab time, parts required from our library, and cleanroom usage. If we are unable to gain access to any of your data that initial fee is not refundable.

Option 2. We return your media to you via either our courier or standard option, and you incur no recovery costs as we were unable to recover your data.

Although the fee wasn’t too bad, I wasn’t going to pay upfront without a recovery guarantee, especially after my friend Tommy, a technology entrepreneur and all-around geek opined “These are extremely difficult and risky techniques. I’m skeptical that they have such capability and even if they do, I doubt that the success rate is 74%. I guess more like 25% or less”. I declined, received my media back a few weeks later via regular mail, and sent it to yet another data recovery company:

Would you have proceeded with the recovery at this price?

Although you don’t often read that in reviews, my main complaint with the Sony A7R2 cameras is sensor dust resulting from the mirrorless design and an ineffective sensor dust cleaning system – it mechanically shakes the sensor using the image stabilization actuators. To cope, I work with two camera bodies in order to minimize lens changes. The excellent 24-105 FE (review) stays on the primary camera which is used for most of the photographs, while I reach for the secondary camera when I need more specialized lenses. On that trip, I had failed to do drive backups and the damaged memory card was in the primary camera, which meant that it contained the majority of a week’s worth of work, and probably the best photographs. However, I retained usable images from the second camera, a few of which illustrate this post.

I decided against proceeding with the attempted recovery, saving me the potential disappointment of failure or costs. It is not that the pictures aren’t worth the amount asked. Rather, including all expenses, the trip cost me only a fraction of that amount. This math didn’t account for my time, but no matter how tiring the effort felt, that time was spent on a process that I largely enjoy. Losing the pictures did not rob me of the experiences I had nor of the scouting I did, and rather than looking back by investing in the recovery, I chose to look forward by saving the money for a repeat trip – and a new camera.

The larger conclusion here is that attempts to read a card with recovery software may not always work, physical recovery services are expensive, and also not guaranteed to work. Even after three decades in photography, the incident reinforced several lessons for me.

Memory cards can fail

The disaster drew home the point that memory cards do fail catastrophically. Both data companies found serious physical damage, but that was a card that had been moderately used for a year without any single glitch, so neither “dead on arrival” nor past any reasonable life expectancy – which by the way nowadays is longer than technological obsolescence. It had never been subjected to any form of abuse before as it spent most of its life in a single camera, was formatted after each download, and prior to failure went straight from the camera to a card reader. There were certainly no warnings nor reasonable explanations.

I have been using digital cameras since the first days of full-frame in the early 2000s (remember the $8,000 Canon 1Ds series?) without any card failure, while during that time, I have had to replace a half-dozen failed hard drives. This made me overconfident in flash technology.

If you browse the internet, you will see that I was far from being alone. Quite a few other professional photographers (some with scores of workshop clients) state that they have never experienced any card failure and that when it happened, they were always able to rescue images with recovery software. Clearly, my experience has been different. The fact that you’ve been lucky doesn’t mean that your luck won’t run out at some point, as it did for me – and others. As we will see next, a quick perusal of customer reviews shows that memory card failure is not that rare.

Cards are not equally reliable

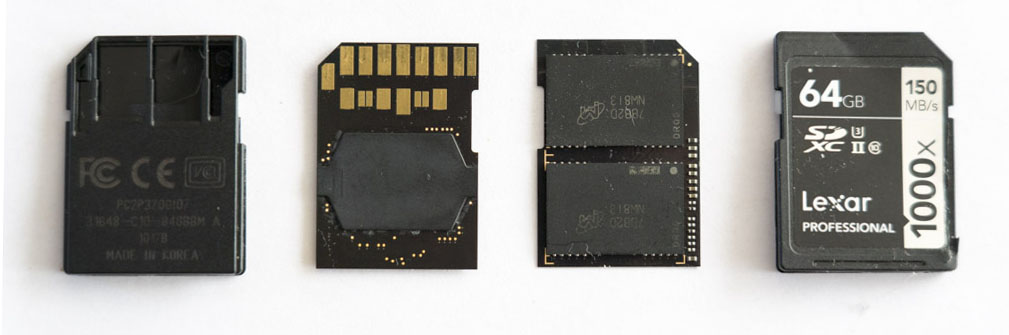
The card that failed is a Lexar Professional 1000x 64GB SDXC UHS-II/U3, which is amongst Lexar’s top line of cards, and deemed “professional” by the manufacturer. I used to believe that any memory card from a reputable brand would be reliable. If in addition, you bought it from a reputable vendor, chances that you’d get a counterfeit of questionable reliability would also be low. The preferred vendors are specialist stores such as B&H, but Amazon is fine, as long as you don’t buy from their third-party merchants. Sandisk and Lexar are two of the most well-known brands, and I’ve used exclusively their cards, depending on the best deal I could find at the moment.

Because of that belief, I didn’t pay much attention to customer reviews, adopting the attitude that nothing is 100% foolproof and unlucky folks can have a bad experience with any product. Besides, a quick glance at the ratings show that almost all cards are rated between 4-stars and 4.5-stars, so they must be good products, right?

It would have done me more good to read the Amazon customer reviews before buying the card, but after the card failure, I looked them up. One of the first 1-star reviews I read described the exact same experience I had:

I literally had just reviewed the pics on my Nikon D610 camera and inserted the card into my card reader and got a message that it was not formatted (which it was – I format every card when it’s new). I put the card back into my camera – and same Format error.
Although I didn’t read all the 300 1-star reviews, the ones that I sampled overwhelmingly bemoaned card failure. Since this was becoming quite relevant, I looked at the 1-star review tally: 15%. That’s almost 1 out of 6 reviews, odds similar to the Russian Roulette. If someone killed themselves playing the game, I don’t think you’d attribute his death to “just bad luck”. Of course, this is not a scientific observation because several factors affect review-writing, but you get the idea. On the other hand, it is instructive to compare the percentage of 1-star reviews for a few other UHS-II cards: If we assume that 1-star reviews are exactly the type you’d leave if the card totally failed, from that small sample, we can see that some cards are four times more likely to fail than others. This data also sugggests that there is a problem with those UHS-II Lexar cards. On the other hand, the Lexar UHS-I card that I have used for several years gets a convincingly low 3% of 1-star reviews. The lesson here is that not all cards are equal, even amongst those from a top brand. And if they can have such a high failure rate, think about cards from less reputable or conterfeit brands! By the way, looking at those numbers also indicate that failure rate with SD cards is far higher than CF cards.

Pay attention to negative customer reviews

Some negative customer reviews are frivolous because they are rooted in user error, or because they concern themselves with delivery rather than the product’s quality or performance. However, negative reviews are generally more significant than positive reviews.

If you think that one shouldn’t focus on the negative while the vast majority of reviews are positive, consider that on Amazon, the average rating for a product is 4.4 (out of 5) as found here by analyzing 7 million reviews. Even a product with an average 4.0 rating (4-star) is below average. The large majority of products are rated above 4.0, so the difference between a great product and a subpar product is less than 1 (star) on average. On the other hand, we’ve just seen that the number of 1-star reviews for different cards varies by a factor of four.

Consider dual card slot for backup

If your camera has dual memory slots, the most obvious and foolproof way to prevent data loss from memory card failure is to set the camera to write to two cards simultaneously so that it creates a back up in real time. Now that memory card have become very affordable, you can buy two sets of cards with enough capacity to last you for your whole trip so you don’t have to reuse any card, and you always keep two datasets.

Dual memory card slots are standard in high-end DSLRs cameras, and after omitting them in their first two generations of mirrorless cameras, Sony has started providing them in the A9 and A7 mk3 series (a good example of listening to customers, since there were complaints about the single-slots in previous cameras, many of them from Canon and Nikon users), with the caveat that the second slot is UHS-I, so using simultaneous writing will negate the benefits of the faster UHS-II main slot. I was thinking of skipping the A7R3 generation and wait for the inevitable A7R4, but the incident prompted me to upgrade.

Recently announced full-frame mirrorless cameras from Canon and Nikon have been greeted with an inordinate number of Internet comments about their single memory card slot. We saw many claims that no professional would use cameras with a single memory slot.

But the fact is that some professional photographers refuse to use the second slot for back up even when their camera has one, and for specific reasons. To start with, when I was shooting the Canon 1Ds series, I did not set up the cameras to simultaneous write, possibly because the size of the memory cards available back then made it mandatory to perform daily backups. More recently, Lloyd Chambers uses his dual-slot Nikon as single slot SD cameras because he is annoyed by the camera defaulting to the wrong card – this reminds me of Ted Orland’s aphorism “Owning more than one lens assures that you will always have the wrong lens on the camera for any given picture” – while Thom Hogan uses his dual slot Nikon as a single slot XQD camera because the SD slot slows down the camera. Colby Brown thinks that “there is no point in making two copies of your SD cards” and accordingly sets his Sony A7R3 to auto switch as he estimates he has a higher chance of missing a shot because of a full card than a SD card failure – what I used to do with the 1Ds.

I wonder if those statements about the rarity of card failures do a disservice to less experienced folks, because what isn’t clearly disclosed is that, although those photographers apparently don’t fear card failure, they also have extensive backup strategies using hard drives.

Have a solid backup strategy

If there is one thing that I wish others learn from my misfortune, it is that a solid backup plan is necessary. You want multiple copies of your data in multiple places. There are quite a few ways to go about it.

Several brands now offer ruggedized portable drives. SSDs, which have fallen in price, are much less prone to damage than HDDs. Using drives for backups, you can do a daily (or even more frequent) backup, and have more than two copies of your data.

On the other hand, compared to the in-camera dual slots backups, drive backups are not in real-time, so you could possibly lose a day of data. More importantly, you need to remember and take the time to perform the backups – when maybe you’d just rather go to sleep. During that ill-fated trip, I carried a portable drive, yet due to a combination of fatigue, loaded schedule and complacency, I did not use it. Another reason was that my portable drive had experienced a glitch during the previous trip, forcing me to skip backups, which in turn broke my habit of making them regularly. This brings up the point that with drive-based backups, you have to carry more gear, which could also fail. Even if you carry several USB external drives, you still depend on your laptop for your ability to make drive backups.

With in-camera dual-slot backups, given the availability of huge capacity cards, you could shoot most trips on a single pair of cards, but if something catastrophic happened to your camera, you’d lose everything. Alternatively, you could use smaller cards, and once a pair of card is filled-up (or another threshold in capacity or time is reached), each of them can be stored at an independent location to minimize the risk of loss due to theft. While the second approach increases the chances of a problem because you have more cards to manage, it minimizes the adverse effects of problems.

For now, I have settled on an approach which I think provides me the most redundancy with the least effort: use the second slot of the A7R3 for real-time backup with a medium-sized card, plus do a daily backup on a single self-contained portable hard drive. My choice is the HyperDrive ColorSpace UDMA3 that I fit with a SSD drive. I generally prefer such a device to a laptop because they are considerably smaller and much faster to deploy for backup.

Eventually, my data loss was caused by my own neglect. I let my guard down and did only a few trips without backing up, and see what happened. This is just my experience and one data point, but I hope it’s been useful to you to read about it. What is your backup strategy? Did you experience a catastrophic memory card failure that you’d like to share?

Twice the Same River: Photographing Tinkers Creek Gorge, Cuyahoga Valley National Park

Observing natural changes is a rewarding aspect of revisiting a place, as I did for the Tinkers Creek Gorge of Cuyahoga National Park – obscure and far from California. The water flow fluctuated, and you can see in this post which conditions worked best for each scene and how I adjusted my composition in response to the changes.

Bridal Veil Falls

Cuyahoga Valley National Park is unusual in that the National Park Service allows local parks within its boundaries to operate independently. Located in the northeast corner of the park, the Bedford Reservation is one such local park, managed as a city park by Cleveland Metroparks. Its highlight is Tinker’s Creek, the largest tributary of the Cuyahoga River, which has carved a deep gorge declared a National Natural Landmark.

Bridal Veil Falls is reached via a short walk (0.3 miles) from a trailhead along Gorge Parkway in the Bedford Reservation. Since it shares its name with the prominent 620-feet waterfall in Yosemite Valley, I was quite underwhelmed by the sight on my first visit. Although the narrow stream of Deerlick Creek tumbles down maybe 30 feet, it does so along a gentle slope rather than a steep drop, and the water flow was low enough that it would have taken some imagination to see a bridal veil there – the photo processing I did was unusually heavy. However, twelve days later, robust rains had changed the conditions enough that most of the shale rock was covered by whitewater. With that infusion of water, Bridal Veil Falls began to live up more to its name.

Sony A7R2, TS-E 24mm, 0.6 s. at f/16, ISO 50

Sony A7R2, 16-35 @ 19mm, polarizer, 3.2 s. at f/13, ISO 100

Sony A7R2, 70-300 @ 80mm, 0.8 s. at f/16, ISO 100

Viaduct Park

Viaduct Park, also part of Tinkers Creek, is under the radar, maybe because it is located just outside the boundaries of the national park. The steep forested gorge, which was not logged due to its rugged terrain, makes it easy to forget that Viaduct Park is surrounded on three sides by urban development – which is never too far in Cuyahoga Valley National Park. Tinkers Creek being a much larger stream than Deerlick Creek, the increased water flow and water opacity resulted in a reduced contrast between the whitewater and the smoother parts of the current. More water doesn’t necessarily make for a better stream photograph.

Sony A7R2, 24-105 @ 24mm, polarizer, 0.8 s. at f/22, ISO 50

Sony A7R2, 16-35 @ 21mm, polarizer, 0.8 s. at f/11, ISO 50

In addition to the creek, Viaduct park includes ruins of an old mill, an old viaduct, and a man-made tunnel through which the creek flows. If I had used the same composition for the high-flow image as for the low-flow image, a mostly cream-colored creek would not have balanced well against the dark forest as in the initial composition where the water was darker. However, I noticed that the higher flow created eddies not present with lower flow. A long exposure captured a circular shape which together with a dark rock formed a counterpoint to the tunnel opening.

Sony A7R2, 24-105 @ 40mm, polarizer, 0.6 s. at f/22, ISO 50

Sony A7R2, 16-35 @ 19mm, polarizer, 4 s. at f/22, ISO 50

Great Falls is not a tall waterfall, but its width and straight drop can make it more impressive than its a 15-foot height would suggest. On my first visit, no water was flowing over most of the drop. I used a tight composition to emphasize the section where most of the flow was occurring, also minimizing the visual extent of the bare rocks on the river bed, and using fallen branches to direct the eye towards the most appealing part of the waterfall, where low flow created texture. On my second visit, the waterfall was now spanning the entire 80 feet width of the outcrop. I framed the photograph with a wider angle of view again, this time to depict the almost the entire wall of cascading water, and now that the riverbed with filled with water that continued the flow of the waterfall, I also made it a prominent part of the composition.

Sony A7R2, 24-105 @ 60mm, polarizer, 0.6 s. at f/22, ISO 50

Sony A7R2, 16-35 @ 30mm, polarizer, 1.3 s. at f/16, ISO 50

Photographing Wet Places in a Dry Land, Mammoth Cave National Park

Mammoth Cave National Park is generally a dry place. I explore a few out-of-the-way watery places within the park, while discussing some of the compositional strategies I used in those relatively plain scenes.

Sloan’s Crossing Pond

Water has made the longest cave in the world. The karst landscape of Mammoth Cave National Park is characterized by water being quickly channeled underground. Streams are few and little surface water is available. Sloan’s Crossing Pond provides important wetland habitat. Its textures are not found elsewhere else in the park, and it is also a rare spot with an opening from the forest.

How did I photograph Sloan’s Crossing Pond? I timed my arrival for the late afternoon. Reflections in water surfaces are an important part of their photographic appeal, and they are more clear when the water is in the shade. I walked the half-mile trail around the pond to look for different viewpoints.

My normal operating mode is upon arriving at a scene to first seek a wide-angle image. Usually, a quick glance is enough to tell if there is a compelling composition, and then it is a matter of framing and balancing elements, which I do instinctively. There is much more to landscape photography than the wide-angle image. The second phase involves more discovery and observation, as I identify the details of the grand scene that I find the most interesting. It takes time and a more deliberate mind to find those images, but the images reveal the natural features of a place in a deeper way and are often more personal. An easy way to start finding those images is simply to switch to a longer focal length and scan the scene. The following images are examples of such details found from the previous image.

Green River Ferry

The Green River crosses the entire length of the park, and from what I read makes for a wonderful float trip, but there are relatively few access points to see the river from land. The most well-known, because it is close to the cave entrances, is the Green River Ferry. While it is fun to make the crossing or observe the unusual ferry operate, the surroundings aren’t too natural.

The Green River Ferry is the only ferry which is currently active in the park, but there used to be more. Although they are now abandoned, their access roads lead to river viewpoints where you’ll find few other visitors.

Houchin Ferry

The river access point with the most possibilities is Houchin Ferry, located at the western edge of the park. The Houchin Ferry Campground is a delightful place to spend the night, as you can set your tent on a grassy area next to the river. It is much smaller and intimate than the campground located near the visitor center, and because it is out of the way, even arriving on a Friday evening without a reservation, several campsites were available. Instead of securing a site upon arrival, I proceeded to catch the sunset colors.

Mammoth Cave National Park consists of heavily forested gently rolling terrain, so most of river views are limited by the forest, but they could be remarkable with the right conditions. As Kentucky has high humidity, and the many cave openings provide quite a bit of cool air, there was a good possibility that that fog would roll in at night to burn in just for sunrise, but I did not get lucky that morning. Right at the landing, a power line intrudes into compositions. Looking for alternatives, from the campground, I followed a narrow user trail leading to the riverbank, which turned out quite muddy and slippery. Besides ruining shoes, the mud doesn’t make for a great foreground, especially with the footprints. My first attempt to mitigate the issue was to hide it with river driftwood.

I then tried a second solution, which was to make the foreground less prominent. I placed its closest elements further away by placing the horizon higher in the picture. The sky, now occupying a larger part of the image, needed something more, and I partly filled it with an overhanging branch. A frequent problem when “framing” pictures with trees is that they bear little relationship to the rest of the image. I avoided that by finding a branch in the water to echo it, and I made sure it was clearly defined by placing part of it against the reflection of the sky.

Dennison Ferry

Dennison Ferry is at the end of a gravel road, and lightly visited. Unlike Houchin Ferry, it is not a boat launch, but rather a canoe launch. Steep stairs lead to the river, whose bank at this point is steep, precluding wandering around, unlike at Houchin Ferry. The only place to stand at is at the bottom of the stairs. During the first exposure I made, light rain created texture on the water’s surface, and I made it the main subject of the picture.

After the rain stopped, the surface of the water changed to a mirror. I noticed a bit of fog rising in the distance, and liking the atmosphere it created, I framed a different image from the same viewpoint.

Of course, visitors come to Mammoth Cave National Park primarily to check out the cave. Besides, what interested me the most in the 80 square miles of rolling hilly country are the sinkholes and limestone cliffs, which offer subtle clues that a vast cave system lies beneath. However, this time I checked out those wet places in a quest to explore each corners of our national parks. Even if you don’t find them remarkable, I hope you’ve enjoyed the peek at my approach to composition.

Polarizing Filters and Vignetting on a Sony FE 24-105 f/4: Filter Comparison

The polarizing filter is such an essential tool because it allows you to control reflections, darken skies, cutting haze, and increase color saturation. Although using 24mm had become second nature for me to use, with a polarizer on the Sony FE 24-105 f/4, I found myself zooming in a bit until the dark corners (as illustrated in the previous post disappear. After a few months of that, I tried to look for a better solution, and it meant trying new filters.

The problem of vignetting by polarizer has long been recognized by the manufacturers. Several offer “wide-angle polarizers” which are designed to mitigate the problem by reducing the filter’s thickness. The thinnest of those filters have no front filter threads. This prevents the use of lens caps for protection, something that I was not fond of in my past use of similar filters.

My Tiffen polarizing filter is reasonably thin and inexpensive. In an extensive comparison, Roger Cicala found that all the tested polarizing filters worked equally well. In order to solve the vignetting problem, I tried several thinner polarizers. One of the difficulties is that the filter’s thickness is not an information is not readily provided by manufacturers, at least in a consistent way. Some provide overall thickness, while others do not count the lens threads. I was able to get this information only after buying the filters, when I measured the thickness with a digital caliper.

The filters

Here are the circular polarizing filters considered in the comparison, all in 77mm: A few things are worth noting about some of those filters. The Firecrests come in a useful box (similar to the B+W but larger) with hand-written “quality control” inscriptions. They have a distinctively warmer tone than others, which you may or may not like. In addition, they turn out to transmit about 2/3 f-stop more light than the other filters tested, which generally is a desirable feature. The Heliopan Circular Polarizer Slim Filter is made of brass unlike the others which are aluminium. Despite it having no front threads, it is slim only compared to the regular Heliopan, which is one of the thickest filters I own at 12.7mm – not included in the comparison because it is not a 77mm.

In addition, I also tested two “protective” filters:

  • B+W UV 5.8mm
  • Hoya UV 6.3mm

The comparison

I photographed a scene from the Evergreen Valley where I live at the 24mm setting on the FE 24-105mm with each filter. First, for reference, here are uncorrected images with the bare lens, showing vignetting respectively at f/4, f/8, f/16:

Uncorrected f/8 images, ordered from the least vignetting to most vignetting:


B+W UV (5.8mm)


Hoya UV (6.3mm)


Firecrest Ultra Slim (4.6mm)


Firecrest Super Slim (7.4mm)


Hoya Pro 1 (7.4mm)


Heliopan Slim (7.4mm)


Tiffen (7.7mm)

Uncorrected f/4, f/8, f/16 with the least vignetting polarizer (Firecrest Ultra):

Uncorrected f/4, f/8, f/16 with the most vignetting polarizer (Tiffen):

Lightroom-corrected f/4, f/8, f/16 with the least vignetting polarizer (Firecrest Ultra)

Lightroom-corrected f/4, f/8, f/16 with the most vignetting polarizer (Tiffen)

Results and conclusion

Here are the findings from the filter tests:
  • The protective filters did not result in more vignetting than the bare lens.
  • For the polarizing filters, there is a strict correlation between the filter thickness and the amount of vignetting. From less vignetting (better) to more vignetting (worse): Firecrest Ultra, Firecrest Super, Hoya Pro1, Heliopan Slim, Tiffen. In view of that, it is regrettable that the thickness information is not provided by manufacturers, but given the choice between a regular model and a slim model of the same brand, the additional expense of the slim model is justified. I am not sure why the Firecrest Ultra vignettes slightly more than any of the protective filters, despite being slimmer.
  • The worst vignetting occurs wide-open. It improves by stopping down, but does not go away.
  • Vignetting from the polarizer is not entirely corrected by applying a profile in Lightroom, but in the best case (Firecrest at f/16) it is barely noticeable.
I chose to keep the Firecrest Ultra. Leaving the lens hood permanently provides enough protection for me. If a filter without front threads is not acceptable, the Firecrest Super is a good choice.

Update June 2024: The Firecrest Ultra has turned out to be a very fragile filter. I have cracked two by leaving them in a pant’s pocket. Not only that, but they are currently quite difficult to replace. The only source I have found on the Internet is the UK site of the manufacturer. They ship worldwide fast, but at a cost!

Polarizing Filters and Vignetting on a Wide-Angle Lens: Corrections in Processing

Modern zoom lenses are quite amazing compared with what was available a few decades ago. A lens such that the Sony FE 24-105mm f/4 G OSS (reviewed here) offers a great combination of sharpness and versatility in trans-standard focal lengths, all in a relatively compact package – consistent with the appeal of their A7 series cameras, Sony emphasizes that this lens is the smallest and lightest of its class.

However, compromises still have to be made for such lenses. In typical fashion, Sony designed the lens with a tight image circle, meaning that the area illuminated by the lens barely covers the full-frame sensor. This results in strong vignetting, the darkening of corners and edges compared to the image center. To keep the lens compact, a 77mm filter thread was chosen, instead of 82mm. As a consequence, corners are further darkened by a thick filter as the filter cuts into the field of view of the lens.

The problem is particularly noticeable with a polarizing filter, because even a thin polarizing filter is still quite thick compared with other filters. Here is a typical example at 24mm, f/11, from the Cadiz Dunes of Mojave Trails National Monument:

The image was photographed on the Sony FE 24-105 f/4 lens on the Sony A7R2 with a Tiffen filter which, at 7.7mm, is relatively thin – by comparison, my B+W and Heliopan polarizing filters are respectively 11mm and 12.7mm thick. This seems to contradict Ken Rockwell’s statement about that particular lens:

There’s no need for thin filters. Go ahead and use your standard rotating polarizer and grad filters. I can use fat 77mm filter and get no vignetting at 24mm on full-frame
It’s not that Rockwell’s website is “a work of fiction, entirely the product of [] imagination and personal opinion”. Rather, he shoots exclusively in JPG, in which case by default the camera automatically corrects vignetting by applying a profile. For example, on the Sony there is a setting “Lens Comp.” and within, the default for “Shading Comp.” is “Auto”. With that default, the image that you see in the viewfinder or LCD has the correction applied, so you don’t even see the full extent of the vignetting. Personally, I prefer to turn “Shading Comp.” to off to see what I get in the RAW file, because such a correction is not applied to a RAW file. With “Shading Comp.” off, the vignetting within the bare lens (example here) is barely noticeable, however, the vignetting caused by a polarizer is evident.

Provided that Lightroom has a profile for your lens and camera combination, it does the correction automatically on the RAW file much the same way as the camera corrects JPGs. “Enable Profile corrections” in the Lens Corrections panel is checked by default. By the way, acquiring the FE 24-105mm forced me to upgrade my operating system, which broke many applications! For some obscure reason, the version of Lightroom I was using was not supporting that particular lens profile, so I needed to upgrade to Lightroom Classic CC. In turn, Lightroom Classic CC was not supported by the version of Mac OSX I was running.

By default, the profiles corrections consist of both distortion and vignetting (both sliders are at 100%). We are concerned here with the vignetting, so let see what happens if we move the “Distortion” slider to 0% and keep “Vignetting” at 100%:

This was not too helpful!

Getting “Distortion” back to its default 100% definitively improves things. This tells us that the improvement is due to the corners being cropped by the distortion correction rather than being brightened by the vignetting correction. If you like to compose tightly to the edges and not crop like I do, this can alter your compositions. Parts of the image’s exposure are also affected, with fewer highlights being recoverable, as can be seen in the upper corner.

For all those reasons, I leave “Enable Profile corrections” off in my own default, and instead apply it on individual images on a case-by-case basis. Most of the time, those corrections are not necessary. A slight amount of vignetting can be desirable, as it helps keep the eye in the image center, and distortion is only noticeable in landscapes with a straight horizon line. Another problem with applying those corrections by default is that they slow down Lightroom quite a bit.

By the way, you can notice in the Lightroom screenshot that “Remove Chromatic Aberrations” is checked. By Lightroom defaults, it is not checked, although of the two boxes that is the one that I enable in my own defaults because there is no downsides to it. In my opinion, Adobe got it wrong with their two defaults here.

Even with the distortion correction, dark corners are still somehow present and distracting. To finish the image, I needed to crop manually to get rid of them.

The other problem with using a polarizer on a wide-angle lens is that this can result in uneven polarization of the sky, since the polarization depends on the angle relative to the sun. The polarizer’s effect is strongest a 90 degrees from the sun. In the image, the polarization is most intense at one-third of the frame which was at 90 degrees, and as you get over or under that angle, the effect is reduced. The overall effect is a darker blob, which is quite noticeable in a cloudless sky. It is quite easy to miss that effect in the viewfinder. In this case, I previously had the zoom set at a longer focal length, where the polarizer was just fine, and didn’t pay enough attention as I set the zoom to 24mm. Be careful with polarizers on wide-angle lenses!

Totally fixing the uneven sky in processing is very time-consuming, since it involves rebuilding the sky in Photoshop – this discussion gives an idea of the techniques involved. I quickly mitigated the problem in Lightroom by reducing the contrast and brightening shadows on a gradient selection of the sky, resulting in the finished image above.

Utilizing Weather in Shenandoah

I have found the adage “Bad weather makes for good photographs” generally true. Cloudless days are not what I look forward to for daytime photography. There are two approaches to finding favorable weather conditions for landscape photography. You can go to a location based specifically on the weather forecast – the best is little-known Meteoblue because it includes cloud cover at different altitudes. Instead of looking for weather, you can wait for it. I somehow used both approaches on the same day in Shenandoah National Park.

I’ve heard some photographers and workshop leaders drive hundreds of miles in a day to place themselves at a scene with “epic” light for a sunset. I am not a big fan of that approach. When I am out in nature, the experience of enjoying the environment is paramount. Spending hours rushing in a car is not a way to do it. Although I admire those epic pictures, I feel that there is more to nature than that, and I’d be missing a chance to make those discoveries if I was focussed only on getting the epic, pre-conceived, picture. Rather, my approach in looking for weather is to make smaller adjustments to my itinerary based on weather conditions, as well as looking for subjects appropriate for the weather.

The day had started sunny, but as I drove down the Skyline Drive in Shenandoah National Park and the road climbed to higher elevations, clouds started to roll in, obscuring views. I abandoned my plans for a long hike to a mountaintop, switching my interest to the forest. I love the depth and atmosphere that fog brings in any forest, and the thicker, the better.

Any place in the park is a good starting point to explore the forest. Whenever I encountered a section of dense fog along the drive, I would look for the nearest pullout or trailhead. Opposite the Little Hogback Overlook, beautiful ferns cover the ground, and so do they along the section of the Appalachian Trail accessible from the Hogback Overlook. When the fog started to dissipate, I’d go back to the car, and then keep driving until another area of dense fog.

By the time I arrived at Big Meadows, the rain was quite heavy. Rainy weather is excellent for photographing in the forest, but having photographed in rain with the benefit of fog earlier in the day, I didn’t feel like venturing in the downpour. I went to the Big Meadows Lodge for a picture of the inside. There, I found a cellular signal, which allowed me to figure out that the rain might stop. If the weather was to break, Big Meadows was a good place to be as, like the name implies, it is only one of the large open areas in the park. It is not a natural meadow but rather was cleared by the early settlers who were evicted to make room for the national park. While most of the park has been allowed to revert to a wild state, the NPS has chosen to maintain Big Meadows in its historic condition. Hawksbill, highest peak in the park, wasn’t too far, but the sound of thunder made it clear hiking high would be too risky of a proposition. I hung around and got out when the rain started to subside, and almost like on cue, the rainbow appeared just before sunset time.

Photographing Waterfalls in Whiteoak Canyon, the scenic gem of Shenandoah National Park

Shenandoah National Park is a long and skinny park. The Skyline Drive runs its entire length of 105 miles. For most of it, the road is never more than a few miles from the park’s boundary on both sides. For this reason, besides the Appalachian Trail that closely parallels the Skyline Drive, there are few hikes in the park that aren’t short. The two best ones are the Old Rag Loop (8.8 miles, 2,400 ft elevation gain) which offers great scrambling and views, and the Whiteoak Canyon/Cedar Run loop (8 miles, 2,750 ft elevation gain). The later combines two hikes: the Whiteoak Canyon, a steep gorge with six waterfalls, has been called the “scenic gem” of Shenandoah, and along Cedar Run, two more waterfalls can be seen (NPS map).

Sony A7R2, polarizer, 24-105@57mm, 1/6s at f/8.0, ISO 200

During my autumn trip to Shenandoah, water levels were quite low for a waterfall hike, but last spring, conditions looked wet enough. Stopping at the visitor center for unrelated information, I thought I might as well ask for trail conditions. I was glad I did, when I was told that there was so much water that the connector between Whiteoak Canyon and Cedar Run was entirely flooded. Starting from Cedar Run, I might have never made it to Whiteoak Canyon. Instead, I changed my plans to hiking Whiteoak Canyon as a out-and-back hike. Always a good idea to do a last minute check with the rangers!

Sony A7R2, polarizer, 24-105@47mm, 1/3s at f/13, ISO 100

The Whiteoak Canyon Trail was quite wet from the start. Hiking became easier after I gave up on trying to keep my feet dry by avoiding the puddles – I had packed two pairs of shoes for my trip. The trail at first doesn’t follow the river, and the sun was still quite bright, so I didn’t photograph much until the bridge over the Robinson River, about two miles from the trailhead. Those bridges always provide interesting vantage points. I waited for a bit of cloud cover to soften the light and reduce the bright spots. Stream and waterfall images are all about the flow, and there is nothing like bright spots and shadows to interupt it. Compared with the photograph I made on the way back at dusk, the afternoon image with some hints of sunlight was more lively. Always a good idea to photograph in different light conditions!

Sony A7R2, polarizer, 24-105@39mm, 1/5s at f/16, ISO 100

After the bridge, the trail mostly followed the Robinson River, providing numerous compositions. Despite the length of the hike, I made sure to carry my tripod to be able to use a range of shutter speeds because water would be a primary subject. Photographing backlit made the leaves glow a fluorescent green. Since I wanted a slow shutter speed to blur the water, I had to wait for a lull in the breeze so that the leaves would not be blurred.

Sony A7R2, polarizer, 24-105@55mm, 1.3s at f/11, ISO 100

Although the cascades and waterfalls over Robinson River are the main attraction in Whiteoak Canyon, because of the wet conditions, water was flowing everywhere (including on the trail), creating ephemeral waterfalls of more delicate beauty than the main stream. Finding it more exciting to try and capture the transient, I made sure to look around.

Sony A7R2, polarizer, 16-35@23mm, 1/13s at f/11, ISO 100

Although a (variable) neutral density filter is ideal for photographing streams, it is not necessary. When the water is not in direct sunlight (a situation to be generally avoided), using a polarizing filter and stopping down gets me shutter speeds which are slow enough to blur the water. By varying aperture and ISO, it is possible to get a range of shutter speeds. Digital photography is particularly great for photographing water because you can experiment with shutter speeds and get immediate feedback. Some scenes look better with the water entirely smoothed, for some it is preferable to freeze the motion a bit, and often a combination of both in a single frame gives the most dynamic result.

Sony A7R2, polarizer, 16-35@16mm, 0.6s at f/8, ISO 250

As with all river hikes in Shenandoah National Park, you start from the ridge (elevation 3,385 ft), and the sound of the waterfalls entice you to hike further and further downhill. Remember you’ll have to work your way up. My favorite part of Whiteoak Canyon was an off-trail point at about three miles, elevation 1,750 ft, where several branches of the stream converge, forming a striking wall of waterfalls. In this photograph, the role of the polarizer was to increase contrast between the whitewater and the darker, more smooth sections of water, as well as increase the saturation of the leaves, rather than slowing down the shutter. Instead, at base ISO it resulted in a shutter speed which was a bit too low for the effect I preferred, so I raised the ISO.

Sony A7R2, polarizer, 16-35@16mm, 1.3s at f/8, ISO 100

On my way back, I detoured again to a rock ledge a short distance downstream from the bridge that provides a fine and vertiginous view of the upper falls, the only such large scene along the trail. In the afternoon, the waterfall was in the shade, but the surrounding trees and cliff were sunlit. Now the scene was softly lit, with a bit of fog providing some atmosphere. Even though a loop can be a more satisfying experience, revisiting a scene on an out and back trail even within a few hours pays.

Sony A7R2, 16-35@22mm, 25s at f/4, ISO 800

Further back, I had spotted a smaller river scene along the trail, but the afternoon light wasn’t favorable. Since it was now dark, I was able to illuminate the scene with a flashlight (described here) creating even light that appears at first like sunshine, but without the distracting shadows that would have resulted from sunshine. Darkness is not a reason to stop photographing.

How to Charge Digital Cameras in the Field

Modern digital cameras can go through batteries quickly. One can just carry enough camera batteries to last for an entire short trip – I own more than a dozen. If you stay under a roof at least every other night, plugging into AC power to recharge your batteries is easy. Otherwise, another way to charge those batteries is needed. In this article, after surveying all available options, I detail the solution I settled on after trying many, down to brand and models.

In 2016, I flew in by floatplane and spent five days at Brooks Camp in Katmai National Park in Alaska. Without access to AC power nor a car, I relied exclusively on external batteries to recharge camera batteries for my two power-hungry mirorless Sony A7R2s.

Charging from the car

On a trip where you drive abundantly each day, you can charge camera batteries using the car 12V DC power from the cigarette lighter. The manufacturer-supplied camera battery charger often operates only on 110V AC, and you could use a power inverter to obtain 110V power from the car’s 12V. Besides the fact that you are converting 12V to 110V and then back to a lower voltage in the camera battery charger, those devices can heat up quite a bit and are not the safest to use. The alternative is to buy a third-party camera battery charger that operates from a lower voltage, either 12V or a 5V (USB). I’ve used both and have a strong preference for USB as discussed later. If I need to recharge camera batteries quickly, unless I am driving non-stop, I will plug them to an external battery rather than to the car’s 12V outlet. This allows camera batteries to recharge even during stops. At the same time, I recharge other external batteries that are not in use on the car’s 12V outlet.

Left to right: dual and quad cigarette lighter to USB adapters, power inverter.

Charging while camping

Private campgrounds often provide AC power. In general, public (including National Park Service) campgrounds do not provide AC power at regular campsites. It is found in the bathrooms, where the plugs are meant for shaving, not recharging devices. Charging batteries from your parked car runs the real risk of depleting your car’s battery and leaving you stranded. Mitigating this risk by leaving the engine running consumes gas and can be a nuisance. Solar could work if you have a campsite set during the day, but is not dependable since efficiency depends on weather conditions. With no access to AC power, the best way to recharge your camera batteries is from external batteries. Depending on the trip I carry anywhere between two to half a dozen 10,000mAh 5V batteries.

The Kendesnii Campground in Wrangell-St Elias National Park, Alaska, where we stayed for three nights, has great views, but no electricity.

Multiple-purpose batteries v. Single-purpose batteries

I always leave in the car a Bestek battery primarily advertised as a jump-starter that works extremely well for that purpose. It is also advertised as a power source. However, although according the manufacturer’s stated capacity it should be able to charge at least 6 Sony batteries, it barely charges 2. The discrepancy is even worse with a Tekkeon battery that can deliver almost any voltage from USB to the 19V needed by laptop computers. I used to carry that one in all my travels for its versatility, before discovering how inefficient it is for charging. If a battery has to support a variety of loads ranging from jump starting cars to charging cellphones or cameras, it is difficult to design a high efficiency power converter across such a wide range and to find the perfect battery technology to perform well in every case. For example, to jump start a car, you need to deliver huge amount of current (in the order of a few hundred Amps) for a short time. To charge a camera battery, you need to delivery mA for hours, at the opposite end of the application spectrum from jump starting a car. The bottom line is that the most efficient batteries are those that deliver a single voltage and are meant for a single type of use (charging other batteries) and nothing else.

12V v 5V (USB)

Which voltage to choose? The fact that it is easier to convert voltage down than up favors the batteries and chargers that use the lowest voltage that is common, which is the 5V of USB-powered devices. Not only they are more efficient in use, but also having the same input and output current makes things simpler to manage. The three 12V external batteries that I own need to be charged by plugging into AC power, whereas all USB external batteries can be charged from AC, 12V, or USB. USB ports are ubiquitous, being found in computers, recent cars, and solar panels. With the proliferation of mobile devices that are all USB-charged, external USB batteries are much more common than 12V external batteries, and available in a variety of shapes and sizes to fit any situation. In addition, most modern cameras can charge their battery if you plug a USB cord, so you always have a USB camera battery charger with you. The only reason to use 12V external batteries would be if you have devices that are 12V-powdered, which is a standard in the video world, and is also used by some motion-control apparatus.

12V power kit. Left to right: Dynamic Perception 12V battery (2700mAh, 194g), Tekkeon battery with extender (7200mAh, 810g), Wasabi Power Sony NP-FW50 charger.

Choosing USB external batteries

I have now standardized on 5V power. As illustrated by the example above, battery manufacturer specifications are not to be trusted. The only way to find one that works reliably is to test. A meter helps by displaying the total energy delivered. After testing several brands and models, I have settled on the 10,000 mAh Anker external batteries. I’ve been told that they use cells from Panasonic which makes some of the highest quality Li-ion batteries in the industry. They deliver about 90% of the specs (some others have been as low as 25%, and even Anker’s 13,000 mAh battery whose dual USB ports are useful, wasn’t as efficient), have some of the best capacity to weight ratio of any external batteries, and are cost-effective. If you need a more rugged battery the Goal Zero devices (such as this one) have very nice features but are quite more expensive.

Charging camera batteries from USB external batteries

You’ll have to buy a third-party USB camera battery charger. I use the OAproda NP-FW50 for Sony which costs less than $10, and equivalent products are available for other camera brands. They are so much more versatile, since you can use them with AC, 12V, and USB, and a side benefit is that they are smaller and lighter than the manufacturer-supplied AC camera battery charger. By the way, the same is true of other devices as well, for instance USB-powered headlamp, lanterns, and AA/AAA chargers, and now I favor those that can be recharged by USB over those that require AC. You’d think that a USB cable is a USB cable, but their choice matters, the shorter and thicker the better, and not only for bulk reduction. With a long and thin USB cable, you could lose as much as 40% of the power. There are also several dual camera battery chargers available, which are slightly more compact than two single camera battery chargers and more convenient as they require only one USB connection instead of two. However, carrying two single camera battery chargers provide more redundancy, should one of the devices fail.

Sony NP-FW50 chargers. Left to right: OAproda (USB, 30g), Wasabi Power (12V, 70g), Sony OEM (AC, 85g).

Recharging USB external batteries

To charge USB batteries (external or camera) from AC power, you need a AC-USB adapter. Although all of them could work in a pinch, their performance varies as much as the external batteries performance. I’ve found the Anker 6-port charger to work very well, maybe because the manufacturer could optimize it operate with their own batteries. To charge USB batteries from 12V DC, one quad cigarette lighter to USB adapter is normally enough for me, and it is not much bigger than one with a single outlet. Here is the power kit with which I normally travel:

5V/USB power kit. Left to right: OAproda Sony NP-FW50 chargers, quad cigarette lighter to USB adapter and iPhone cable, Anker 6-Port USB Wall Charger with replacement short power cable, USB cables, Anker 10,000mAh and 13,000mAh 5V batteries.

Photographing Cataloochee, the quieter side of the Great Smoky Mountains

With more than 10 million visitors per year, Great Smoky Mountains National Park is the most visited of the national parks, and its most popular area is Cades Cove which receives over 2 million visits per year, more than many large entire parks. Cades Cove is so popular because it has a bit of everything for everyone: historic structures, wildlife, and pastoral landscapes. Fortunately, at the opposite end of the park, Cataloochee offers a smaller version of Cades Cove, one that is considerably quieter. Follow me on a quick tour of Cataloochee and learn the technical choices behind the photographs.

Remoteness has so far preserved Cataloochee’s tranquility. The quickest access, via Cove Creek Road off US 276, is further away from a gateway town than any other significant park entrance, and involves a steep, narrow, and twisting road, some of which is unpaved. The unpaved road via Big Creek is even longer and more rough. Although all the roadside sights can be easily seen within a day, I stayed at the campground. It was not filled up, but note that you need to reserve your site by phone or online, which means prior entering Cataloochee since there is no cell signal in the valley.

There is only one clear view of the mountains in the Cataloochee area, at an unnamed overlook located shortly after the point when the road becomes paved again. The overlook is north facing, so both sunrise and sunset create side lighting. With mostly cloudy skies, the light was weak, but I thought the images I made after sunset made the most out of it, as the ridges were better delineated by the soft backlight and the sky momentarily acquired a bit of color.

An unexpected reward for staying at the campground was to find there a nicer cluster of Mountain Laurel than any I’d seen on the trails. Picnic tables were all around, but by moving in close and pointing the camera up, I excluded them. Is that still a truthful photograph? I chose the moment when the blooms were in the shade while the trees behind were sunlit. Like other small subjects, flower close-ups almost invariably work better in soft light, and if you photograph at a close distance with a wide-angle lens, the foreground becomes a close-up. On the other hand, if the trees had been in the shade, their darker leaves would have let the sky, which was inevitable as the camera was pointed up, create distracting bright spots. The potential downside of this choice of light is that the blooms could be too dark. In the old film days, I would have added a bit of light to the blooms with fill flash, but I knew that Lightroom would easily let me brighten them.

Like Cades Cove, Cataloochee features historic meadows encircled by mountains. This large but relatively featureless landscape needed strong light and shadows to define its structure. I photographed in the late afternoon, as the shadows were moving into the valley, but before they became overwhelming.

The Cataloochee area was once the most populated area in what became Great Smoky Mountains National Park. Nowadays it features eight historic sites easily accessible, only two fewer than Cades Cove. I wanted to give a sense of place for my photograph of Caldwell’s House by including the river and footbridge. As is often the case, having the river in the shade turns it into a mirror, whereas direct sunlight suppresses reflections. With the low late afternoon sun, shadows from the trees generated a confusing patchwork of shadow and light, so I waited for the meadows and house to be entirely in the shade.

Shade is a foolproof light for photographing a close-up scene, and I am always ready to make my own, even at midday. However, I noticed that branches of a nearby tree were filtering the sunlight enough to eliminate dark shadows while preserving a bit of direct light, resulting in beautiful illumination. Following the light, I looked for a composition and found those ferns and leaves, whose textures and colors were accented by the sunshine in a subtle way.

Besides looking for close-ups, I busied myself at midday by photographing inside the historic structures, where it becomes all about geometry. The images are not as straightforward as they seem, and necessitated careful adjustments with a shift lens. Fortunately, I could adapt the excellent Canon 24mm TSE to use on my Sony A7R2. For the schoolhouse above, notice how I was able to keep the shape of the back wall a rectangle rather than a trapeze, although most of the scene is located on the right side of the camera. This was made possible by shifting the lens towards the right, rather than rotating the camera. Similarly, for the barn below, notice how, with the central point of perspective located approximately 1/3 up the frame, you see more of the interesting ceiling than of the floor, yet vertical beams have remained parallel. This was made possible by rising the lens, rather than pointing the camera up. The Sony A7R2 almost handled the extreme contrast between the sunny outside and the dark inside with a single exposure, but for a bit more highlight detail, I merged two exposures in Lightroom in each case.

Firefly Variations

In this post, I revisit a firefly photograph in some detail, first comparing it to a similar image made with a different technique, then showing its components images to highlight firefly specifies within.

Single exposure v. Digital composite

I mentioned previously that there are two approaches to photograph fireflies together with the forest, a carefully timed single long exposure or a digital composite from several short exposures. Even if you are not going to photograph fireflies any time soon, note that those considerations also apply to star trails or even light trails from cars at night. The composite approach is safer for several reasons. The first reason is that it makes it possible to use a base exposure while there is still light, so that one can avoid high ISO and a long exposure, a combination particularly problematic, as taken individually, each of them is already the main cause of noisy images. The second reason is that besides noise, a single, long exposure is vulnerable to incidents such as someone shining a light. With several short exposures, you have the option of simply not using the affected frames, whereas a single exposure could be ruined beyond repair. The third reason is that it makes it easier to control the brightness of the final image. If you do not time well a single exposure and it is too long, the forest may end up too bright relative to the fireflies, which would ruin the shot. With separate exposures for the forest and the fireflies, you can easily tune their relative brightness.

With the lens set wide open at f/1.4, I focussed at infinity. This resulted in the light from the fireflies forming an out of focus disc of size inversely proportional to their distance, which helped convey the sense of the depth in the forest I had in mind for this photograph. Unlike for others, I had chosen a slightly elevated viewpoint to this effect. However, in the single exposure frame below, some fireflies had flown very close to the camera, resulting in blobs of light that could be distracting.

Single frame, Sony A7R2, Rokinon 35mm, 8 min at f/1.4, ISO 800 (Click image to enlarge)

For the digital composite, I selected 13 frames, leaving out those with distracting fireflies, resulting in a similar total exposure time. I loaded them as layers in a stack by using “Tools > Photoshop > Load Files into Photoshop Layers” in Bridge (you can also do that directly in Photoshop with “Files > Scripts > Load Files into Stack”). Then in the Layers palette, I selected all the layers and changed the blending mode from “Normal” to “Lighten”. The “Lighten” blending mode creates a composite by taking for each location the brightest pixels in the stack, and since the fireflies are brighter than the forest, I was done. I tried to use a brigher base exposure for the forest, but eventurally prefered the darker exposure from the first frame of the stack.

Digital composite, Sony A7R2, Rokinon 35mm, 13 frames, 30 sec at f/1.4, ISO 1600 (Click image to enlarge)

I’d appreciate it if you would let me know which of the two is your favorite? Does it matter that a photo was captured as a single exposure, or does only the result count?

Create your own user feedback survey

Click here to answer poll if you don’t see window above

Photinus frontalis v. Photinus carolinus

Another benefit of making several short exposures is that the individual frames reveal the light patterns of different firefly species better than a single long exposure or a composite does, even if the later is more impressive by virtue of the myriad of lights captured. In the two photographs above, the fireflies appear to be all over the place, blanketing the forest. However, the 30-second exposures let you see the long light trails of the Mammoth Cave National park fireflies with evenly spaced blinks like the Photinus frontalis species. The animated GIF below consists of the 13 frames that make up the composite.

Mammoth Cave National Park fireflies (click image to enlarge)

By contrast, the Photinus carolinus of Great Smoky Mountains National Park have shorter light trails, since they blink only 5-8 times before going dark for a period of time longer than the flashing time. This can be seen in the animated GIF below.

Great Smoky Mountains National Park Photinus carolinus fireflies (click image to enlarge)

The difference in flashing patterns was not as readily observed in the final composite image below:

Digital composite. Sony A7R2, Sigma 20mm f1.4 lens. Base exposure: 30s at f/2.2, ISO 200. Fireflies: 28 frames, 30s at f/1.4, ISO 3200

I hope that this series of posts has inspired you to go and seek these bioluminescent beauties that bring enchantment to summer evenings in the eastern forests, and has given you enough information to try your hand at photographing them. Firefly populations are on the decline, due to increased light pollution and habitat loss, so while enjoying them, be sure to thread lightly!

Part 3 of 3: 1 | 2 | 3