Light Painting the Redwood Forest
No Comments
When you think about natural subjects for night photography, things like the rock formations or bristlecone pines of the southwest often come to mind, not the redwood forest. In old-growth groves, the dense canopy obscures most of the night sky. I made so many visits to Redwood National Park in the 1990s that I haven’t returned there for a decade. In the while, digital photography had opened up new possibilities. When I revisited Redwood National Park last month, I was excited to try to photograph at night.
During the day, except when the forest is in dense fog, the light in the redwoods is often a challenge. Like in most other forests, sunny conditions are difficult to work with. The large contrast between sunlit areas and shadows appears as the main problem, but what I find even more problematic is that the shadows themselves break the organic shapes, creating a choppy impression. The soft light of a cloudy day is preferred by many. However, it limits the composition possibilities since you have to exclude the sky, which would otherwise present itself as an overexposed bright spot, distracting the eye from the trees.
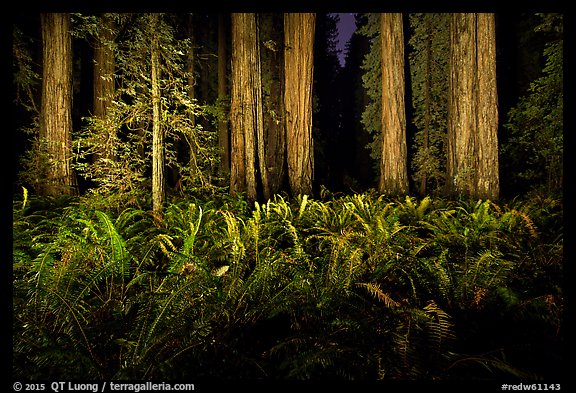
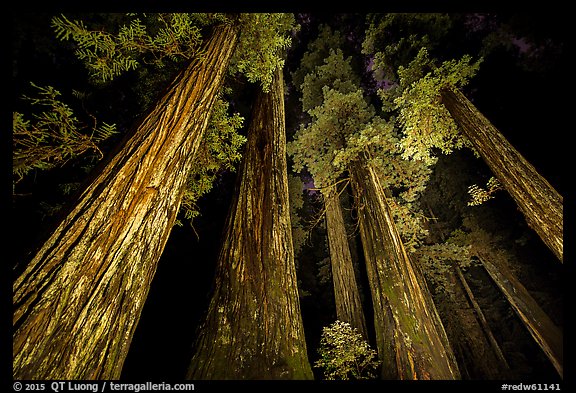
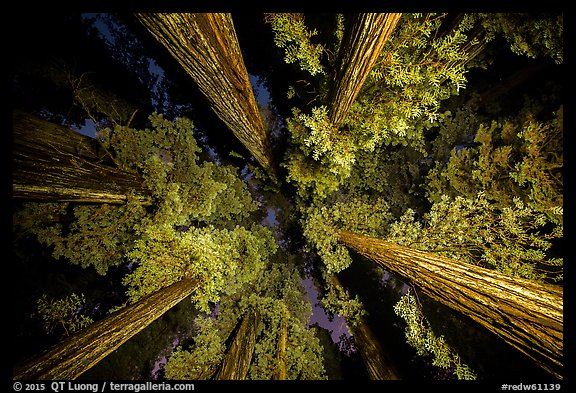
At night, you start with a blank canvas. By bringing your lights, you can illuminate the dark groves with more brilliant light than you’ll ever be able to see in the daytime. Instead of showing up as a bright spot, the sky turns an intriguing dark blue. Because of the three-dimensional character of the subject, using a fixed light source creates uneven lighting. The best solution here is to illuminate the subject selectively with brushes of a hand-held light, a technique known as light-painting. The groves of Redwood National Park are particularly favorable for night photography since a short stroll from your car will often take you into the heart of magnificent groves. You will most certainly have them for yourselves! Here are some tips if you’d like to try your hand at light-painting in the forest.
How to compose. To photograph at night, you will need a tripod able to support your camera vibration-free for long exposures. Since it can difficult to see the composition well, the easiest is to operate by trial and error, adjusting the camera position and orientation after checking out the previous image on the LCD.
My settings. I prefer a wide-angle lens (from 14mm to 24mm) and found that exposing at 30s, ISO 1600, wide open works well. This exposure time ensures that any stars present will not exhibit significant trailing. It is also short enough for multiple attempts, which are usually necessary for light painting. Longer exposure times would allow you to use lower ISOs for a cleaner image.
Use a bright light. A powerful flashlight will allow you to reach the canopy and distant trees. With the previous settings, a headlamp is just not bright enough. I have a few different flashlights that are all based on the XM-L T6 LED. The one used for these images uses single LED for a light output of about 1600 lumens. For comparison, the maximum output of the Petzl Tikka+, which is quite bright for a headlamp, is 140 lumens. Other flashlights use multiple XM-L LEDs for even brighter output. One drawback of the LED lights is that the light is quite cold, giving the scene a nasty “electronic” look. I combat that problem by sticking a yellow-orange warming gel over the light.
Create cross-lighting. While illuminating the scene, do not stand next to the camera all the time, as the alignment of light and lens will create flat light, comparable to on-camera flash. Instead, for most of the illumination, stand sideways from the camera as far as you can to create cross-lighting, which helps define the shapes. You can prevent unwanted strong shadows by illuminating from both sides of the camera or adding a brief flash of front lighting.
Vary illumination duration. The light that a subject receives is inversely proportional to the squared distance to the light. That means that nearby subjects receive much more light than distant subjects. To avoid overexposing them, illuminate areas near you much more briefly than further areas. With the settings above, anything more than a couple of seconds of light on the background is too bright. A flashlight with a narrow beam helps to light more selectively, for example distant trees framed by nearby trees. Don’t worry about getting the illumination levels perfect everywhere, as you can always dodge and burn in processing. All the images on this page are single exposures.
I hope you’ve been inspired you to try something new. Please share your results. Do you have any favorite tips about light-painting the forest ?

