Terra Galleria Photography

Cedar Grove, Kings Canyon National Park – the other Yosemite ?

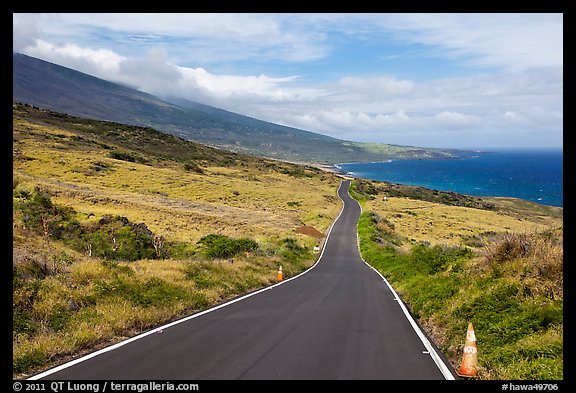
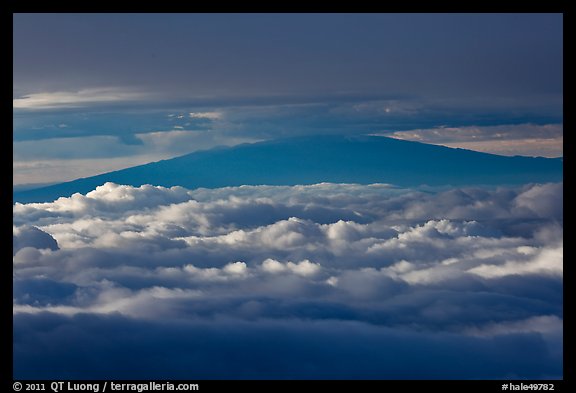
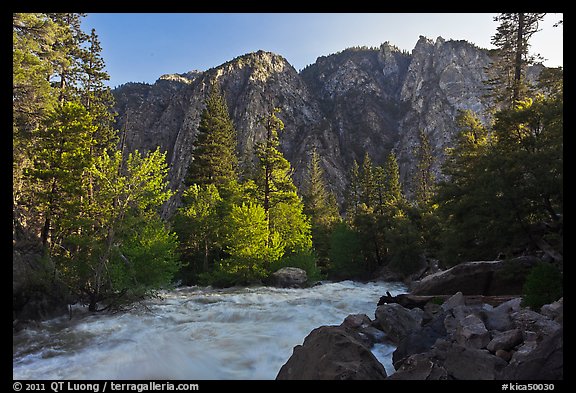
Kings Canyon National park was conceived by as a “wilderness park”, mostly free from development. There are only two sections accessible by car within the park, one around Grant Grove, the other in Cedar Grove. Both those sections are small: many visitors do not notice that shortly after Grant Grove, they exit the park, entering lands now protected as Giant Sequoia National Monument. Although I have often seen this view labeled as “Kings Canyon National Park, no lands belonging to the park proper can even be seen from this picture of the narrowest section of Kings Canyon, as the park is re-entered only in Cedar Grove.

In the past, I had explored at some length the most spectacular alpine sections of the park (such as Dusy Basin near the Sierra Crest, but visited Cedar Grove only for a day. This spring, with the publication of my Yosemite Book completed, I decided to spend only one week-end in Yosemite, saving more time for a return to Cedar Grove: could that glacial valley surrounded by tall cliffs, be another Yosemite Valley that I had overlooked ?

If that was the case, I was not the only one. Although I visited at the beginning of June, the Cedar Grove valley was remarkably quiet, nothing like the busy Yosemite Valley. The parking lots at the trailheads were never more than half-full. Even without a reservation, I had plenty of campsites to choose from. There was no need to stand elbow-to-elbow with other photographers, in fact nobody else was even standing near me when I took the images in this posting.

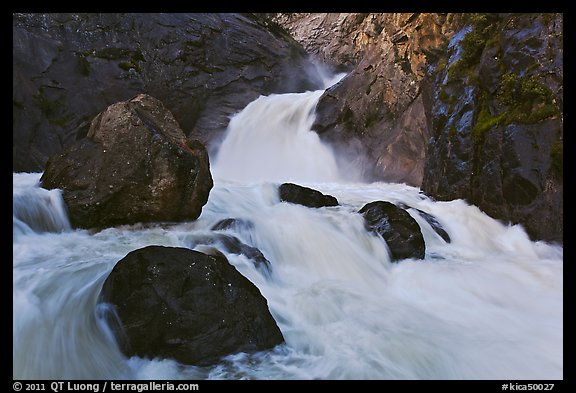
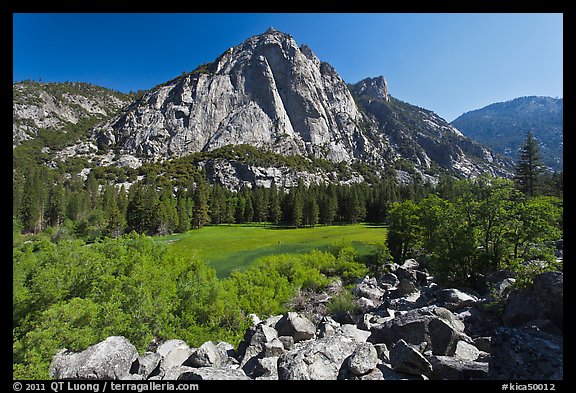
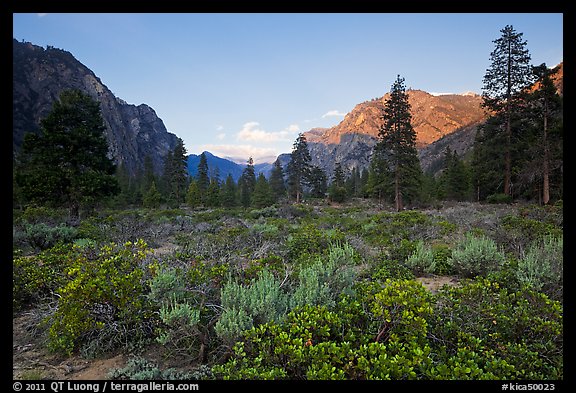
I realized that Cedar Grove lacked many features of Yosemite Valley, besides the crowds. The surrounding cliffs are not as monolithic, and there are no high waterfalls. The tallest one is Roaring River Falls, which looks more like a series of cascades. The short trail to this waterfall is the most popular in the park, together with Zumwalt Meadows, but besides, there are not many developed trails in Cedar Grove, and no great viewpoints from the valley rim (let alone easily accessible viewpoints such as Glacier Point). Even the meadows are smaller, making it difficult to get clear views of the entire valley. I found such views only at Zumwalt Meadows and on an un-named meadow close to Knapps Cabin.

Although no long hiking was required, almost all the views required some exploring, instead of pulling out at a designated overlook, as is sometimes the case for Yosemite. I liked the fact that in Cedar Grove, although the place is easily accessible, I was able to work from a “blank slate” and actually had to find my own views, instead of being influenced by a vast repertoire of existing images, which are difficult to escape in Yosemite for someone who has any interest in the rich history of photography there. I created my own list of photo spots.

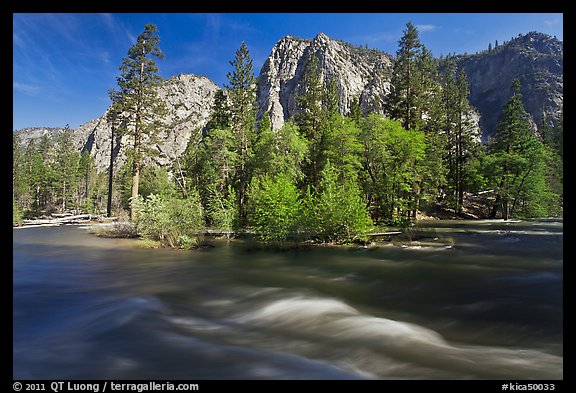
For a photographer looking to escape the beaten path, while photographing some beautiful Sierra scenery of cliffs, forests, meadows, and water, I’d recommend a visit to Cedar Grove.

More images of Kings Canyon National Park

Catching a glimpse of the Na Pali Coast, Kauai

The Na Pali Coast, on the North Shore of Kauai has some of the most spectacular coastal scenery anywhere, with the the grandest fluted coastal cliffs in all the Hawaiian Islands. Because of its steepness the Na Pali Coast is entirely roadless.

Besides boat and helicopter, the only way to see the Na Pali Coast is to hike.

The Kalalau trail crosses some of the most lush and exotic terrain in the US.

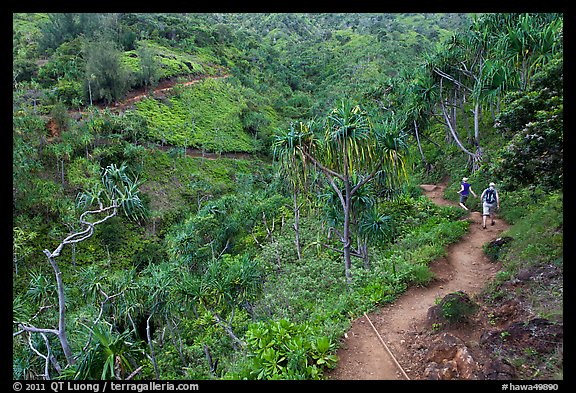
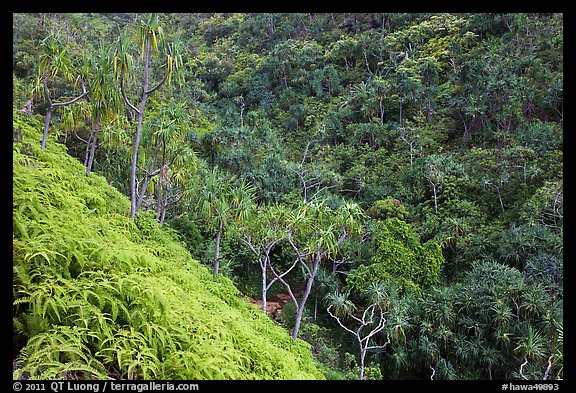
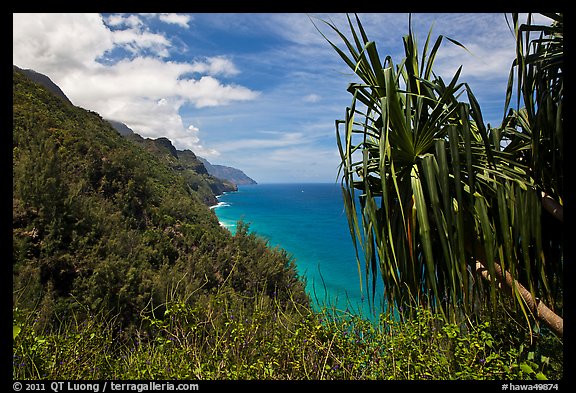
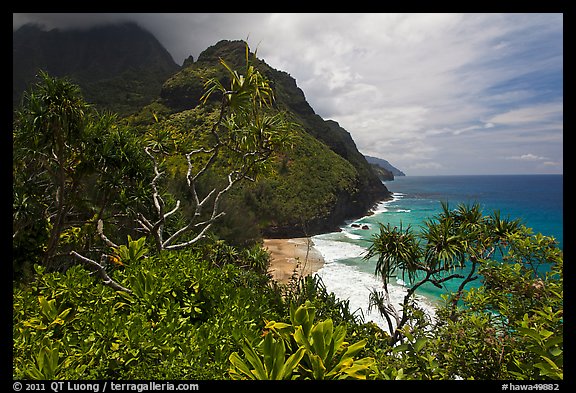
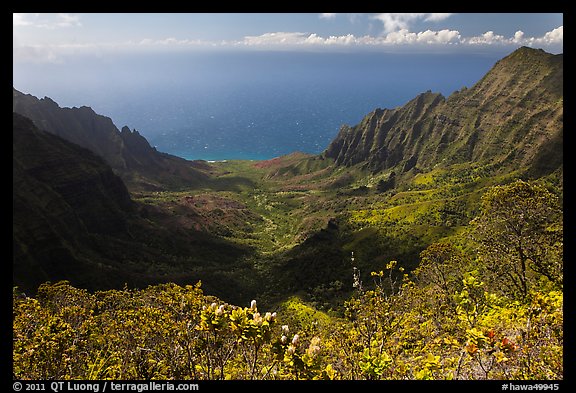
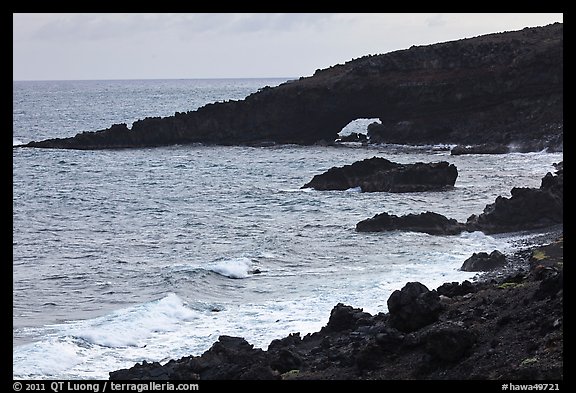
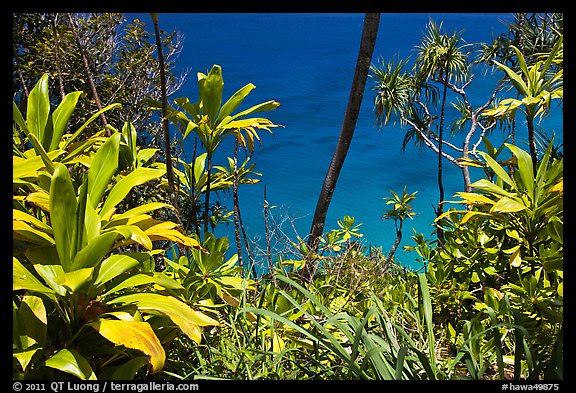
The Kalalau trail overlooks the Ocean all along the way. Many views are a glance through vegetation.

There are also a few open views, such as this one, only about 1/2 mile from the trailhead.

The Kalalau trail is 11 mile, but as a day hike with kids (5.5 and 7) our objective last May was just the first beach along the trail, the Hanakapiai Beach, 2 miles from the trail head. Yet, we found we got a good flavor of the trail’s beauty.

After hanging out at the beach, it was difficult to get the kids going back, hiking up in warm weather. Fortunately the next hike, that we did on a subsequent day, starting at a higher elevation, was cooler.

On the opposite end of the Na Pali Coast, the Pihea trail let you see the famous fluted cliffs (Pali in Hawaiian) from above.

Less than a mile from the trailhead, you are treated to a spectacular view of the Kalalau Valley, which is the terminus of the Kalalau trail.

More images of Na Pali Coast

Large Format photography in “Treasured Lands”

In exactly one week, I will be giving a second lecture about “Treasured Lands”, the exhibition of my 58 images of the National Parks at the National Heritage Museum. Since in my first lecture, I talked quite a bit about large format photography, I won’t do it again in the new lecture, and instead focus on new work done in the interval. Here are some remarks delivered during the first lecture.

In the summer of 1993, after moving to the San Francisco Bay area, inspired by the rich local tradition of US Western landscape photography, I began to use the large format camera. The more contemplative approach that this exacting type of photography promotes, and the extremely detailed prints it produces are perfect for making the viewer feel immersed in the land. I had found the perfect tool to share the sense of wonder and passion inspired by the US National Parks. Each image in the “Treasured Lands” exhibit was photographed using the same large format camera.

You need to operate such an instrument in a more deliberate way than a small format camera. Just to be able to see the composition, you need to put the camera on a sturdy tripod and slip under the a dark cloth – because the viewing glass is so dim. As everything is manual, not only focus and exposure, but also film transport, there are countless ways to ruin an image. The cost of each exposure adds to the time commitment it requires, favoring more conscious decision making. You need to make choices before shooting, rather than doing so after the shoot.

The primary reason for putting up with such a demanding camera – so heavy to carry in the wilderness – is the amount of detail recorded, thanks to the sheer dimensions of the sheet of 5×7 transparency film, whose surface area is about 25 times that of a 35mm (“full”) frame. Moreover, besides the focussing knobs, there are six other mechanical controls that affect perspective and sharpness distribution. For instance, by tilting the lens with respect to the film plane, I can get in perfect focus two objects that are at a different distance from the camera, rendering deep space in a uniformly clear way.

When I photograph a wide-angle scene, with an angle of view equivalent to that of a 24mm lens on 35mm camera, I am using a lens of 110mm focal length on my large format camera. A tree in the distant background is rendered as clearly as if I had focussed on it with a telephoto, and framed it tight. I do not need to direct the viewer’s attention to it, but they can discover that tree when they explore the image for themselves.

This descriptive power let me produce images that are complex, taking the whole scene in without a singular point of focus, because they have so much detail that the viewers could take time and read them, look at all the features, and discover highlights and inter-relationships for themselves.

In that sense, those photographs give a sense of place and time by letting the viewers see through the images as much as I saw myself. They allow them to stand before the landscape in a state of heightened awareness similar to mine. Although they would observe these natural wonders through my own celebratory perspective, they would realize that there is nothing they could not experience for themselves. Hopefully, this would help them recognize that those unique areas are truly treasures to be preserved and protected for future generations.

Mid-day long exposures with the Big Stopper: seascapes, Kauai

Even more so than for landscapes, many photographers prefer to shoot seascapes at sunrise and sunset. I see two main reasons: to get more color (enhanced by the open horizon and water reflections) and to capture water motion through a longer exposure. Thinking about it, I saw no reason a beautifully flowing seascape could not be photographed at mid-day: the color of tropical water is often best revealed by a high sun, while to obtain a longer exposure is just a matter of using a sufficiently dark filter.

During my week on Kauai Island, since this was a family vacation, I often found myself on the beach at mid-day, close to Kilauea, since we were staying nearby. The second image is the site of Patrick Smith acclaimed Maestrom series. In those images, huge waves wash over the lava bench and drain back into the blowhole, but when I was there, the bench was never even close to getting wet. On those occasions, while the kids were playing around, I tried to put my theory to test, by (quickly) making long exposure images with a 10-fstop filter.

Do you think those mid-day seascapes work ?

Varying the mood: ocean storm, Kipahulu

The weather system that produced interesting clouds over the crater summit continued to hang over the coast. I was hoping to do some night photography, but when I got up two hours before sunrise, it was pitch dark, with the stars totally obscured by dense cloud cover.

I crawled down to the beach and set up the camera. In contrast with my previous visit in more sunny conditions, the mood was definitively dark. Nature changed this for a few minutes, when the sun unexpectedly appeared through a tiny hole in the clouds. For this composition, I emphasized context by including the coastline and some rock ribs that echoed it.

Independently from conditions, I was also able to change the mood just by varying the shutter speed with ND filters. A shutter speed of 20s (Lee Big Stopper 10 f-stop ND) transformed the powerful motion of ocean fury into a smooth surface, creating a dreamy and meditative image. The Lee also creates a blue color cast that I only partly correct, as I find a neutral color balance with a long exposure looks less natural. A shorter exposure time of 1/6s (Hi Tech 4 f-stop ND) creates a dynamic image more faithful to the awesome power of the ocean on that morning, with enough blurring to convey a sense of motion. The composition concentrates more on elements, the open ocean, rocks and pattern of receding water chosen for their symmetry.

That’s a lot of variation in character with just a few changes. Which of the two compositions do you prefer and why ? Which variations within each compositions ?

A side note of warning so that you won’t make the same costly mistake that I did. Sleepy from the early rising, I had forgotten to take plastic bags to shield the Canon 5D mark2 from the constant spray of the waves, but assumed it would be OK. Subsequently, I noticed the autofocus loosing its reliability, and some controls getting a bit sticky, although the camera appeared to be working fine. After returning home, and sending the camera and lens (24-105) to CPS, I was shocked to receive a repair bill of $800 (after 30% discount). The 5D is definitively no 1D series when it comes to sealing.

More images of Haleakala National Park

William Neill’s Yosemite – App and ebook review

William Neill‘s exquisite portfolio of Yosemite photographs, “Yosemite: The Promise of Wildness” became my favorite Yosemite picture book upon publication in 1994, one year after my arrival in California. It has remained so until today (even though I have my own) to the point that the spine has begun to separate.

There are many scenes of detail where the well-known sensitivity to texture, form, and color of William Neill shines, but also grander views captured with the exceptional light that only a local resident can witness – William Neill has lived continuously in the Yosemite area since 1977. If you don’t own a copy of this work, and you have any interest in nature landscape photography, you should consider acquiring one. But under which form ?

I am a photobook collector and love the physical object. However, when I read that Richard Benson recently said “Forget about [print]. Everything that is happening now in the digital realm is better.”, I had to pay attention. You see, Richard Benson is possibly the most knowledgeable authority about photographic printing (see my review of The Printed Picture).

Since the Yosemite work of William Neill’s has been so inspirational to me, I was particularly happy to be given the opportunity to look at its new digital incarnations, in the form of a new iPad App and a relatively recent PDF e-book. Their prices are much lower than the book, making them an excellent value.

Both electronic versions feature the same contents. There are now just 52 images, some of which were not in the book. This includes very evocative images that I was glad to discover, since I had not seen them before. Since the book had 70 images, a new volume is be expected (this one is called Yosemite Volume 1 !). Each image comes with an insightful comment, which has been expended and now includes a location note precise enough for someone to find the picture spot in many cases – with a bit of work.

The App design, done by Jim Goldstein– who besides being a talented and versatile photographer is also a mobile app consultant – is simple and functional. The images fill the screen, with the aid of a rotation for verticals. You swipe horizontally to move from one image to another, vertically to read the comments, tap to hide them. This is clearly easier than going to the final pages of the book to look for comments. You have the possibility to view images without the distraction of text (like in some art books which don’t even include a single word), while retaining easy access to information. In addition, the images are provided at a higher resolution (HD: 1920 pix) than the screen size, so that you can zoom to view details with the usual pinch. The larger images cause a tiny delay when moving from one image to another, but this is hardly noticeable. What is more noticeable to my eye is a possible color management problem, as I have noticed that the colors are less vivid on the App than both in the book and PDF – it looks like there is not enough red. This is subtle, someone who is not a printmaker may not notice it, and it wouldn’t detract from the images for those who have not seen them before.

I was surprised to see the PDF work that well for switching between full-size images and comments. There is one section for each of them. When you click on the full-size image, you jump sections and go to the corresponding comment page, and vice-versa. When used with a good PDF reader on the iPad (I like Goodreader), the operation is as intuitive as with the App. This is so far one of the PDF with the best navigation I have seen (better than previous ones by William Neill too).

The main difference between the App and the PDF is that the PDF is designed like a book, while the App works like a native photo album. We are comparing here a mixed presentation, simulating a printed page on digital media, versus a purely digital presentation. Like on the printed page, there is a roomy white border around the images with the PDF, and even a page number. An advantage of the PDF is that it can be seen on many different devices. While the layout works very well on a large computer screen – which takes advantage of the high-resolution of the images (1500 px), the images appear a bit small on the iPad. Maybe because the iPad itself looks like a black frame and mat, I felt that the white space in the PDF did not help the images unless used in the dark.

With the digital versions, and in particular the iPad, I miss the high resolution of the printed page – most of William Neill’s early Yosemite work was done with a 4×5 camera. However, this is made up for by the contrast of the images. It is a simple matter of physics that an image on a transmissive medium (screen) always offer more contrast range than an image on on a reflective medium (paper), presenting therefore a wider range of tones. Then, there is the portability of the digital medium. I can leave “William Neill’s Yosemite” permanently on the iPad, together with the other PDFs of William Neill (equally fascinating) and enjoy the images in a wide range of conditions, whenever I need a bit of the regenerative power of nature. I hope that this new nice presentation of enduring and outstanding images together with interesting words, updated for the digital age, will bring a new generation of viewers to William Neill’s great photography.

The road (much) less traveled: South Maui

Most visitors to Haleakala National Park visit the Haleakala Crater, however the Park extends down from the summit to the ocean, reaching it in a small, but interesting area called Kipahulu.

Instead of driving from the summit to Kipahulu through the Hana Coast, this time I tied the more direct, but seldom-traveled route through the south of the island.

Whereas the Hana Coast is incredibly lush and tropical, the south, in the rain shadow of Haleakala, it is mostly arid and barren.

The landscape, dominated by lava flows reminded me of the Big Island of Hawaii, rather than the lushness normally associated with Maui.

On a section between Kaupo and Ulupalakua, only those curious-looking trees were able to take root on the lava rock.

Whereas the Hana Coast, considered the #1 attraction on Maui, sees a fair amount of traffic, you see only a few adventurous souls on the south side, besides the tour mini-bus. The road is sometimes bouncy, there are one-lane sections and unpaved sections (less than 10 miles total), but it is passable by any passenger vehicle.

I was happy to discover another side of Maui. One of the reasons whey the Hawaiian Islands are so fascinating is that within a relatively small area, they offer a dramatic change of landscapes.

More images of South Maui

Top ten ways to make money in photography

Creating beautiful and meaningful photographs is hard enough, but making a living of them is even harder. For most who manage to do it, there is not a single source of income, but rather a wide variety of income streams that hopefully accumulate to form a large river. Here are what I think are the top ten potential streams of revenue for photographers, in no particular order, since what works for each photographer is different.

Sell prints through art galleries and art fairs. As photography is gaining wide acceptance as an art form, print sales have gone from non-existent to a main source of support for artists in less than half a century. However, who is going to spend three to four figure amounts on a print without seeing it in person first ? Galleries have the reputation, connections and established clientele to sell prints to a sophisticated audience at good prices. Although folks who visit art fairs are generally not willing to pay gallery prices, they are still there specifically to buy art, and come in much larger number than those who stroll into galleries. Combined with the lower barrier to entry, this makes fairs a more lucrative outlet for many photographers.

License images through stock agencies. Images are used everywhere, and the trend is only growing as our culture is very visual. Professional art buyers who are willing to pay proper fees for major uses (eg. global advertising campaigns) go first to a stock agency when they are looking for an image because with millions of images, it is likely than the agency will have what they want. Who has time to scour the web ? In addition, with an agency they are more confident about proper rights clearances (incl. model releases). Agencies have also privileged relationships with big accounts (through volume discounts).

Seek assignments in your area of specialty. Stock is shot on speculation: you put in the money first to produce the shot, and you may or may not recoup it through licensing fees. With assignments, even as you shoot the same subject matter, you are guaranteed a predictable payment as long as you execute the shoot. High profile assignments provide you access that you are unlikely to be granted on your own, as well as high visibility for your work once published.

Provide custom photography. If you cannot find assignments in your area of specialty (maybe because the same subjects are often shot by amateurs), maybe try to cover areas for which new, custom work, is always sought. This includes commercial photography, events, portraits, and wedding. People are always going to get married.

Teach photography. Quite a few fine art photographers hold academic teaching positions, whose reliability gives them the confidence to do personal work. Workshops have been a primary source of income for many nature photographers for ages, but these days, there is more interest in photography as a hobby than ever. At the same time it has created more competition for pros, digital and internet sharing has made photography more fun for amateurs, so the workshop market is only growing.

Speak. As a photographer, you have a unique perspective, and seen more of the world than most. You can talk about your adventures and deliver rich presentations and captivating slide-shows. Your audience goes beyond photographers interested in your techniques and insight, as you kind inspire, inform, and entertain non-photographers as well.

Write. A good accompanying article will help sell your images to a magazine as a package, be it a general interest magazine or a photography magazine – some pay for words, but not images. In the internet age, there are more outlets than ever: third-party blogs, e-books, apps. Writing an old-fashioned book still helps establish you as an authority.

Provide consulting and services. You have acquired very specific technical and business skills in the course of operating your business. I have seen photographers and “creative consultants” charge as much as some attorneys. Tasks range from setting up a printer, optimizing a computer for photoshop, to editing photos, negotiating a license or determining a strategy for selling prints. The easiest way to make money in photography has always been to sell your camera, but you can actually keep it and instead offer new equipment for resale if you’ve developed a following. Don’t let this studio, large format printer, high-end scanner, profile make, or computerized mat cutter sit idle. You can recoup its cost, and maybe beyond, by letting others use them or putting them to use for others.

Seek sponsorships. Even if you are not famous enough to license your name (like for instance Galen Rowell did for Singh-Ray filters), you can still get free equipment and maybe some money for your projects in exchange for an endorsement. Besides the financial benefit, your name will get more exposure as it is featured by the endorsed company in their promotional materials. If you have enough followers, even mere affiliate programs could be lucrative.

Did I forget anything ? Be sure to check the next post in this series for my twist.

Part 4 of 6:

1 | 2 | 3 | 4 | 5 | 6

Between Heaven and Earth: Haleakala Clouds

The Heleakala summit, at more than 10,000 feet high, is above the inversion layer separating lower maritime air from upper atmospheric air. On my previous visit to the crater, I always found myself above the clouds, in clear air.

Last May, I arrived in Maui as storms were moving in and out. There were unusual high-altitude clouds as well. This created some of the most dynamic cloudscapes that I’ve ever seeen. It was fascinating watching the changing light on clouds below and above.

One minute, you wouldn’t see anything from the crater rim, the next, a hole in the clouds would reveal part of the crater as if it just had been created.

At one point, an opening between the low altitude clouds and the high altitude clouds was large enough to see the summit of Mauna Kea, which lies on the Big Island of Hawaii.

More images of Haleakala clouds
More images of Haleakala National Park

Treasured Lands: extension, lecture, reviews, online images and text

Treasured Lands, the exhibition of my 58 images of the National Parks at the National Heritage Museum (Lexington MA) initially scheduled to close in Fall 2010, then Spring 2011, has been extended a second time, until Sept 10, 2011.

I will deliver another lecture on that closing day at 2pm (museum website). As the 2010 lecture was to a filled-up room, I have been told that the upcoming lecture will take place in the larger Maxwell Auditorium. I will also be signing copies of my recently released Yosemite book. Please be sure to introduce yourself if you attend, it would be a pleasure to meet you.

I’d like to thank Seth Kugel for mentioning the exhibit (“Mr. Luong’s large-format camera creates images of beaches and glaciers and deserts and waterfalls from American Samoa to Maine that were so astonishingly sharp and mesmerizing that my father was convinced there was some special 3-D technology involved. There’s not: they’re just awesome photos.”) in the Frugal Traveler column of the New York Times.

For the record, I must make a correction to Jody Feinberg’s Patriot Ledger review (which has since been repeated in several different sources). I am not the first to have photographed all the National Parks. This would have to be, without any doubt, Henry William Jackson, who was the first to photograph Yellowstone, which for a while was the only National Park. In 1941, when there were 25 National Parks (see list of National Parks by date of designation), Ansel Adams came very close to photographing all of them – partly on a Guggenheim fellowship, how times change ! – but he missed Everglades. Stan Jorstad photographed all of them when there were 55 of them. My claim is just to be the first to photograph 58 National Parks in large format. As far as I know, nobody else has done it since. Given the declining popularity of film, there is a possibility this won’t be done again, but one never knows.

My goal for Treasured Lands is to make it a traveling exhibit. Please feel free to suggest venues. In the while, I have created a Treasured Lands webpage where you can see the all of exhibition’s images and text on a single page. This could take some time to load on a slower internet connection.