A non-technical slot in Zion: Keyhole Canyon
One Comment
If the previous posts have awakened your interest for Zion’s slot canyons, but you don’t want to engage in technical canyoneering, read on. Keyhole Canyon, which I describe in detail, may be the best opportunity for adventurous hikers to explore a beautiful small Zion slot without swims or rappels.
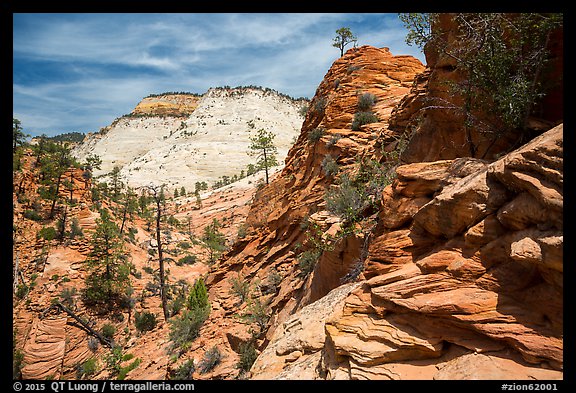
Dominated by slickrock, Zion Plateau, the area of the park east of the Zion-Mount Carmel Tunnel along Highway 9, has a different character from Zion Canyon. At a first glance, what strikes you is the more open scenery. However, Zion Plateau also conceals unexpected places where you can experience narrow canyons close and personal.
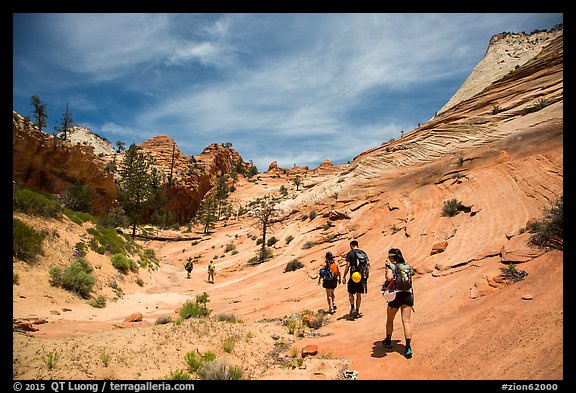
Start of the approach up the bowl. Head towards hoodoo in the center of the picture.
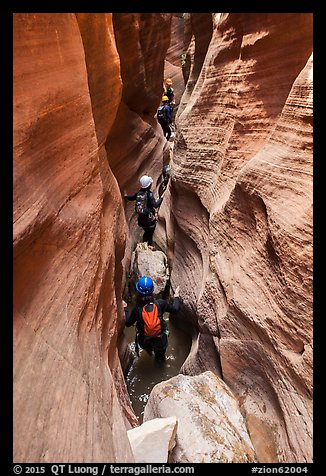
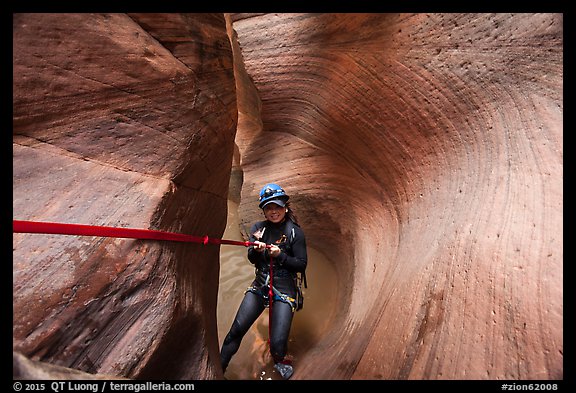
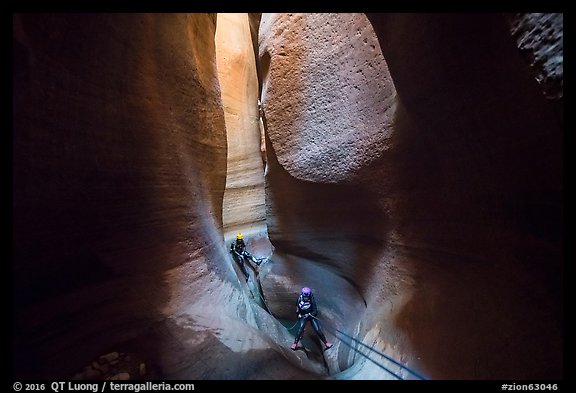
Keyhole Canyon is possibly Zion’s most accessible narrow slot canyon. The approach time is only about 15 minutes, with great views. The canyon has two distinct parts. In the photos, our group is wearing wetsuits and harnesses in anticipation for the second part (west), which involves rappels and is wet, cold, and dark. You will not need such gear if you do only the first part (east). It requires only off-trail hiking and scrambling, with a bit of climbing. You will need to pack your gear so that both of your hands are free. The reward is to adventure in a beautiful location out of the beaten path that gives you a taste of Zion’s technical canyons.
Canon EOS 5Dmk3, 17-40mm lens @ 40mm, f/8.0 1/40s, ISO 1000
The first part of Keyhole Canyon isn’t very dark compared to other canyons, so hand-holding your camera is possible. However, a tripod will allow you ensure a sharp image with better depth of field and e a lower ISO for a cleaner image. Since those may not be readily visible in a web-sized image, I’ve indicated some of the camera settings used in the early afternoon.
Canon EOS 5Dmk3, 17-40mm lens @ 27mm, f/8 1/30s, ISO 1250
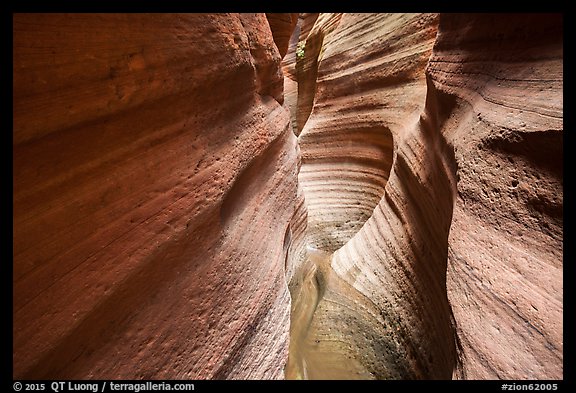
Canon EOS 5Dmk3, 17-40mm lens @ 24mm, f/16 0.6s, ISO 100
Before going, be sure to check the weather forecast, and do not enter the canyon if precipitations threaten since the canyon is subject to dangerous flash floods.
Directions
Park at a north-side pullout at mile 1.7 from the east entrance kiosk, and walk west along the road for 0.2 miles. Hike up for about 0.25 miles a steep slickrock bowl north to a pass with a hoodoo. Scramble down carefully a steep and loose gully on the other side, grabbing roots and branches. The slot will be on your left.
Start of the descent in the gully
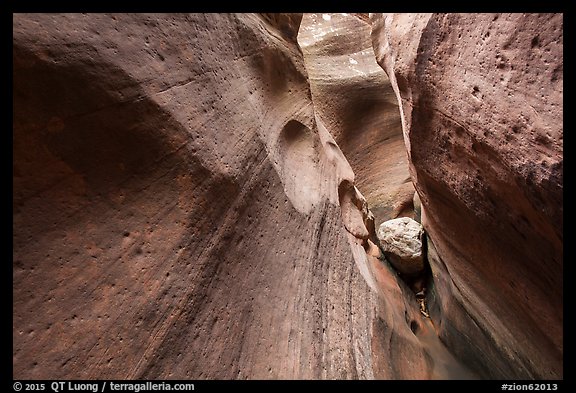
In the narrow slot, you’ll face obstacles such as jammed boulders and logs, that you will have to downclimb for heights up to your body. If you squeeze yourself between the narrow opposing walls, you will be safe! However, a 10-feet rope or sling could be useful for lowering bags or helping members of your party go faster.
Canon EOS 5Dmk3, 17-40mm lens @ 19mm, f/8 1/15s, ISO 2000
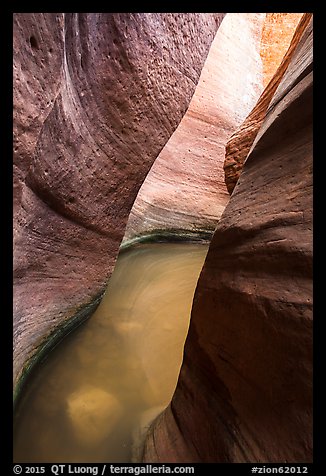
Depending on the conditions, you may have to wade through potholes of water that can be waist deep. Plan accordingly by wearing shoes and clothing that you don’t mind getting wet. A camera carried in a backpack shouldn’t get wet, but it is always safer to use a dry bag.
Canon EOS 5Dmk3, 17-40mm lens @ 23mm, f/16.0 0.8s, ISO 100
When the canyon opens up again to a sandy wash, after about 0.2 miles, turn around, since the second part requires technical canyoneering. You’ll climb up the obstacles that you downclimbed. The light can change fast in those narrow canyons, so even though the section of canyon was short you might see something new on your way back.
Although very short, the second (technical) part of the canyon has a very subterranean feel.
Zion Canyons: Part 3 of 5. 1 | 2 | 3 | 4 | 5


Hoping that leaving this comment gets me signed up for the newsletter. I am also a Word Press blogger, but didn’t see a way to follow your blog through Word Press.