| Home/Mountaineering/Yosemite Rock information |
"Riding the pig" down the East Ledges
Detailed beta for the East Ledges
Descent, plus information concerning how to rappel with a very
heavy load.
By
"Pass the Pitons" Pete Zabrok (aka "Dr. Piton")
If there is any single routefinding suggestion to getting down the East Ledges as easily
as you can, it is to "stay right whenever possible". This will often require you walking
perilously close to the edge of the cliff which is never a pleasant thing to do with a
hundred-plus pound pig threatening to topple you over with every step! Whatever you
do, don't head left into the killer manzanita tunnels or you will be cursing the day you
were born. (Even if you find the best way down you will still be cursing the pig....) The
benefit of staying to the right is that you will avoid the worst sections of slippery and
dirty trails, and will instead be able to follow clean-washed slabs much of the way.
There are a few things you will need to do before you start down. The first thing is to
make sure you have a decent pair of shoes with sticky rubber souls. These days, most
everyone who climbs El Cap has a pair of "approach shoes" which work well on the
descent, although every now and then I see pathetic wretches wearing duct-taped
running shoes, slip-sliding their way downhill. Watch your step every inch of the way -
avoid walking on the brightly-polished bits of rock as they are very slick and will pull
your feet out from under you, the result of which will be bruises to more than just your
pride. It's always a really good idea to have some moleskins handy - a bad blister can
make an already difficult descent excruciating.
It is critical to pack your pig so the thing isn't so top-heavy that it's nearly impossible
to carry. This usually means you will have to put the heaviest items like your rack right
on the bottom, and fill your pack with progressively lighter gear. If you don't do it that
way, you'll find yourself in trouble. Be sure to leave your harness, helmet, rappel
device, gloves(!), some slings and some locking crabs on top of your pack. It is also
really smart to have your ascenders with you, too. You must also grab the "docking
tether" that you were using on the wall to secure your load to the power point. This
will allow you to fasten yourself and your bag into the rap station with a "load release
knot" that can be removed under tension, meaning you won't have to struggle with
unclipping a carabiner that supports both the weight of yourself and your bag!
Remember, doing things the hard way is the sport of fools. If you don't know what I'm
talking about, you'd really better familiarize yourself with how to tie a load release knot.
Unless there are fixed ropes (these were removed in the summer of 2001) you will
need two ropes to rappel. Although it is possible to do shorter rappels with a single
200' rope, you're just making things hugely harder for yourself than you need to. Keep
out two long ropes, and follow the route laid out below.
I highly recommend you do not attempt the East Ledges in
the dark unless you are already familiar with it, and you have fairly light loads. There
are definitely some dangerous spots where you really don't want to blow it! Best to
get a fresh start in the morning. Of course, "Pass the Pitons" Pete simply doesn't "do"
mornings, preferring to brew up an extra pot of coffee whenever possible. The
objective in descending the East Ledges is merely to make it to the pizza deck in Curry
Village before it closes, so there are no extra points awarded for going quicker. A side
benefit of starting in late rather than early morning is that you won't be walking
directly into the sun, and the winds caused by the day's convective heating will be
whipping up to keep you cool. The hottest time of day to be on the slabs above the
rappels is around 10:00 a.m.
Starting in the area of the Nose, work your way down following the most obvious path,
which in many places isn't really all that obvious. During the first part of the descent,
at least as far as Zodiac, you don't have to walk right at the edge of the cliff. When
you come to some pine trees close to the edge, you are at the top of Zenyatta and
Lost in America. This is the recognized "drop zone" for "air express packages" which
land over two hundred feet out from the wall. Below this is a short section where you
walk though some bushes and step down into a little slot between two boulders, then
you're back on the open slab heading down and left to Zodiac. A long way off to the
left here there are horrendous manzanita tunnels that you sure don't want to get
stuck in.
You know you've reached Zodiac when you arrive at a sidewalk-width flattish area
running at ninety degrees to the cliff face. The bolts are right there at the edge, and
you can (carefully!) lean over for a spectacularly vertiginous view of the Southeast
Face. If you've run short of food and water, you might get lucky and find some here,
left over by benevolent climbers who obviously know a lot more about hauling, packing
and comfort than you.
Less than two hundred feet below Zodiac, there is a fork in the trail. It is best to go
right here and walk directly to the edge - not only will you get a superb vista from a
cliffside belvedere (the best view of the whole journey and about the only good part
of the descent!) but you will avoid a nasty little body-length climbdown directly above
the streambed. Leave your camera out, but just be careful in this section - there is
one short "no falls zone". But take heart - it's not nearly as nasty as it might at first
appear.
Immediately below the belvedere you will enter the streambed of Horsetail Falls. This is
the last viable campsite en route, so if you are splitting your descent into two days,
you should either stay here or back at Zodiac. The benefit of crossing the streambed
in the springtime is that you can have a swim - there are a couple pools, and the
water is usually warmed after flowing over sun-baked slabs. Don't camp here, though,
if you think it might rain - you could wake up to find yourself surfing towards a very
deep abyss!
There are two ways out of the streambed, an "upper" way and a "lower" way. Both are
marked by cairns, but I prefer the lower as it is less manzanita-y. You'll find it very
close to the edge of the cliff (again!) down near a big ol' burned log. There's a short
climbup, then follow the trail along the edge. It's not too bad here. There are
impenetrable bushes to your left.
A little bit farther along, the other fork of the trail rejoins having gone through the
bushes a bit. Straight ahead of you you'll see a big giant sequoia, not that tall but
with a thick moss-covered trunk. Head down through the open slab this way following the trail where possible. You may be tempted to head left, but don't. Stay right all the
way down until you can see below you that the slab is about to end, at which point
you will traverse left along a semi-flat section back towards the trees and a cliff-face
that has now appeared on your left. I can't effectively describe where - just use your
"mountain sense". In the springtime when the slab is seeping, you will have to avoid
the wet bits.
You should now find yourself back in the trees heading downhill - you will be right up
against the base of a cliff on the left, and quite a long way from the scary edge. You'll
know you're on route when you have to squeeze between a couple trees and the wall
- somebody REALLY needs to take a saw to those branches I've been fighting for the
last fifteen years! If your pig is tall, it will catch on the upper branch.
Immediately after the "tree squeeze" there is about a twenty-foot climbdown, which
at the time of writing (September, 2001) had a ratty chunk of fixed rope to use as a
handline. As you face downwards, you can either go down the slot on top of the tree
branches, or else go around the little arete to the right ("climbers' left"). This is the
one point on the East Ledges descent where I routinely have to take my pig off - I
can't negotiate that climbdown safely with the pack on. You can easily pass the packs
from one person to the next down here - there is no exposure and nowhere anything
can come to grief.
Continue following the trail through the trees keeping the cliff on your left. There is
only one way to go and you can't get lost. You will come out of the trees at the top
of a very long slab that is narrow at the top and widens below. Up to your left you will
see a very high cliff with wild white dykes on the black wall. (Remember - given the
choice between "dykes on bikes" and "chicks with dicks", you must always take the
former. Should you ever even CONSIDER the latter, you will never share a portaledge
with me.)
At first you will stay on the right side and do some short downclimbs alongside of a
short left-facing chossy black cliff, and then you will be down on the top of the slab
proper. At this point I prefer to walk left over huge boulders towards the base of the
dykes wall - it's a bit longer, but less exposed than the direct route heading more or
less down and a bit right. You'll have to walk over more boulders and past some wood
washed down by rains, but always keep looking right to find the way back across the
slab towards the cliff face. You are aiming for the top of the deep gully in the middle -
don't go any lower on the main slab than you have to before you start to move back
across. You are looking for the line of weakness across the slab where there's a spot
that's night quite as steep as the rest. This is another "no falls zone" - you don't want
to blow it here or you and your pig will tumble a long way down the slab and off the
five-hundred-foot-high cliff at the bottom(!) Try not to think about this - just watch
your step here. You're in the right area if you make a little downclimb next to a
two-foot-high pine tree, then climb up the slab maybe ten or twenty feet to follow a
traverse line across the top of the slab towards the gully drainage.
This is the first bifurcation of paths - you will go straight down the gully if the fixed
ropes are in place ("C" on Chris Mac's topo). The fixed ropes were used by Scott Burke
while he was working on free climbing The Nose, but the ropes were removed
sometime during the summer of 2001. Since the ropes were installed by Scott, it
seems unlikely to me that they'll soon be replaced.
If by some stroke of luck you learn from a reliable source that these fixed ropes have
been set up again, then you will go straight down the middle of the gully drainage
across smooth water-scoured granite aiming for a big pine tree right in the middle. The
fixed ropes used to be rigged to this tree and go down this slab to the base of the
slab. You will have to rap with the pack on your back in this section since it's not very
steep. Be extremely careful at the bottom of the slab - one time as I rapped down and
reached the anchors, I lost my balance and ended up pendulum-falling to climbers' left
with that huge monster pig on my back. There is a little emergency bivi cave on this
ledge. From the huge fixed bolts there were fixed ropes heading down to a rebelay,
and then a final rappel where you had to fight your way through the trees at the very
end. I don't know how far it is from anchor to anchor - it could indeed be more than
two hundred feet. So I wouldn't recommend rappeling this on a double rope pull-down
unless you're more certain than me.
If the fixed ropes are not in place, or you're not sure they're in place, from the very
top of the gully drainage move down about forty feet, then climb up onto the shoulder
of the buttress and descend a horrible ball-bearing slope of choss with the assistance
of a fixed rope, hopefully in place. You will find yourself on a flat ledge with an adult
pine tree about twenty or thirty feet from the edge. There are about a hundred ratty
old fixed slings and chunks of ancient rope rigged off this tree to a create a rap point
just over the edge. This is annotated with an "A" on Chris Mac's topo. Don't go down
here - this is the least preferred of the three possible descents. The problem with
going down here is that when you pull your ropes after rappeling, there are any
number of nasty rope-eating blocks for them get hung up on.
The better rappel route requires climbing down and left here (left as you are still facing
down the slab). There is sometimes a fixed rope here. I was unwilling to downclimb this
section with a heavy pack, and instead I took it off and used the fixed rope to lower it
to my buddy. He dragged it across the exposed top of the slab beneath, then across
to a tree. From here, you downclimb on an arete-y thing around the trees a short
distance to another ledge with fixed ring bolts. This is "B" on Chris Mac's topo.
As you look over the edge of the cliff, you will see a giant inside corner directly
beneath you. To the left is a huge void, to the right it is high-angle face down about a
hundred feet to a ledge below a big tree. You want to get to the rap station
immediately below the big tree, but you want to reach it from its upper side, which is
the right (west) side as you look down.
It's now time to rig your pig for rappeling. Traditional Big Wall Technology would have
you connect your rappel device to your harness, attach the haul bag to that same
carabiner so the bag hangs directly beneath the rappel device, and you would descend
this way, fighting the pig the whole way! Not only is this awkward and difficult, but it
poses serious risk to your future family life! There is indeed a better way. Note: Any
time "Pass the Pitons" Pete writes "Traditional Big Wall Technology" you should
substitute the words, "The Stupid Way".
The easiest, safest and hence most correct way to rappel with an enormous load is to
"Ride The Pig". This means that you attach the PIG to the rappel device, then attach
yourself to the pig, NOT the other way around (see "Traditional Big Wall Technology"). This way, you control the pig, and not vice versa.
Once you have your two ropes set up to rappel, you must rig yourself and the pig for
rappeling. First attach a locking crab to the top suspension straps of the haulbag.
Onto this first locking carabiner you will attach the load release knot cord that you
used for docking the load to the power point while you were on the wall. This is
nothing more than a fifteen-foot-long hunk of 7mm cord doubled and with a figure 8 on
a bight tied in the middle. Make sure you fully understand what I'm talking about or
you may end up dead! Secure the bag to the rappel anchor with the load release knot
cord using a load release knot as described as described in my article
How
to attach your haul load to the anchor. Knowing how to do this
is imperatively FUNDAMENTAL to big wall climbing, and you shouldn't go anywhere near a wall until you have internalized this system.
Next, you pass your descending device through the two rappel ropes and clip it to a
separate locking crab. You then attach this crab-and-rappel-device to the top of first
locker. You have effectively put the pig on rappel! (Note that the pig is still docked to
the rappel anchors)
Next you must attach yourself to the pig. Remember, the pig is rappeling, and you are
riding the pig! You need to clip yourself into the first locking carabiner that is attached
to the straps of the haulbag and has the load release knot cord hanging off of it. This
way you are hanging from the pig at all times. You DON'T want that pig hanging from
you, that's for sure! The important thing here is to attach yourself as closely as
possible, certainly no more than a foot and most probably around three to six inches.
It's best to use your adjustable daisy cinched up tight. You need to be this close to
the bag in order to control both it and the rappel device.
When rappeling with REALLY FAT SOWS, it may be necessary to use a second rappel
device in series with the first. Put it BELOW the primary rappel device so you can
better control it. A munter will work, but it's better to rig up something that won't
twist the rope, like a good old-fashioned carabiner brake-bar setup. This secondary
device will not have that much weight on it - the weight of you and the pig is on the
primary (upper) device. Therefore this second device need not support that much
force or bend the rope all that sharply. You can rig it sticht-plate like through the
LARGE hole in a figure of 8, if you like, just enough to give you a bit of extra braking.
It's now time to enjoy the only fun part of the whole East Ledges Descent - Riding The
Pig! If you've never rappeled like this before, you will be absolutely amazed at how
simple and painless it is! No struggle to unclip a carabiner, you just untie the knot in
the load release knot cord and away you go. You grip the pig between your legs and
rappel down - it's so incredibly easy you'll be kicking yourself that you didn't learn this
years earlier. Put on your helmet and take off squealing! Now that you know the
better way of doing things, you can safely and easily handle loads that weigh even
more than you do. No longer will you be subject to the vagaries of Traditional Big Wall
Technology (see above).
Rappel from here being careful to stay to climbers' left - you don't want to swing out
right into the void. You want to go to climbers' left of the big tree staying on the uphill
side. Marvel at how well you can control the pig - bet you never thought it could be
this easy, eh?
Perhaps thirty feet below the trees on the edge of a ledge is the next rap station from
more huge ring bolts I think. Pull your pig up beside the bolts, tie your load release
knot through the bolts, let your pig (with yourself attached) hang from the bolts, and
take the pig off rappel. Pray that your ropes don't hang up in the big tree above you
when you pull them.
This next rap is a full 60m, so you'd better make sure your ropes are long enough. If
not, you might have to choose the intermediate station to climbers' left. As always,
make sure you tie a BFK (Big Fricking Knot) in the ends of your ropes. Duh. As you
rappel, again stay to the left (west) to avoid getting swung out into the void. You will
reach the ends of your ropes as you land on a large tree-covered ledge. Continue
rappeling down the ledge to climbers' right past a tree and locate more big rap bolts on
the wall to your left. You will be at the very very end of your ropes, and you will just
barely be able to tie your load release knot cord through bolts. If your ropes are not
quite long enough you will have to downclimb this section, which isn't too terrible. Say
another prayer then pull your ropes.
The last rap is about a hundred and fifty feet to a big flat ledgy area where you can
safely unrope for good. The path down from here is not that obvious, and involves
some dicey downclimbing on chossy rock. There used to be ratty old fixed handlines
here, but most of them were gone last time I went down, which is a shame. Be very
careful not to knock loose rock on anyone, and keep your helmet on for sure! It's a lot
farther down to the streambed than you might hope, but just keep on keepin' on and
eventually you'll reach it.
Cross the streambed and look for the trail on the left. It's quite narrow and slippery
here, so watch your step, especially on the rocks that are covered with rock dust. I'm
guessing it's still another seven hundred feet or so of descent - this trail is really nasty
and dirty and will fill your shoes with dirt and gravel. It never seems to end! But you'll
know you've nearly got 'er licked when you wind through some tree stumps and big
fallen logs. Another couple minutes and you'll hit the flat road from where it's only a
two or three minute walk to the parking lot of the picnic area.
The more crafty and enterprising individuals will be able to finagle both a ride and a
beer from picnickers. Appearing exhausted and debilitated seems to work most
effectively - you shouldn't have any trouble looking that way!
November, 2001
More information
 It's amazing what some people will do given the proper motivation. Take me, for instance.
I was hangin' out at the base of El Cap fixing pitches for a solo ascent of Native Son. All of a sudden these dudes rappelled into my campsite - they had been up on Iron Hawk doing a bit of big wall filming. Turns out it's Chris Falkenstein, renowned Yosemite photographer. One couldn't help but notice that there were four loads to hump down to the meadows, but only Chris and his two buddies. Read about my ascent of Native Son, and how Chris and his compadres cajoled my infamously lazy ass into sherpa duty. Find out about Chris' monumental effort to rap off the summit to shoot this photo.
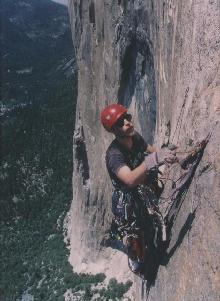
Big wall climbing is plenty rad, and doing it on hooks a couple
thousand feet off the deck is radder still. Unfortunately when you
climb solo, you can't get many good pictures of yourself. That's why
finding someone who is actually willing to come up and take photos of
you soloing a big wall isn't an opportunity you get every day. So
what else can I tell you about Chris except, "he's just The
Shit!".
"Pass the Pitons" Pete Zabrok (aka "Dr. Piton")
Oakville, Ontario
Canada, eh?
 It's amazing what some people will do given the proper motivation. Take me, for instance.